Free Photography Bundle ($180 value): PS actions, LR presets, photo overlays, & print templates!
Get it here.
The popularity of blogs and social networks open up all kinds of possibilities for getting exposure to your photos, but unfortunately it also raises the possibility of problems with theft and copyright issues. One way to protect yourself, to a certain degree, is to add a watermark to your photo. The problem with typical watermarks is that they are ugly and they often ruin the look of the photo.
Today we’d like to offer you a free Photoshop file that you can use to brand your photos in a way that is a more attractive and professional-looking. We offer several sets of logo overlays here at PhotographyPla.net. In this tutorial we’ll show you how to use one of them, and you can download the sample logo overlay for free. The overlay comes in layered .psd format and can be used in Photoshop and Photoshop Elements. You’ll get it in both white and black, although you can always change the colors to suit your own needs.
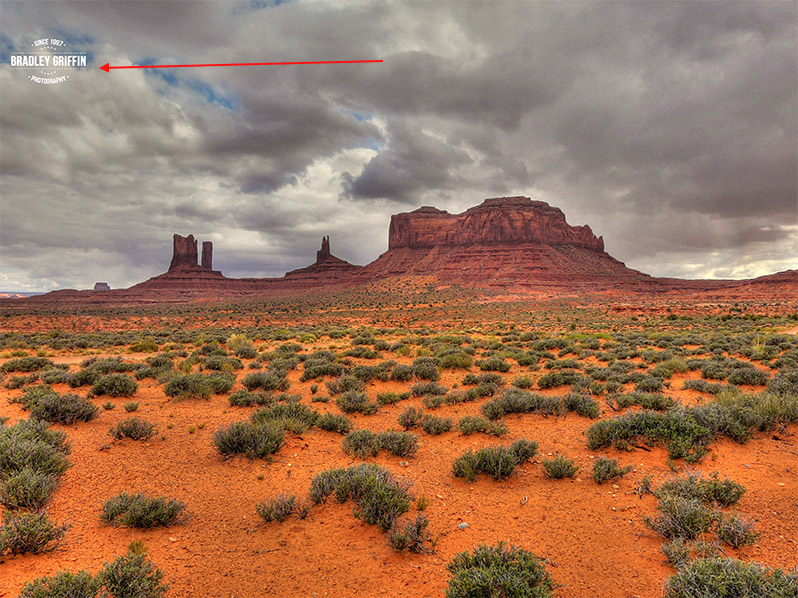
Here is a preview of how the logo overlay looks on a sample photo.

To use the logo overlay, first you will need to download it. Then open your photo in Photoshop and also open the .psd file for either the white or the black logo.
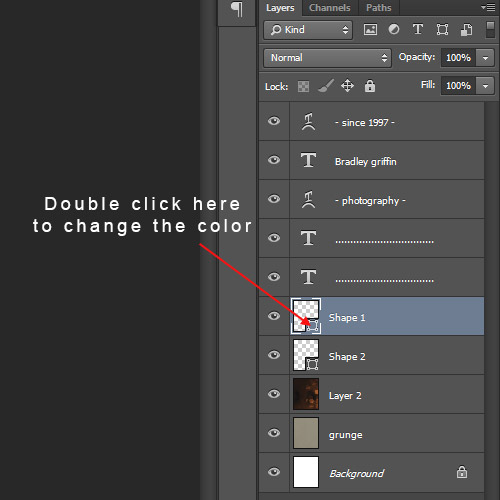
In the logo overlay file use the text tool to change the text as needed (this logo overlay uses the free font Bebas Neue so you can either download it or use another font of your choice, and of course, if you already have it you don’t need to download it). You can change the color of the text as needed. If you’d like to change the color of the star shapes in the logo overlay simply double click on the shapes in the layer’s palette and it will open up the color picker.

Now that you have your text and the colors changed as needed (you can always adjust it later), select all of the text and shape layers in the layers palette (make sure you do not select any of the background layers).

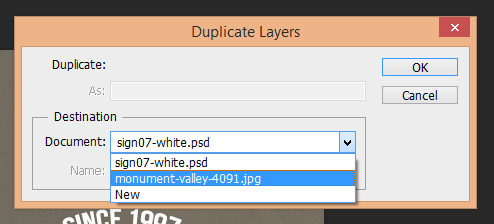
Then go to Layer > Duplicate Layers. It will open the Duplicate Layers options. Use the dropdown to select the photo that you want to use with the logo overlay.

Then click “ok”. Now your logo overlay layers will have been duplicated on top of your photo.

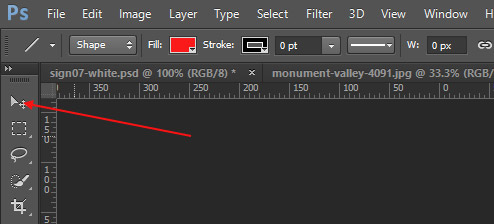
Now we’ll need to adjust the size and location of the logo overlay. Select the Move tool by clicking on the icon shown below.

Then make sure that all of your text and shape layers are selected in the layers palette.

Then go to Edit > Free Transform. Now use your mouse to move the logo into place or drag one of the corners (while holding down the shift key) to make it larger or smaller. Since it uses vector shapes and text you won’t lose quality by increasing the size.
And that’s it! You now have an attractive logo overlay on your photo. And you can still change the colors at this point if you’d like.

Once you have made the text changes to the logo overlay .psd file I’d recommend saving it so you don’t have to make those changes each time you want to use it. Now you’ll benefit from some added exposure whenever your photo is shared on blogs or social networks.

