Free Photography Bundle ($180 value): PS actions, LR presets, photo overlays, & print templates!
Get it here.
This article is part of our series Photo Editing 101 by Ian Pullen. This series will cover all of the basics of using Photoshop for editing photos. If you’re just getting started with Photoshop or photo editing, or if you’re looking to improve your skills in this area, this series will provide an excellent foundation. If you want to make sure that you don’t miss future articles you can subscribe to our newsletter or follow us on Twitter, Google+, or Facebook. You can also find the articles that have already been published by visiting the Photo Editing 101 course page.
The Clone Stamp is one of those tools that has seen Photoshop become a verb. When we talk of an image as having been photoshopped, often it is because an element has been painted out or perhaps duplicated and very often the Clone Stamp is the tool that has been used to achieve this effect.
Explained simply, the Clone Stamp tool allows you to select an area of a photo and then paint a copy of that area into another part of the photo. When used with care, it can be invisible to the eye, but there are also plenty of cases where users have made glaring mistakes.
In the following steps, I’ll introduce you to the basics of working with the Clone Stamp.
How Do You Make Non-Destructive Edits with the Clone Stamp?
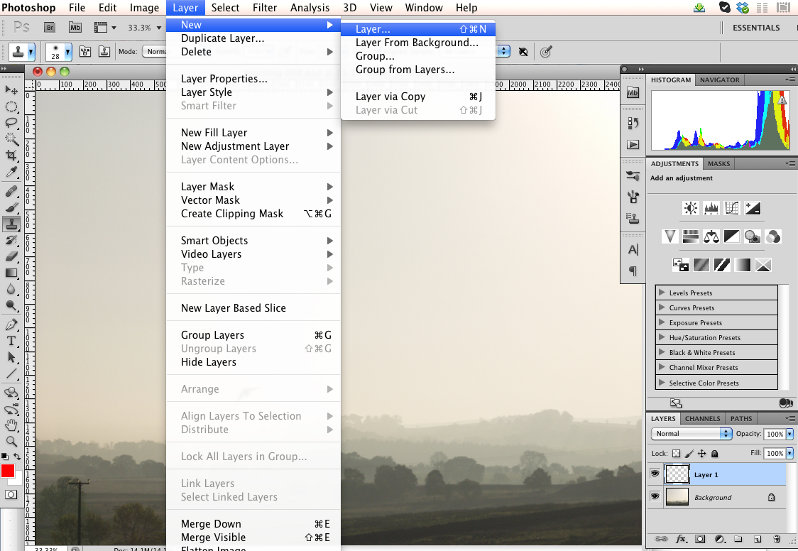
Before actually using the Clone Stamp, I want to share a simple tip that allows you make non-destructive edits to your image. If you make your adjustments to the Background layer of your image file, the changes you make will be permanent and impossible to undo once you have closed the file. However, there is an easy way to use this tool and make editable changes.
Firstly, add a new layer above the background, either by clicking the New Layer button in the Layers palette or going to Layer > New > Layer. Now click on the Clone Stamp in the Tools palette and you’ll see the tool options bar shows the various controls for the tool. To the right of the bar, you should see the Sample drop down menu and if you set this to All Layers, you can then clone from the Background layer, but paint on your new layer. This means the original image layer will be unchanged, despite any edits that you make with the Clone Stamp.
How Do You Select a Suitable Brush?
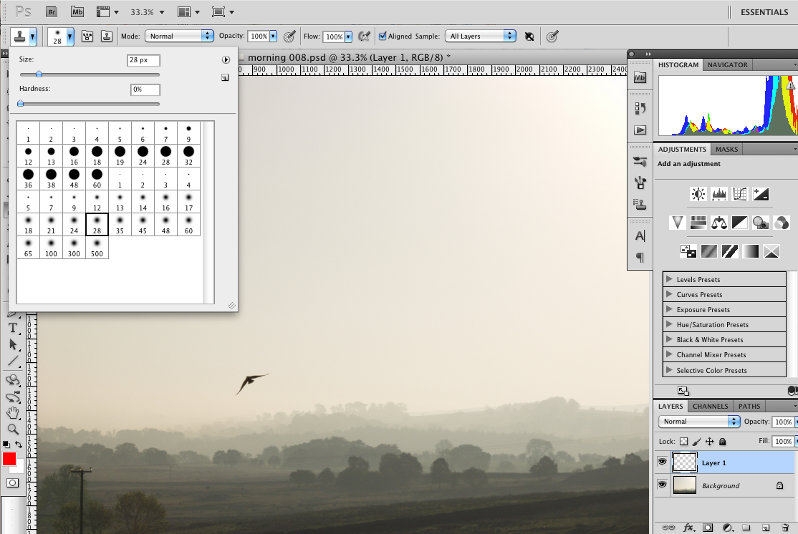
In the tool options bar, the second drop down menu from the left opens a palette of brushes. For best results, you should choose a soft edged brush and I prefer to use a size that’s a bit smaller than the item that I’m cloning. To the right of the drop down is a button that opens the Brush panel and that gives you a greater degree of control over your brush setting, but I rarely find need for it.
How Do You Use the Clone Stamp?
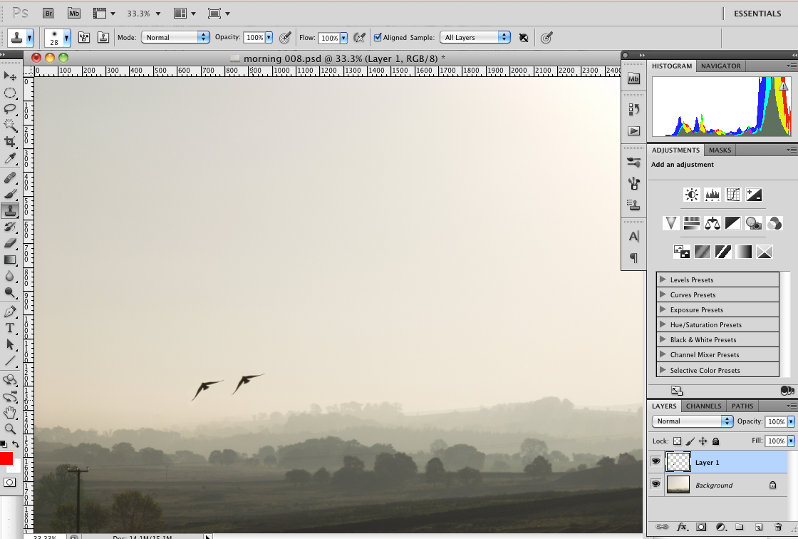
Before kicking off, look at the tool options bar and check that the Opacity and Flow are both set to 100% and the Aligned checkbox is ticked. When Aligned is set, once you start cloning, your source will always be selected relative to the cursor position. If Aligned is turned off, once you start cloning, each time you click and hold, the source is reset to original source point. I may not have explained that very well, but if you try using the tool with it on and off, the difference will become clear.
The first step in using the Clone Stamp is to select the source that you want to copy. Hold down the Alt or Option key, depending on your keyboard, and click on the image at the point that you want to copy. In my image, I clicked on the body of the bird.
Now move the cursor to the point that you want to place your cloned object and click and hold, while you paint in the cloned object.
How Do You Vary the Cloned Objects?
If you look at the previous screen shot, it’s quite obvious that the two birds are in fact the same bird. I could adjust the effect by transforming the top layer, but the Clone Stamp allows you to transform objects while you’re cloning them.
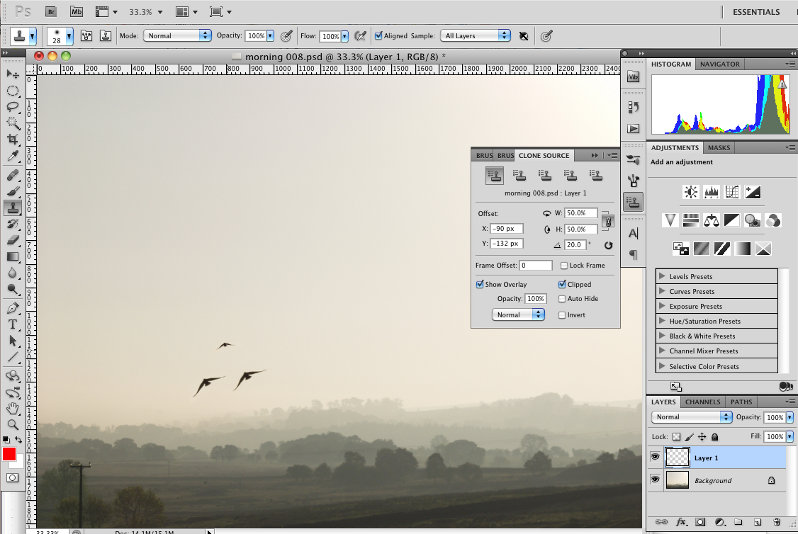
Go to Window > Clone Source or click the toggle Clone Source button in the options bar. Here you can set up to five different clone source settings, that you can use to transform cloned items. If you look at the screen shot, you should see that I changed the width and height to 50% and set the rotation to 20º. You can see the result in the third bird that now looks different to the original although that was used as the source again. This control is perfect for situations like this, where you want to clone something multiple times, but not make it so obvious.
Conclusion
This is a very brief introduction to the Clone Stamp and it is a tool that is well worth investing some time in getting to know. It can be very easy to use for straight forward cloning of objects. It can also be useful for painting out items, sometimes using a reduced opacity and multiple source points to avoid obviously repeating patterns.
See more articles in the Photo Editing 101 series.

