Free Photography Bundle ($180 value): PS actions, LR presets, photo overlays, & print templates!
Get it here.
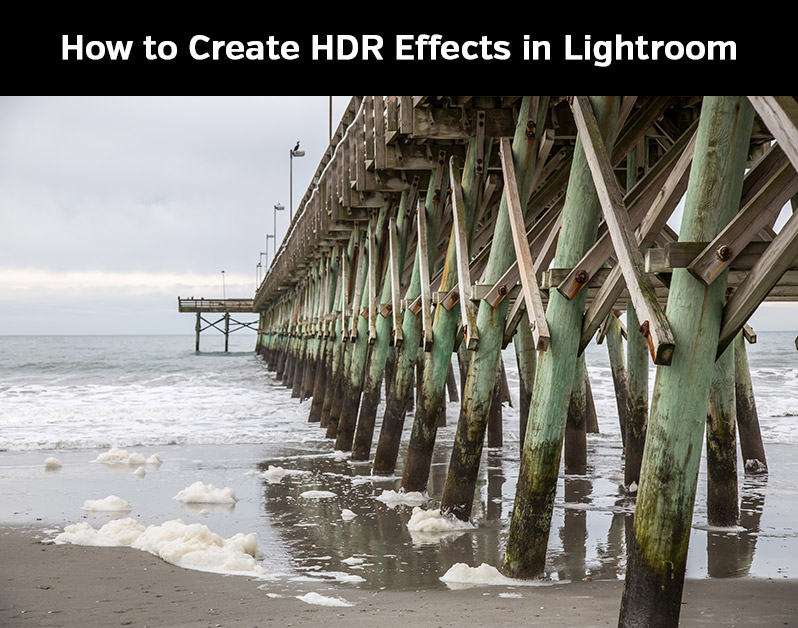
There are a lot of different options when it comes to processing HDR photos. You can use standalone programs like Photomatix, you can use Photoshop’s HDR Pro, you can hand process the photos as layers in Photoshop, and there are plugins that you can use within Photoshop or Lightroom. But another option that can work very well with many photos is simply to use the tools in Lightroom’s develop module with no other plugins or programs.
Typically with HDR photography you’ll be merging at least 2 different exposures of the same scene (and often 3, 5, or more exposures) to create the end result. But what are your options when you want to increase the dynamic range and you only took a single exposure? Lightroom has the ability to improve the shadows and highlights of your photo, plus you can adjust vibrance, clarity, and other elements that are typical of HDR photos. This easy approach can produce a great-looking image with many of the same HDR qualities.
In this tutorial we’ll walk through the process of creating this faux HDR look in Lightroom. For the tutorial I’ll be using our HDR Lightroom Presets, but if you don’t own the presets don’t worry, you’ll be able to follow along with the develop module settings that are used. Also, you can download a preset created in this tutorial for free.
The HDR Lightroom Presets include 30 different one-click presets for applying HDR effects to your photos. These are some of our most popular presets because they can quickly and easily transform your photos. Now, let’s look at how you can create an HDR look in Lightroom.
Example #1
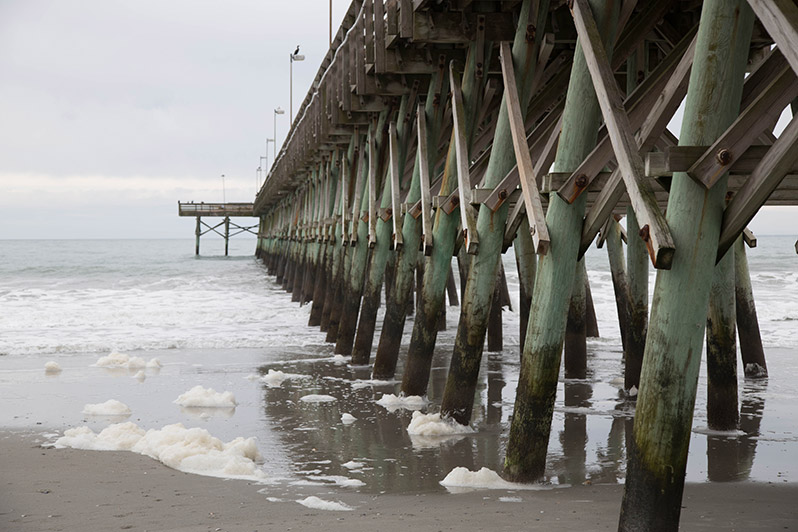
Here is a look at the sample photo straight out of the camera.
And here is a preview of the end result that we will be creating.

Ok, to get started we’ll open the develop module of Lightroom. In the Basics section, change the following settings:
- Contrast: +20
- Highlights: -80
- Shadows: +80
- Whites: +40
- Blacks: -20
These changes will add a little bit of contrast and boost the dynamic range by lightening the shadows and recovering some highlights. Moving the blacks slider to the left will also establish a strong black point.
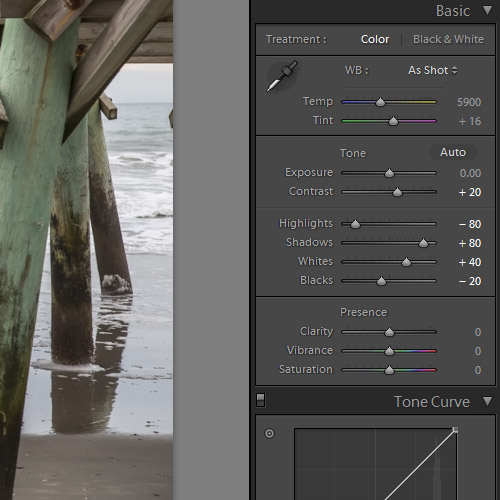
At this point our photo looks like this:

Next, set clarity to +25 and vibrance to +5.
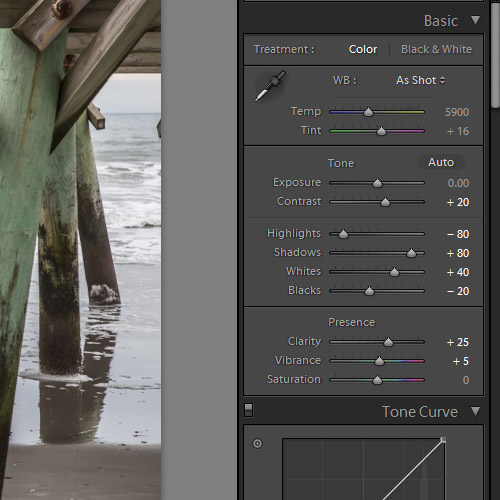
The clarity slider adds mid-tone contrast, which gives the appearance of a sharpened photo. Using a setting of +25 is on the lower end for an HDR look, so if you want a more extreme look you can move the slider farther to the right. The higher you set the clarity the more sharp and textured the photo will look. Vibrance is also a key setting for HDR images. You can push the vibrance slider to the right if you want a stronger look.
Our last step is to adjust the sharpening and noise reduction settings. Here are the settings we are using:
Sharpening:
- Amount – 50
- Radius – 1.5
- Detail – 40
- Masking – 50
Noise Reduction:
- Luminance – 40
- Detail – 50
- Contrast – 20
- Color – 30
- Detail – 50
- Smoothness – 50
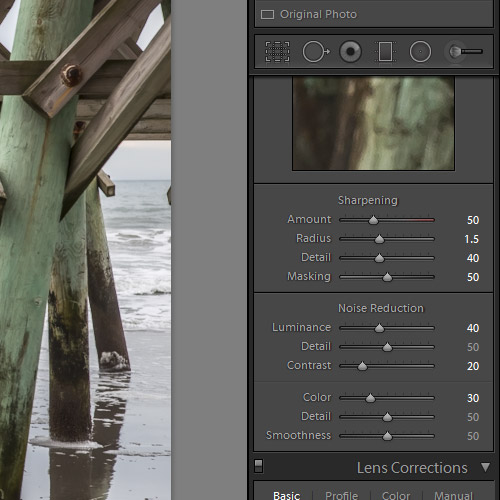
The settings we’re using here will apply a small amount of sharpening and noise reduction without doing anything drastic. And here is a look at our end result:

If you’d like to use this effect with your own photos, download the preset here. And if you’d like to improve your workflow for creating HDR effects in Lightroom, please take a look at our full set of 30 HDR Lightroom Presets.

