Free Photography Bundle ($180 value): PS actions, LR presets, photo overlays, & print templates!
Get it here.
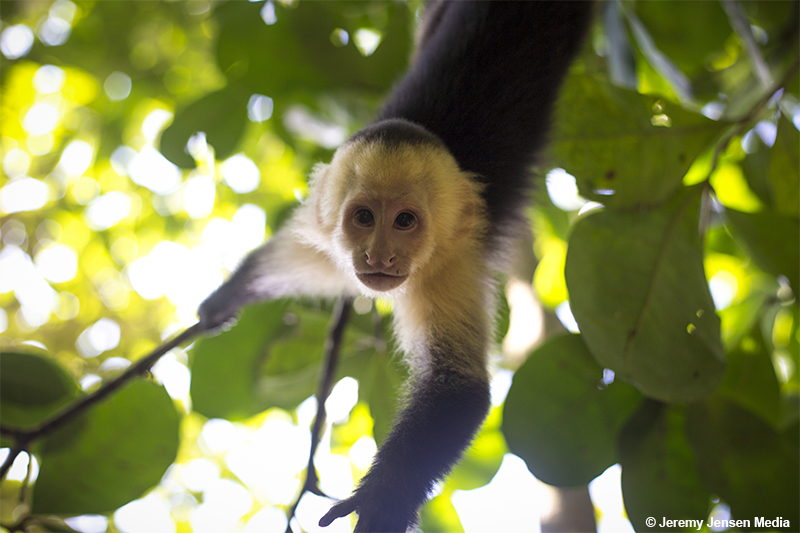
Using a shallow depth of field draws our eyes into the subject, shot at f/1.8
One of the most powerful elements available to us as photographers, is the ability to control our depth of field in order to draw attention to our subjects. For those of you new to the concept, Depth of Field (DOF) is the distance between the nearest and farthest subjects that appear in focus in your photo. Notice in the photo above how the Capuchin’s face is in focus while the leaves in the background rapidly fall out of focus and become blurred.
In this article we’ll be discussing the technical aspects to creating DOF, in addition to demonstrating how your camera’s settings can be applied situationally.
The Three Technical Aspects To Creating DOF
The three aspects to controlling your depth of field are: Aperture (f/stop), the distance of your subject to the camera, and the focal length of the lens on your camera.
Aperture
Many new photographers assume that aperture is the sole technical aspect to creating your DOF, and while this isn’t true, it definitely plays the biggest role. Every lens is given an f/stop rating which indicates how wide the lens will open. The f/stop rating plays a key role in how much light will enter the camera, along with how shallow you can make the DOF. The best way to remember how aperture will affect your DOF is:
Large Aperture = Small F/Stop Number = Shallow Depth of Field (i.e f/2.8)
Small Aperture = Large F/Stop Number = Larger Depth of Field (i.e f/22)
To put it simply, a smaller number is always going to be a smaller depth of field, while the larger number is going to be a larger depth of field. Notice in the two photos below how the background becomes noticeably different when the aperture is adjusted.
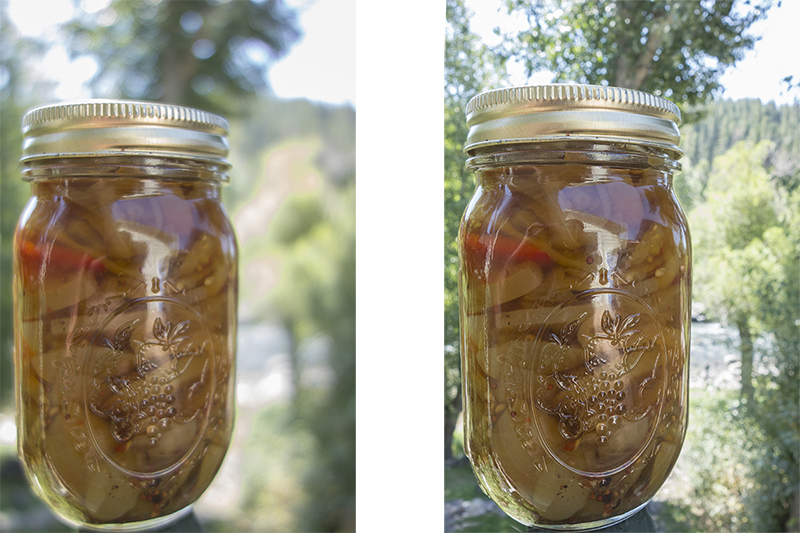
The photo on the (Left) was shot at F/1.8 while the photo on the (Right) was shot at F/7.1
Distance of Your Subject To The Camera
This is the easiest rule to comprehend, and it goes: the closer your subject is to the lens, the greater the depth of field becomes. The same principle applies for the subjects background; the further away the background is, the more it will become out of focus.
The Focal Length Of Your Lens
The focal length of our lens is what determines how far we can be from our subject in order to capture it. Again, this rule is rather simple as the longer the focal length becomes, the shallower the depth of field. For example, a 16mm Wide Angle Lens has much less magnification than a 300mm telephoto lens; if both are set to F/2.8, the 300mm lens will have a much shallower depth of field due to the increased magnification.
Looking at the photo below, notice how the foreground has a very shallow depth of field as the telephoto lens locks the focal point on the model in the center of the frame.
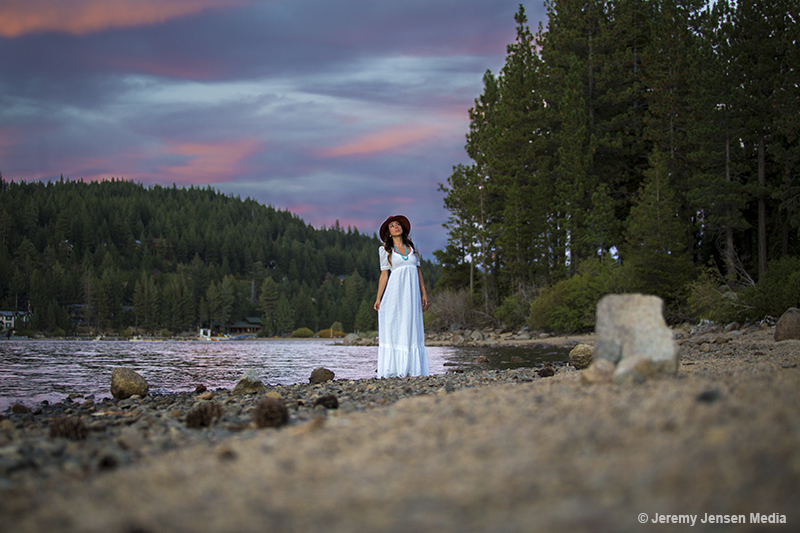
Longer focal lengths increase DOF.
How To Use DOF For Creative Control
Now that you can grasp how depth of field is achieved, you’ll be able to apply it situationally to place the most emphasis onto your subject. For our first example, let’s look at how to capture a landscape photo.
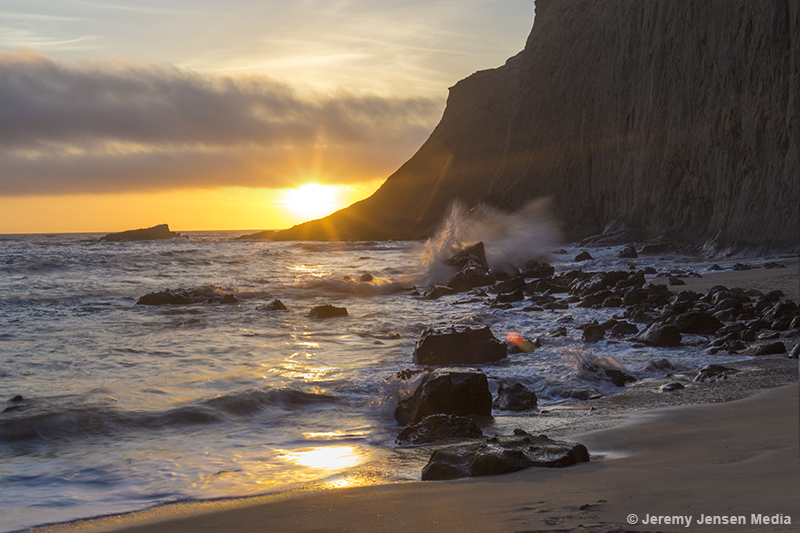
Landscapes require a larger depth of field to get everything in focus. Shot at F/16
Because we want the entire landscape to be in focus, we need to use a larger depth of field (Small F/stop, F/16). If we had used F/2.8 instead, the wave crashing on the rock may have been out of focus, making the photo less appealing.
On the opposite end of the spectrum, let’s examine using a model as our subject.
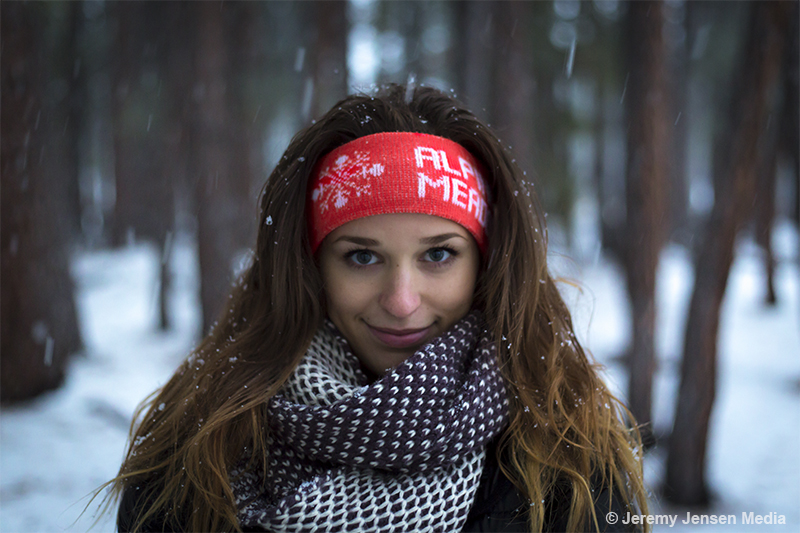
Using a shallow DOF places a strong emphasis on the model
By opening the aperture to F/2.2 on Canon’s 50mm lens, we’ve created a strong DOF around the model, placing the emphasis on her face, and not the trees in the background.
And of course, if you’re shooting a model in a scene where the landscape can be of equal aesthetic importance, you can adjust your depth of field to cater to both.
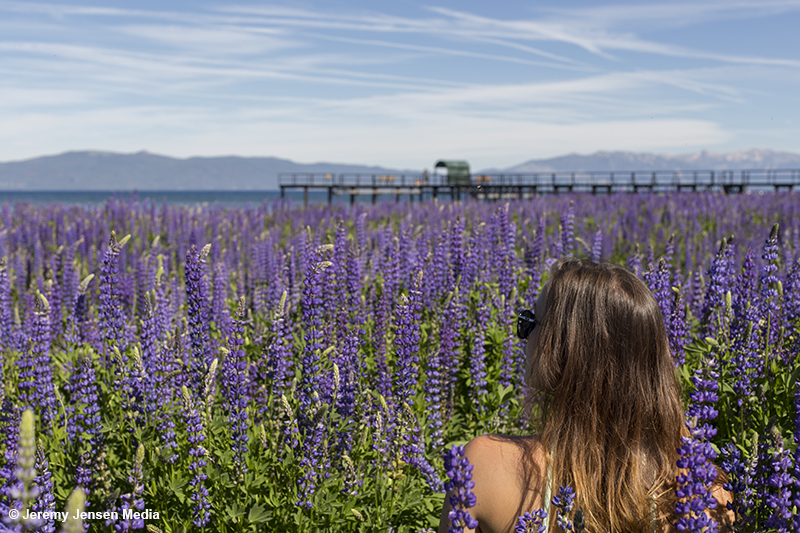
By using a shallower depth of field, you can place the focus on the model, while still revealing enough of the landscape to make both appealing. Shot at F/5.6
Experimentation Is Key
There are hundreds of different combinations of focal lengths, F/Stops and distances to experiment with. By knowing how your lenses behave at certain F/Stops, you’ll be able to make creative decisions must faster while you’re out shooting. The best way to get familiar with your lenses is repetition!
If you have any questions feel free to leave them in the comments!

