Free Photography Bundle ($180 value): PS actions, LR presets, photo overlays, & print templates!
Get it here.
Shooting in RAW format offers many benefits, but the downside is that many of your photos can look dull straight out of the camera. If you’re shooting in JPG format some finishing touches will be applied to the photo when it is internally converted to a JPG, so by shooting in RAW format you’re not getting those finishing touches done for you. And that’s actually a good thing because the RAW file gives you far more flexibility and control, it just takes a small amount of extra work.
One option to deal with dull RAW files is to use an import preset in Lightroom to apply certain settings automatically when you are importing photos. If you use a standard import preset for all of your photos those settings will serve as the starting point for your post processing, and this can potentially save you many hours when multiplied over hundreds and even thousands of photos.
In this article we’ll take a look at some basic settings that can be used to improve RAW files that feel a little flat or boring. You’ll also be able to download the settings as a preset, and we’ll show how you can apply that preset when importing photos.
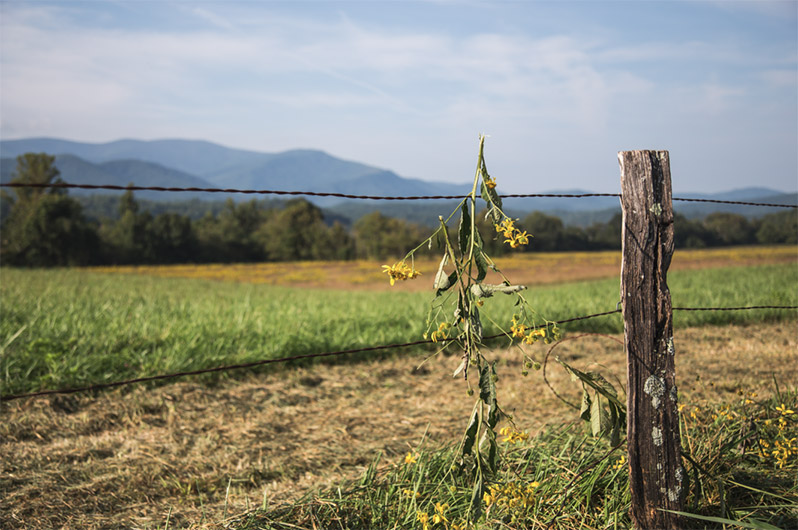
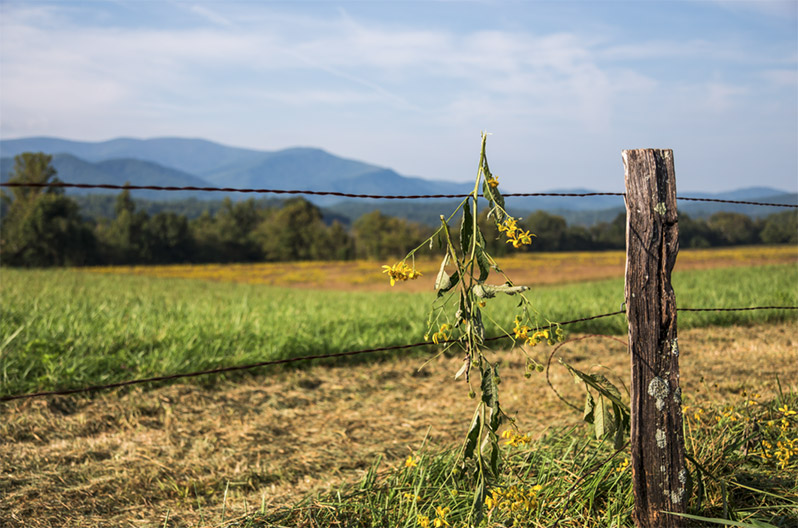
Let’s get started with this RAW file:
Now, there are a few things we are not going to address with these settings, including exposure, white balance, sharpness, and noise reduction. If your photos need adjustments to exposure or white balance you will want to apply those settings as needed. Most photos will also need a little sharpening, but that really varies from one photo to the next, so I won’t be including it here. Some photos will also need noise reduction and others won’t, so we’re going to leave that untouched.
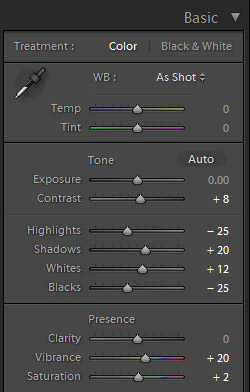
To get started I’ll adjust the settings in the Basic section as follows:
- Contrast +8
- Highlights -20
- Shadows +25
- Whites +12
- Blacks -25
- Vibrance +20
- Saturation +2
The other changes we’ll make will be in the Lens Corrections section. Check the boxes next to “Enable Profile Corrections” and “Remove Chromatic Aberration”.
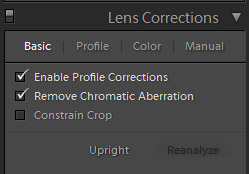
The lens profile correction will help to fix subtle distortion or vignetting caused by the lens, assuming Lightroom recognizes the lens you used. Chromatic aberration affects some photos with colored areas or halos around the edges of some objects in the photo. Lightroom does a pretty good job of removing it just by checking the box, and if your photo doesn’t have any problems with chromatic aberration it doesn’t do any harm to have the box checked.
After these changes the photo looks like this:
This is often a good starting point for your RAW files. In some cases these adjustments may be enough, and in other cases you may want to continue working with the photo. You can download these settings as a preset here.
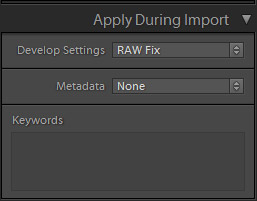
If you would like to apply these settings to all of the photos in a batch that you are importing you can simply tell Lightroom to apply the preset automatically when importing. In the Library Module you’ll click on “import” to bring up the import options, and then simply select the preset from the dropdown that says “Develop Settings” under “Apply During Import”.