Free Photography Bundle ($180 value): PS actions, LR presets, photo overlays, & print templates!
Get it here.
This article is a part of our series Photo Editing in Lightroom 101. Throughout the series we’ll cover the details of Lightroom’s library and develop modules and how you can use Lightroom to improve your own photos. As new articles are published they will be added to this page. If you don’t want to miss future articles in the series, please subscribe to our RSS feed or our email newsletter.
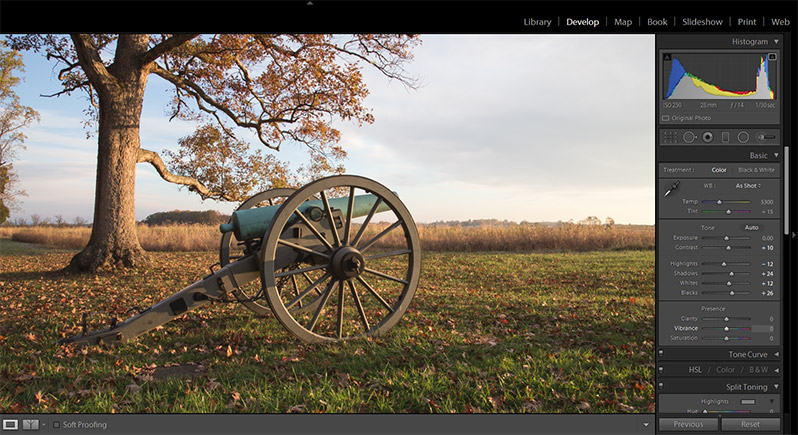
In the previous article we looked at the process of adjusting white balance in Lightroom. In this article we’ll move on to adjusting an images tone. We’ll talk about exposure, contrast, highlights, shadows, whites, and blacks. These settings are in the “basic” section of the develop module, just below the temperature and tint sliders.
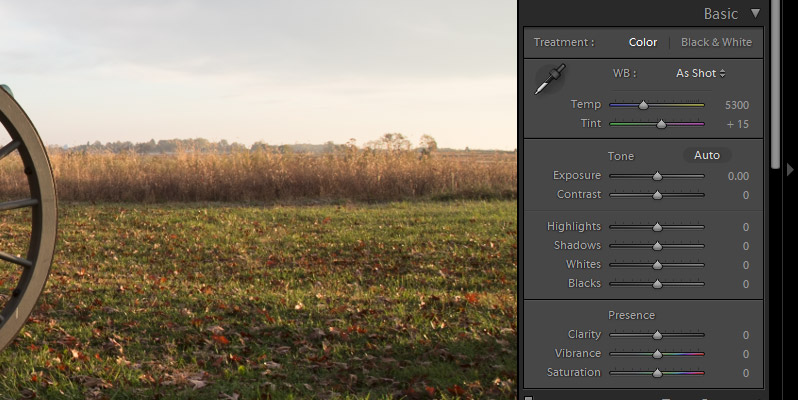
The first slider is for exposure, and it is pretty straightforward. You move the slider to the right to lighten the photo and move the slider to the left to darken the photo. Personally, unless the exposure is way off I prefer to work on the highlights, shadows, whites, and blacks first. Many times when you get those settings correct the exposure won’t need to be adjusted.
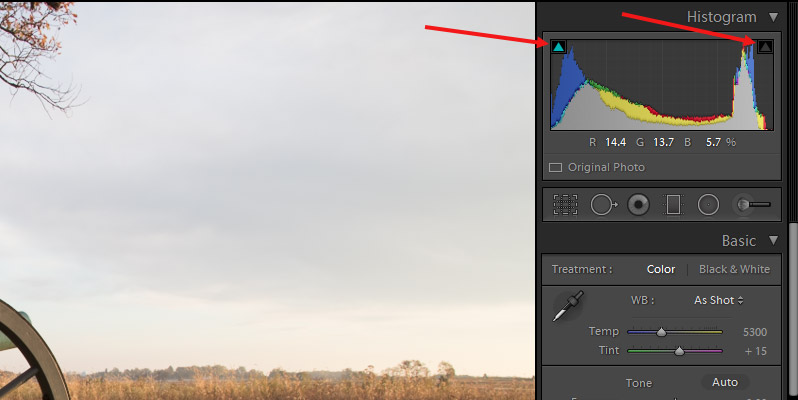
So, let’s start by looking at highlights and shadows. At the top of the right hand column in Lightroom’s develop module is the histogram.

The highlights and shadows settings will impact the middle area of the histogram. The whites and black settings will impact the far edges of the histogram. With the highlights and shadows sliders you may be able to recover some detail and increase the dynamic range of the photo.
Moving the highlights slider to the right will lighten the highlights, and moving it to the left will darken the highlights, and the same is true for the shadows slider. If you need to recover the highlights you would move the slider to the left, and if you need to recover the shadows you would move the slider to the right.
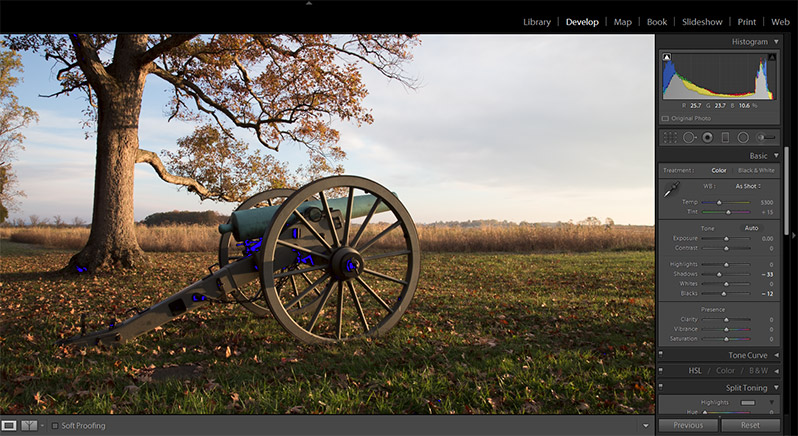
On the histogram you can click the little arrows at the top left and top right and it will show you when you are clipping the shadows or highlights.
For example, with it set to show shadow clipping, the clipped areas appear blue.
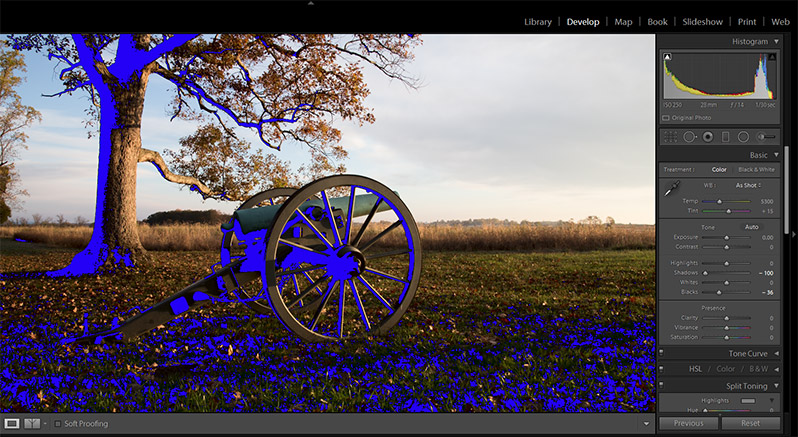
I can then adjust the shadows and black sliders as needed to avoid or reduce the clipping.
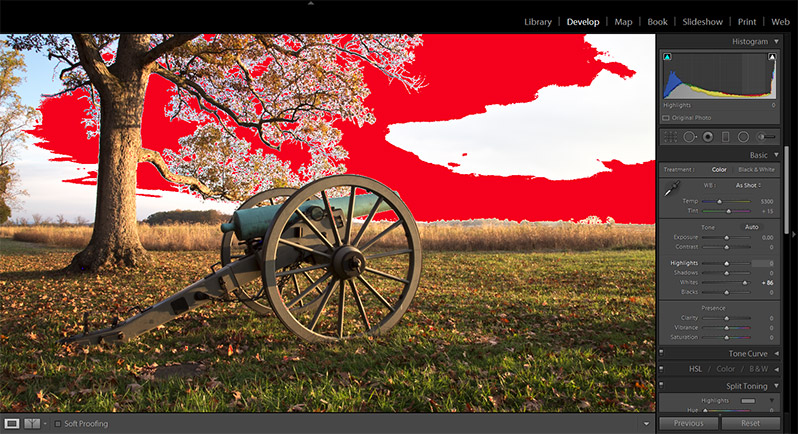
The same thing is true with the highlights, except the clipped areas are shown in red.
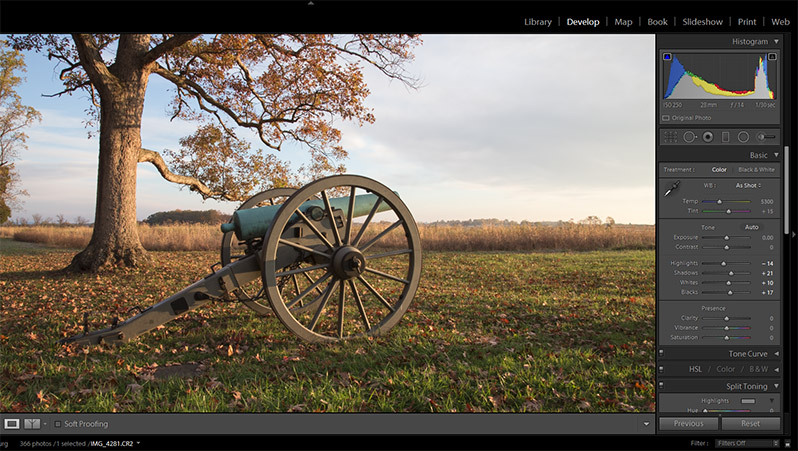
In the case of this sample photo I am increasing both the blacks and the whites a little bit to get the edges of the histogram where I want them, without clipping. And then moving the highlights slider to the left and the shadows slider to the right to show more detail in the mid tones.
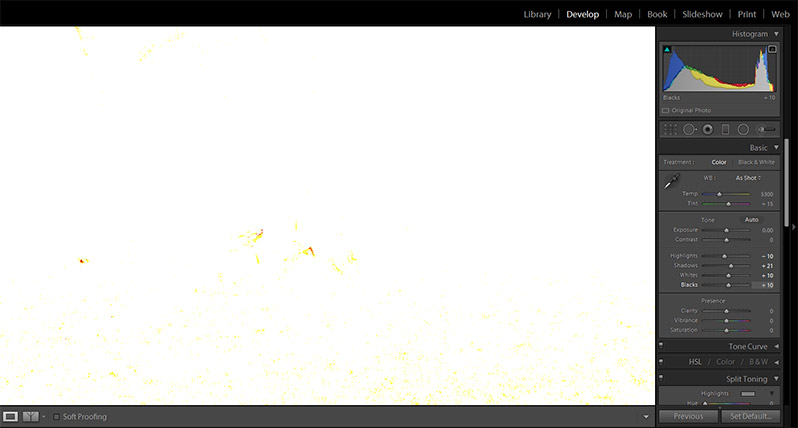
Another trick you can use is to hold the alt key while you are adjust the slider. The screenshot below shows what happens when I hold the alt key and adjust the blacks slider. When the screen is completely white there are no black points in the photo. As you move the slider you will start to see some colored areas to represent the black points.
After you have the highlights, shadows, whites, and blacks settings you can also adjust the contrast and exposure. You can move the slider to the right to increase contrast, which essentially stretches and flattens out the histogram. Taking away contrast will bring the edges of the histogram in, and raise the middle. The image below shows the histogram of our sample photo at the far extremes of +100 and -100 contrast.
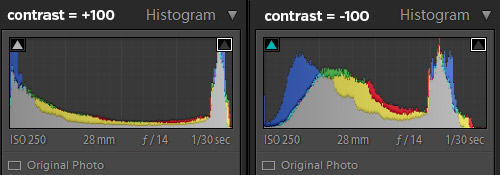
The histogram is a very helpful tool when you’re working with the tone adjustments in Lightroom, so be sure that you use it to your advantage.
In the case of this sample photo, I’ll increase the contrast just a little (+10) and make no adjustments to the exposure.
If you don’t want to miss the other articles in this Photo Editing in Lightroom 101 series, please subscribe to our RSS feed or our email newsletter. As new articles are published they will be added to the series page, which will serve as an index for the entire series.

