Free Photography Bundle ($180 value): PS actions, LR presets, photo overlays, & print templates!
Get it here.
With many portraits your post processing will create soft effects that tend to be pleasing, but in some situations you may prefer to create a more dramatic and intense effect. This tutorial will show one method of doing just that in Photoshop. The effect created here is very similar to the effects that can be easily applied with our Dragan-Inspired Photoshop Actions, so if you like this look be sure to check out those actions.
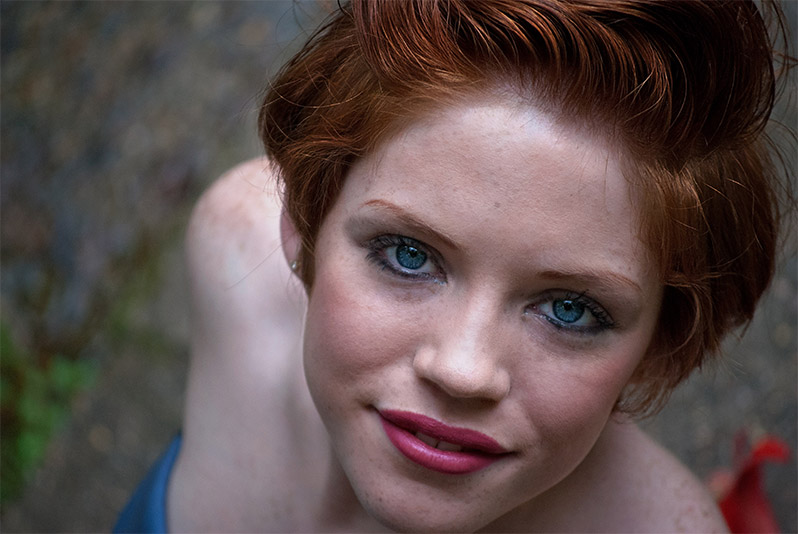
Here is a look at the before version of the photo that I’ll be working with for this tutorial:
Ok, let’s get started. The first step is to create a duplicate of the background layer. To do this go to Layer > Duplicate Layer.
Next, with the duplicated layer selected, go to Image > Adjustments > Shadows and Highlights. Apply the following settings:
Shadows:
- Amount: 40%
- Tone: 35%
- Radius: 45px
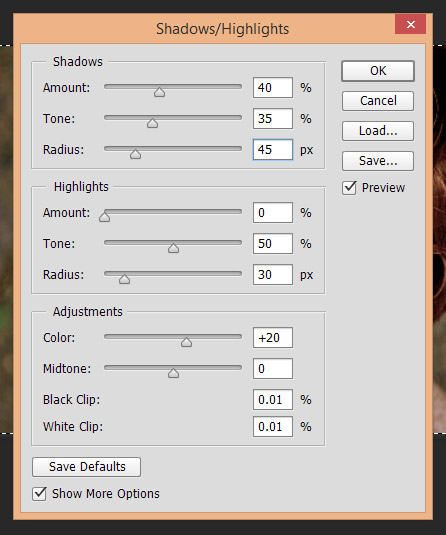
This will lighten the dark, shadowy areas of the photo a little bit to bring out more detail.
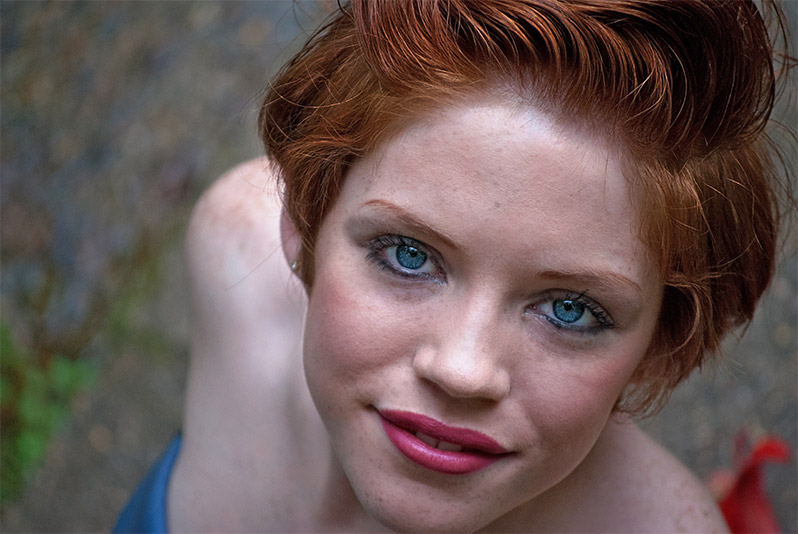
After this change the photo looks like this:
The next step is to apply some sharpening with the unsharp mask. Since the goal is to create an intense portrait we’re going to use more sharpening than we normally would, but adjust the settings as needed for your photo. Go to Filter > Sharpen > Unsharp Mask. Here are the settings used with the sample photo:
- Amount: 50%
- Radius: 10px
- Threshold: 0

Since the radius is a pixel measurement you will need to consider the resolution of the photo you’re using. I’m working with a high resolution sample photo. If you are working with a low resolution photo the 10px radius will have a much stronger impact, so you can reduce that number as needed.
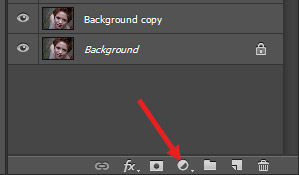
Next, we’ll add a levels adjustment layer. To add a new adjustment layer click on the icon shown in the screenshot below, and then select “levels”.
For the levels adjustment layer we’ll change the following settings:
- Shadows input: 30
- Midtone input: 1.20
- Highlights output: 240
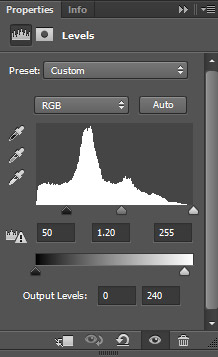
The most significant impact of these changes to the levels is that we are giving the photo a very strong black point with the shadows input setting, and then we are lightening the midtones a bit by changing it to 1.20.
At this stage the photo looks like this:
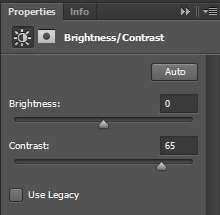
Next, we’ll add a contrast adjustment layer and set the contrast to +65.
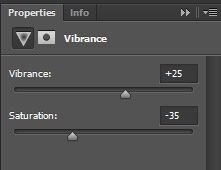
Then add a vibrance adjustment layer and set vibrance to +25 and saturation to -35.
The last step is to add a gradient map adjustment layer to add warmth to the photo. I’m using a gradient with the shades #fbd97f and #fbd97f.
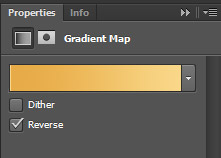
Then for the gradient map adjustment layer, set the blend mode to “soft light” and opacity to 30%.
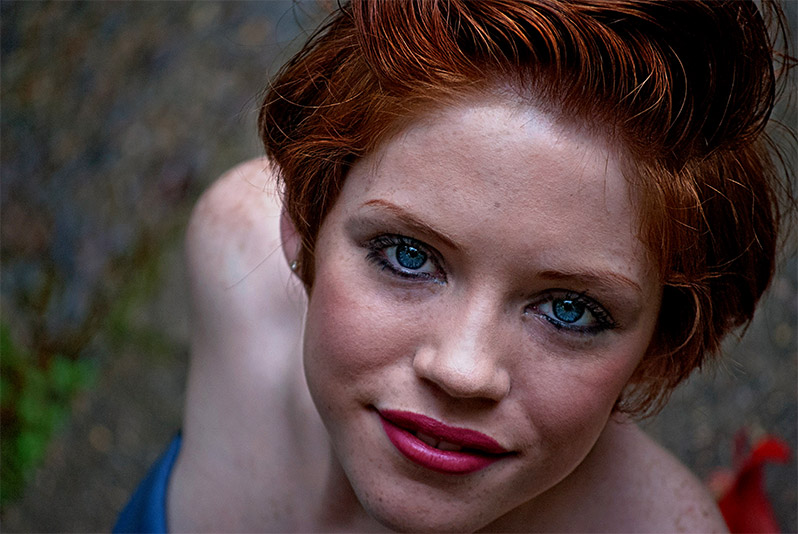
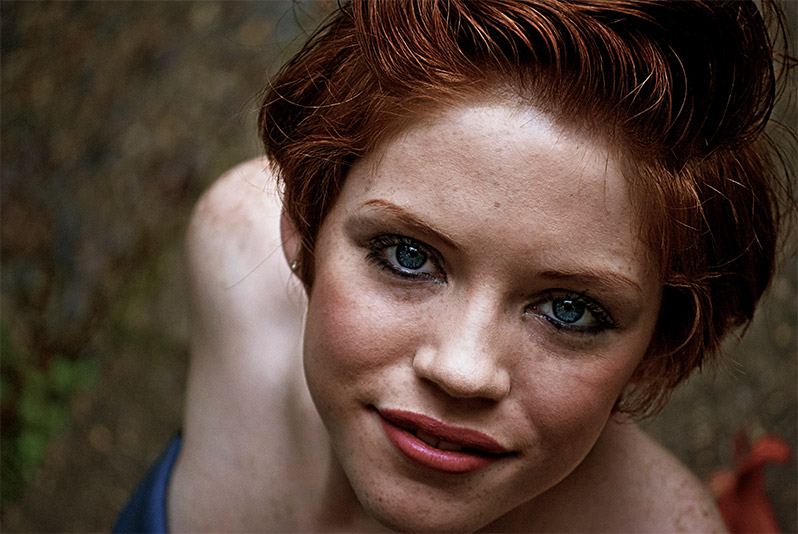
And here is the final result:
If you’d like to be able to create this type of effect easily please see our Dragan-Inspired Photoshop Actions.

