Free Photography Bundle ($180 value): PS actions, LR presets, photo overlays, & print templates!
Get it here.
This article is part of our series Photo Editing 101 by Ian Pullen. This series will cover all of the basics of using Photoshop for editing photos. If you’re just getting started with Photoshop or photo editing, or if you’re looking to improve your skills in this area, this series will provide an excellent foundation. If you want to make sure that you don’t miss future articles you can subscribe to our newsletter or follow us on Twitter, Google+, or Facebook. You can also find the articles that have already been published by visiting the Photo Editing 101 course page.
The Black and White adjustment layer feature in Photoshop makes it very easy to creatively convert color photos to mono shots. In the days of black and white film cameras, photographers could use colored filters on their lenses to affect the way that light reached the film. White light is formed from the combination of different colors of light and you can see these colors broken down every time that you see a rainbow.
Filters were designed to block different colors of light from reaching the film. For example, a red filter would block red light and so a red flower would appear lighter because less light reflected from it would reach the film.
The Black and White adjustment layer emulates some of these traditional filters. However it also gives users far more flexibility and control than was enjoyed in the days of shooting on film.
How Do You Activate the Black and White Adjustment Layer?
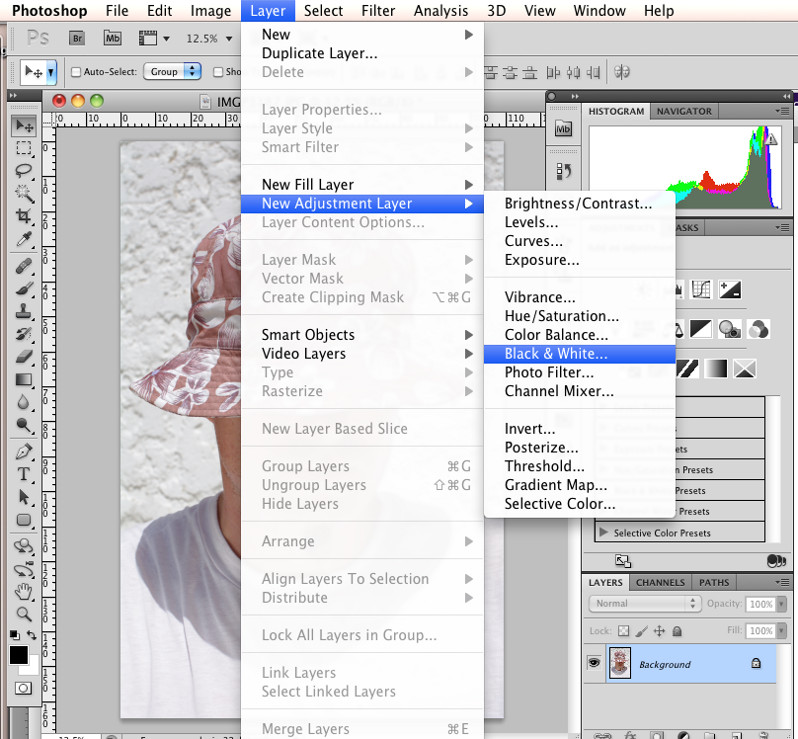
You have a couple of options for adding a layer to an image that you’re working on. You can either go to Layer > New Adjustment Layer > Black and White or, if the Adjustments palette is already open, you can click on the Black and White icon. This is the diagonally split rectangle that is the fourth from the left in the middle row.
Do You Need to Change any Settings?
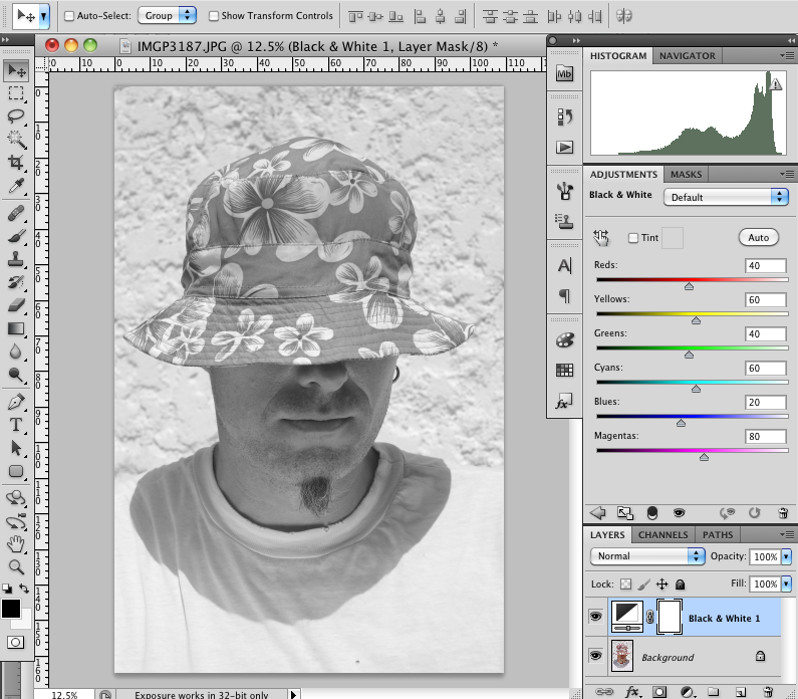
Once you add a Black and White adjustment layer, you will see that your color photo has been converted to mono using the Default settings. You may be happy with the conversion as is and in some cases this will be the most pleasing result. However, there are a number of different ways that you change the result of the conversion, so let’s have a look at a few of these different techniques.
How Do You Use the Presets?
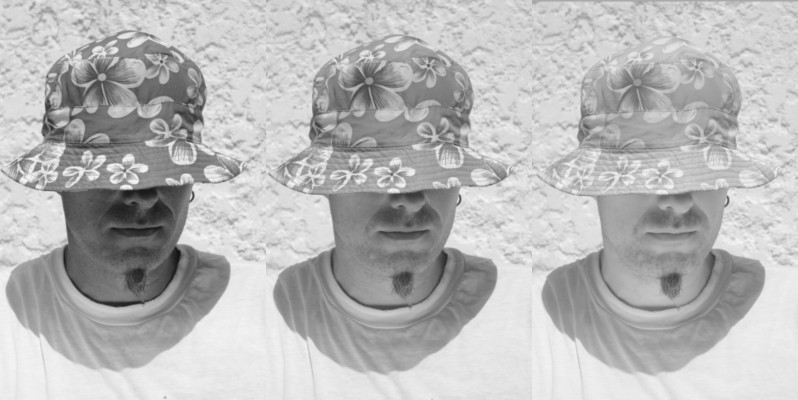
At the top of the Adjustments palette, you can see a drop down menu that should be set to Default. If you click on this, you will see a list of different presets that you can choose from. In the image above, you can see the difference that using the blue, green and red presets had on the same image. The difference is very dramatic and allows you to make creative choices about how to convert your images.
How Do You Manually Adjust the Conversion?
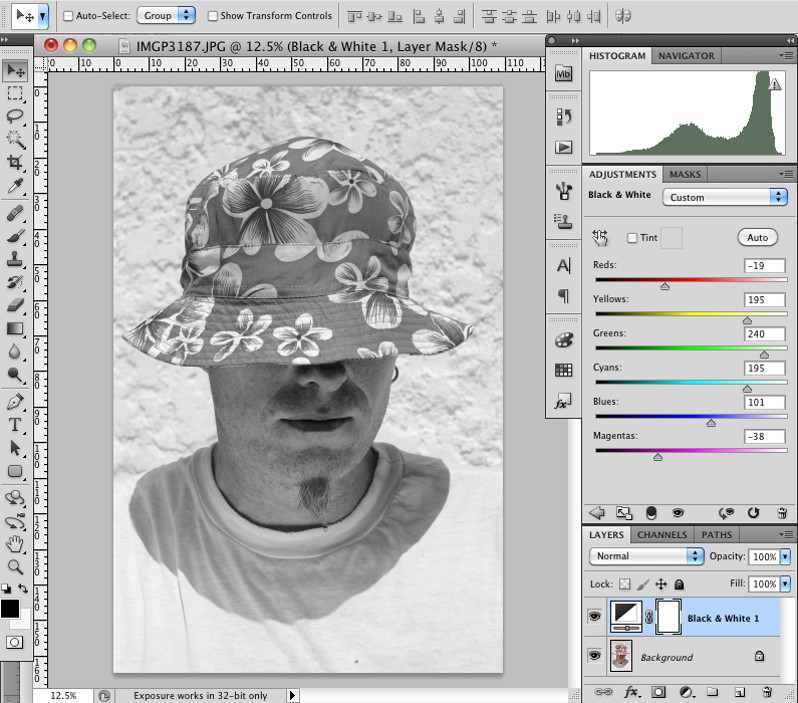
As you switched between the different presets, you probably noticed that the six sliders in the palette changed their settings with each change. This allows you to take complete control over the conversion to black and white by changing the brightness of each of the six colors manually. If you drag one of the sliders to the left, such as the Red slider, any pixels in the photo containing red are made darker. Move the same slider to the right and the same pixels will become lighter.
How Do You Adjust Values Directly on the Image?
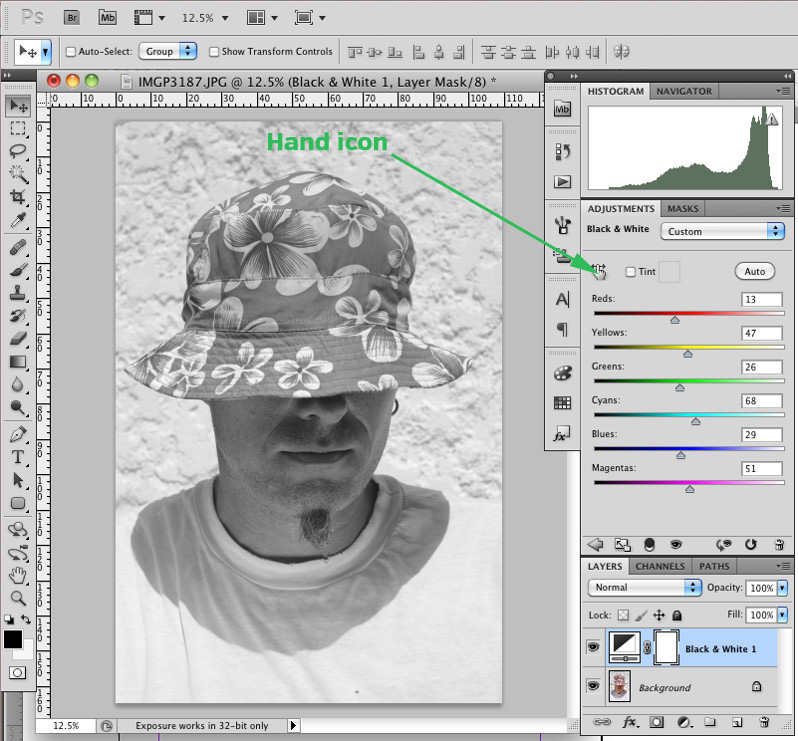
Manually adjusting your image as described above isn’t the most intuitive method, but there is another very easy way to manually adjust your sliders. Click on the small hand icon with the two arrows pointing left and right and drag your mouse over the image. You’ll see that the cursor has changed to an eye dropper. Now click on the photo at a point that you’d like to darken or lighten and drag to the left or right. Any other pixels that are a similar color to the point that you clicked on will also be affected. As with the sliders, dragging to the left makes the pixels darker and to the right lightens them.
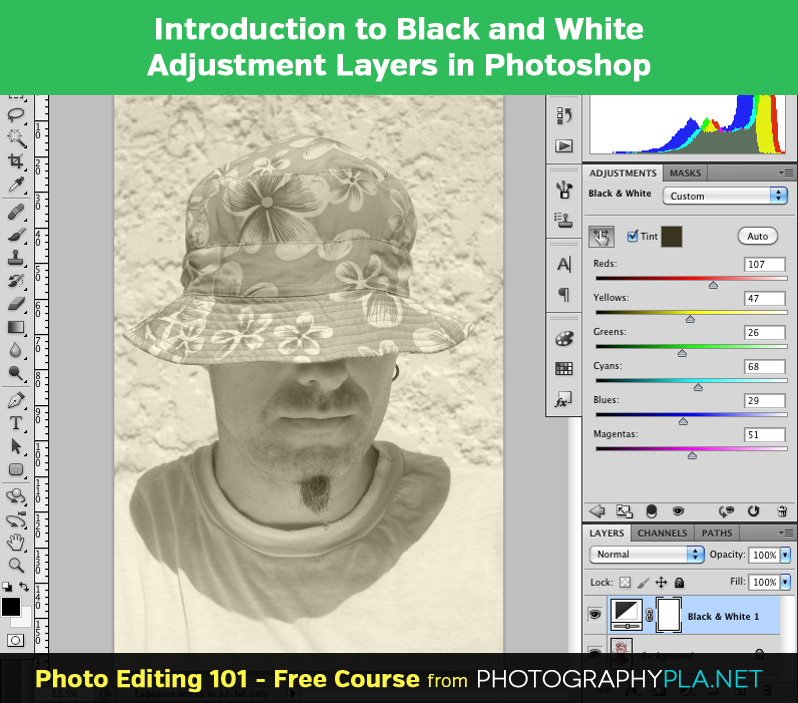
How Do You Tint Your Black and White Photos?
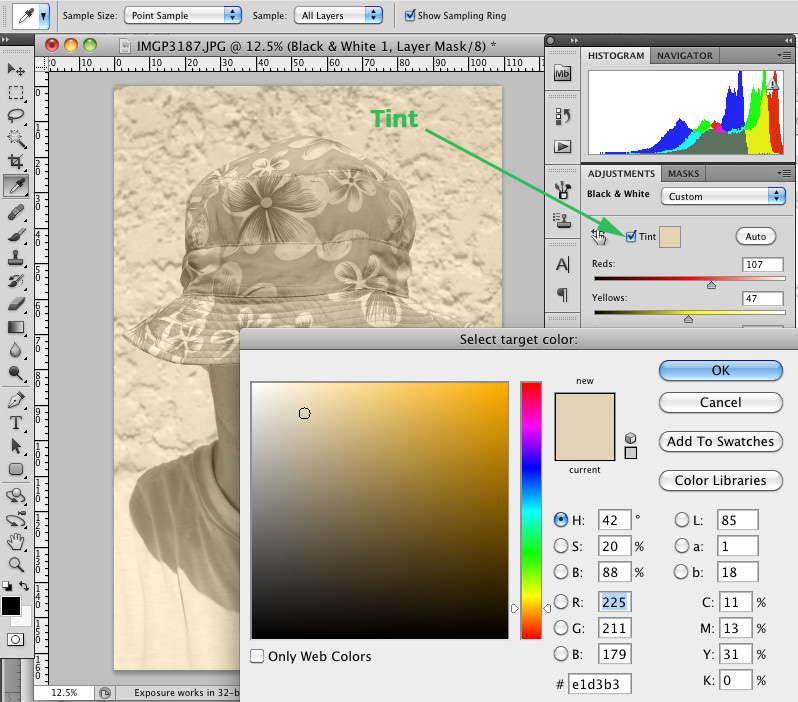
You may have already noticed the Tint check box and if you click this, a colored tint will be applied to your photo. You can adjust the color of the tint by clicking on the colored square and then selecting a new color in the dialog that opens, clicking OK when you’re happy with your selection. Just click the check box again if you want to turn the tint off.
Conclusion
There are several different ways that you can convert your color photos to mono in Photoshop, but the Black and White adjustment layer feature is one of the easiest and more intuitive ways.
See more articles in the Photo Editing 101 series.

