Free Photography Bundle ($180 value): PS actions, LR presets, photo overlays, & print templates!
Get it here.

This article is part of our series Photo Editing 101 by Ian Pullen. This series will cover all of the basics of using Photoshop for editing photos. If you’re just getting started with Photoshop or photo editing, or if you’re looking to improve your skills in this area, this series will provide an excellent foundation. If you want to make sure that you don’t miss future articles you can subscribe to our newsletter or follow us on Twitter, Google+, or Facebook. You can also find the articles that have already been published by visiting the Photo Editing 101 course page.
It’s very easy to think that the Crop Tool in Photoshop is a very simple tool and while the job it does is quite straight forward, there’s more to it than you may realize if you don’t pay attention to the tool options bar. Interestingly, it’s a little unusual in-so-far as the tool options change between activating the Crop Tool and using it.
To get the most from the tool, I’m going to run through the options available to you and show how you can adapt the Crop Tool for your tasks and personal taste.
How Do You Activate the Crop Tool?
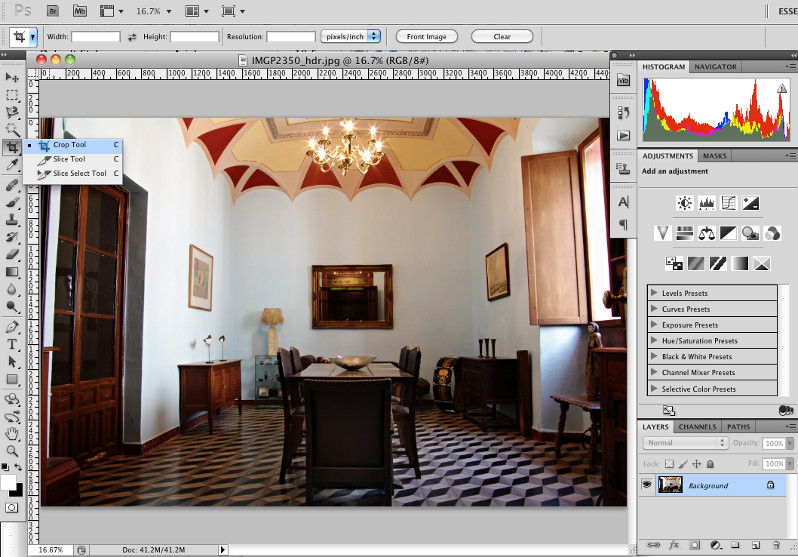
The Crop Tool icon is a familiar design of two opposed right angles with overlapping corners that is used by a wide range of image editing applications. If you can’t see it in the Tools palette, look instead for a scalpel like icon and click and hold on it to open the fly out menu and you can then select the Crop Tool. Adobe have saved space in the palette by grouping similar tools together and using fly out sub menus. In this case, you can ignore the two slice tools as these are designed for use by web designers, rather than photographers.
You just draw on your image and a crop selection is made. You can drag any of the handles to adjust the selection after you have made it and if you hold the Shift key while dragging one of the handles, the proportions of the selection will be kept. Just double click on the selected area or press the Return key to apply the crop.
How Do You Constrain the Crop Size?

Occasionally you may choose to crop a photo in the way that is visually most pleasing and let the final shape and/or size be set by the process. However, in most cases, you will probably need to crop your image to a predetermined ratio and also bear in mind the pixel size of the resulting image to ensure that it reproduces well. If you crop a small area out of large photo and then try to print it at A4 size, you are likely to be very disappointed with the result.
When you activate the Crop Tool, the tool options bar displays several input fields that you can set to control how the crop box appears.
You can add a value to just one of the Width and Height fields or both. If you set just one of them, the value of the other will be calculated relative to the set value when you actually crop the image. If you enter a number only, the value will treated as a pixel value and ‘px’ will be appended to the value. You can also use other measurement systems, such as inches by adding ‘in’ after the number you add.
If the image is to be used in print, you can also set a value for the Resolution and you can switch that value between pixels per inch and pixels per centimeter using the drop down menu. If you want to crop several photos to the same size as an existing photo, if you open that photo so that it is the file in focus, you can just click the Front Image button and the Width, Height and Resolution settings will be set to match that file.
The Clear button will wipe all of the values from the fields with a single click.
Note that you should take some care when setting these values as it is possible to set your cropped image to be larger than the original size, which may lead to unacceptable loss of quality. To avoid this, I advise that you click the Front Image button before starting and then ensure that you don’t set your values higher than these settings.
How Do You Cancel a Crop Without Applying It?
After you have drawn a crop selection, you may want to cancel it, perhaps because you forgot that you’d set constraining values. Just press the Esc or Escape key on your keyboard and the crop box will disappear.
Should You Delete or Hide the Cropped Area?
The first controls in the tool options will be grayed out unless you are working on an image with at least one layer. By default, photos open as a Background layer and the Cropped Area controls are inactive in this case, but double-clicking the Background layer in the Layers palette will convert it to a layer.
Assuming you have at least one active layer, if the Cropped Area is set to Delete, any areas of the layer outside of the crop selection are deleted when the image is cropped. If set to Hide, the dimensions of the image are cropped but the areas of the layer outside of the crop still exist beyond the borders of the image.
To illustrate this, the following two screen shots show the same image cropped with both Delete and Hide. I’ve then changed to the Move tool and dragged each version of the image to the left.
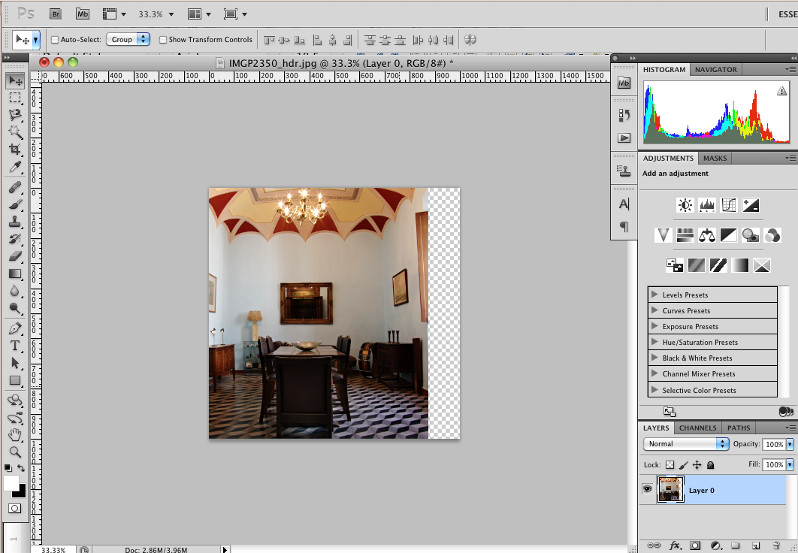
The one above used Delete and has a blank space on the right hand side.
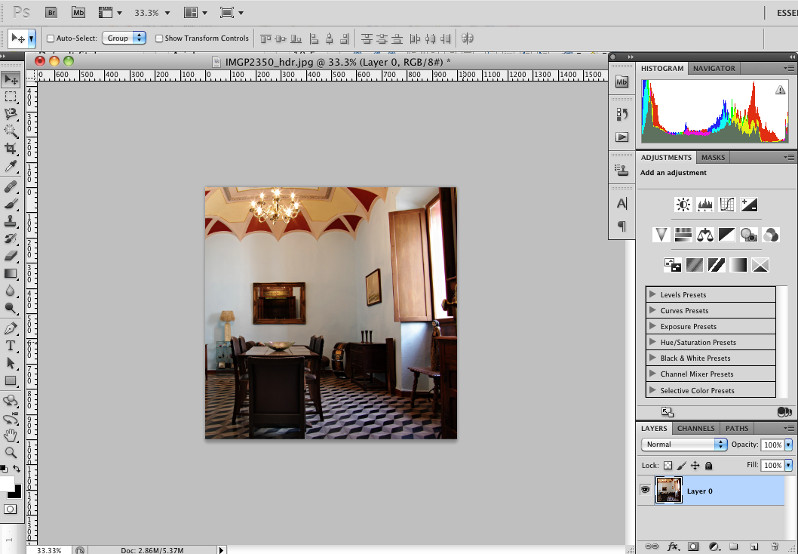
The one above used Hidden and still has the original photo that was outside of the cropped area.
What Does the Crop Guide Overlay Do?
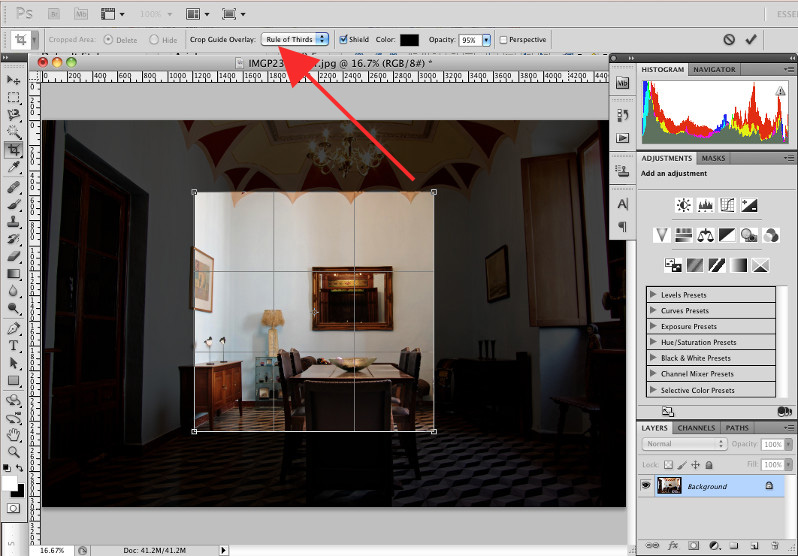
The Crop Guide Overlay drop down has three options. Set to None, there will be no additional lines within the crop selection. If you set it to Rule of Thirds, you can use the guide lines to help position the most important element in your photo. The last option overlays a grid of guides which can also help you to judge relative proportions more easily.
How Do You Adjust the Shield?
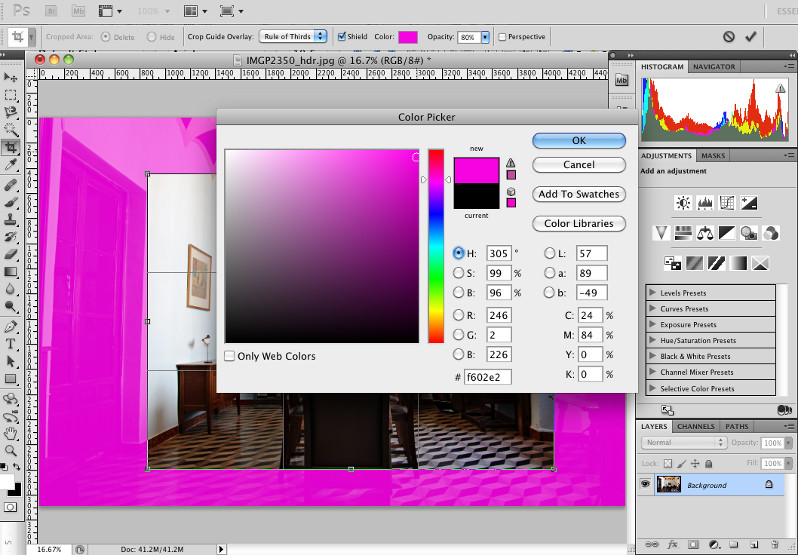
The shield is designed to obscure the area outside the crop selection to make it easier to judge where to crop. You can turn it off by deselecting the Shield check box. Alternatively, you can change the color by clicking the Color box and using the color picker. You can also change the opacity to suit your personal taste by using the slider control or typing in a value.
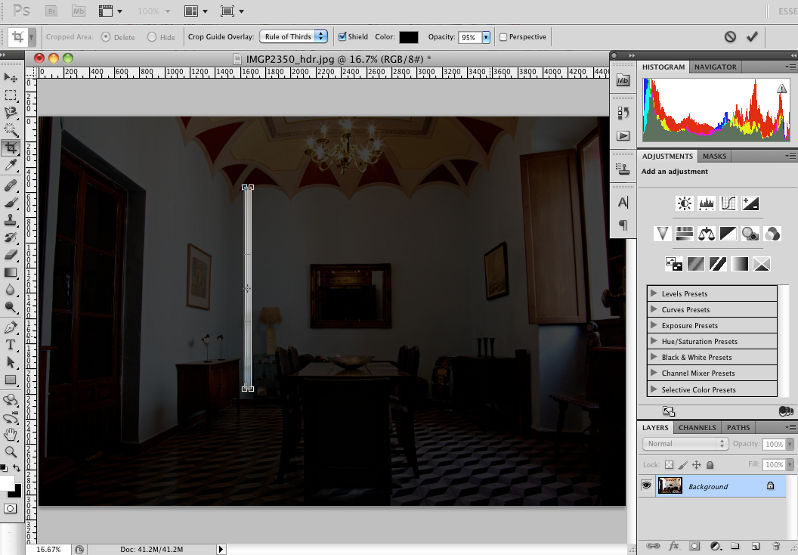
What Does the Perspective Check Box Do?
This last setting can be handy for images where lines are converging due to perspective. When this box is unchecked, when you drag a corner handle, the crop selection remains rectangular in shape. If you click this check box and drag a handle, it moves independently and changes the shape of the selection.
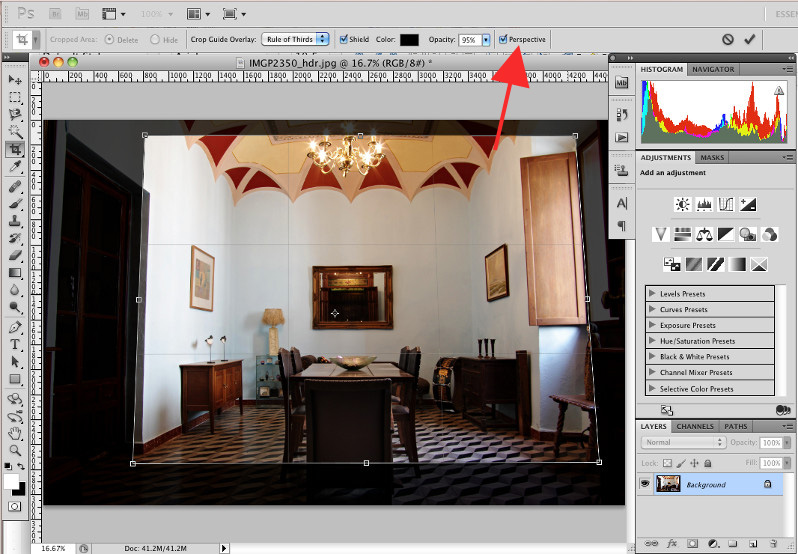
In the screen shot above, you can see that I took this photo of my dining room from relatively low down and as a result, the doorway to the left and the window and shutter to the right are both leaning into the image. Hopefully you can also make out that the left and right sides of the crop selection also lean and match the angle of the door and shutter.
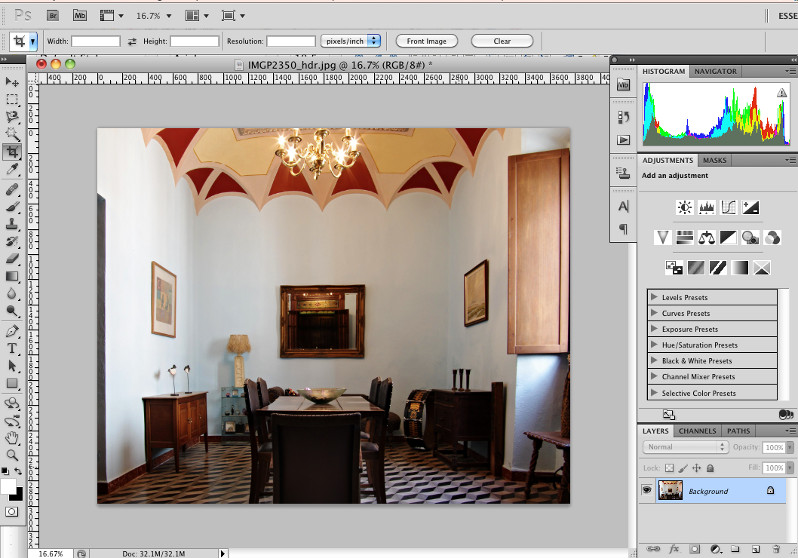
In this last screen shot, you can see the result of the crop and the doorway and shutter are now almost perfectly vertical.
Conclusion
This should have shown you that there’s more to Photoshop’s crop tool than may meet the eye at first glance. Making use of all of its features that can speed up your work and help you to adjust for problems caused by perspective.
See more articles in the Photo Editing 101 series.

