Free Photography Bundle ($180 value): PS actions, LR presets, photo overlays, & print templates!
Get it here.
This article is part of our series Photo Editing 101 by Ian Pullen. This series will cover all of the basics of using Photoshop for editing photos. If you’re just getting started with Photoshop or photo editing, or if you’re looking to improve your skills in this area, this series will provide an excellent foundation. If you want to make sure that you don’t miss future articles you can subscribe to our newsletter or follow us on Twitter, Google+, or Facebook. You can also find the articles that have already been published by visiting the Photo Editing 101 course page.
The Reduce Noise filter in Photoshop gives users reasonably fine grained control over noise reduction in their photos. Modern digital camera sensors have become very adept at reducing noise in photos, but it can still be an issue when shooting at higher ISO settings.
Noise presents itself in digital images in two ways, as luminance and chroma or color noise. Luminance noise affects the brightness of a pixel, making it appear brighter or darker than it should. It’s sometmes referred to as ‘salt and pepper’ noise because of this.
Chroma noise can cause a pixel to appear with a strong unnatural color and can make shadow areas appear to have odd color patterns rather than a smooth tone.
In this article, I’ll run through some of the features and aspects of the Reduce Noise filter.
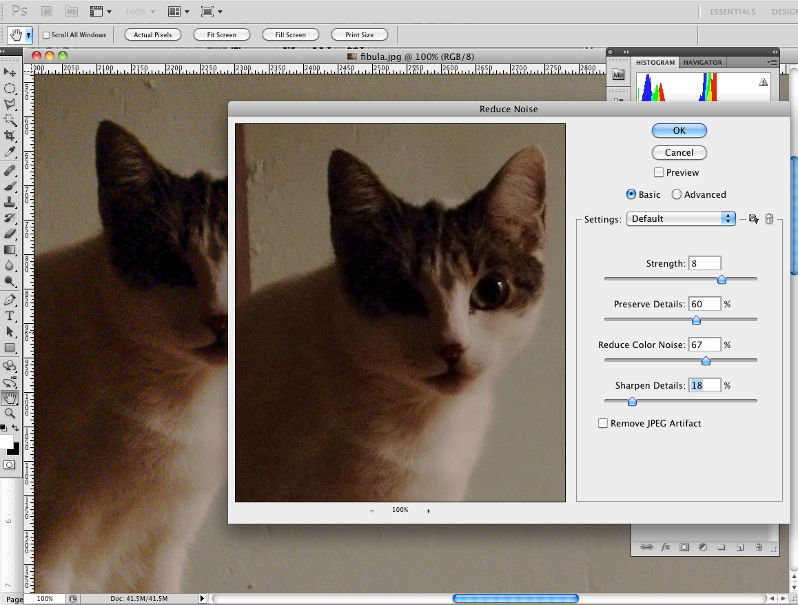
How Do You Open the Reduce Noise Filter?
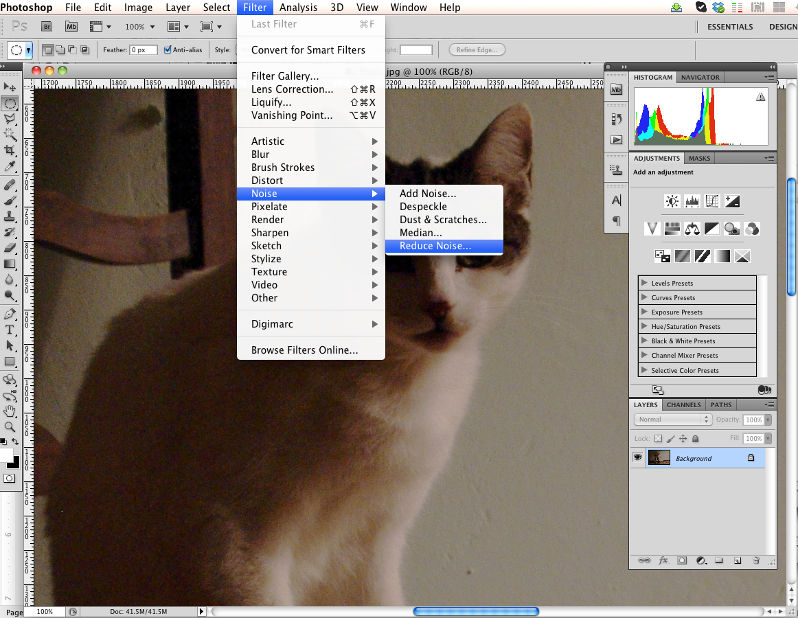
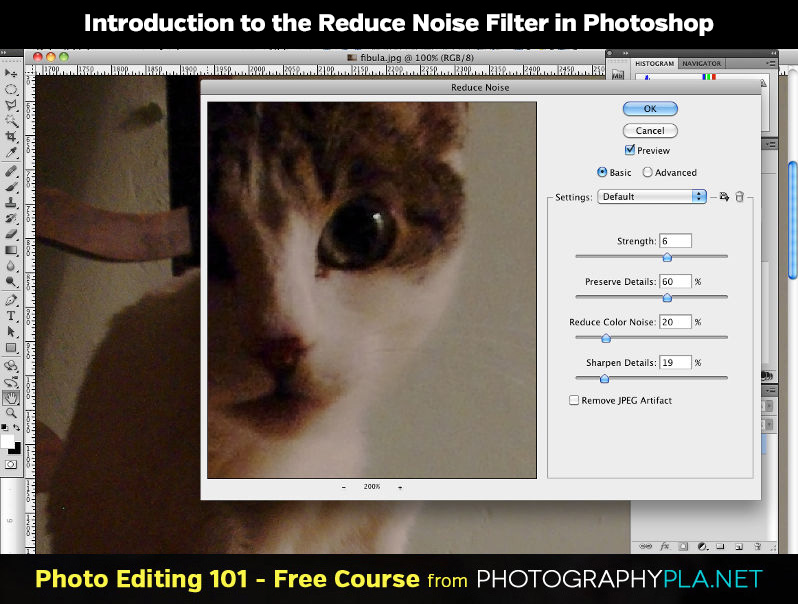
You can open the Reduce Noise filter by going to Filter > Noise > Reduce Noise. You’ll see a new dialog open with a range of controls. You can use this filter in a non-destructive way by first right-clicking on the Background Layer in the Layers palette and selecting Convert to Smart Object. Now, any filters that you apply to the layer can be edited or deleted without affecting the underlying image, though note this is not an option in earlier versions of Photoshop.
How Do You View the Effect that Your Adjustments are Having?
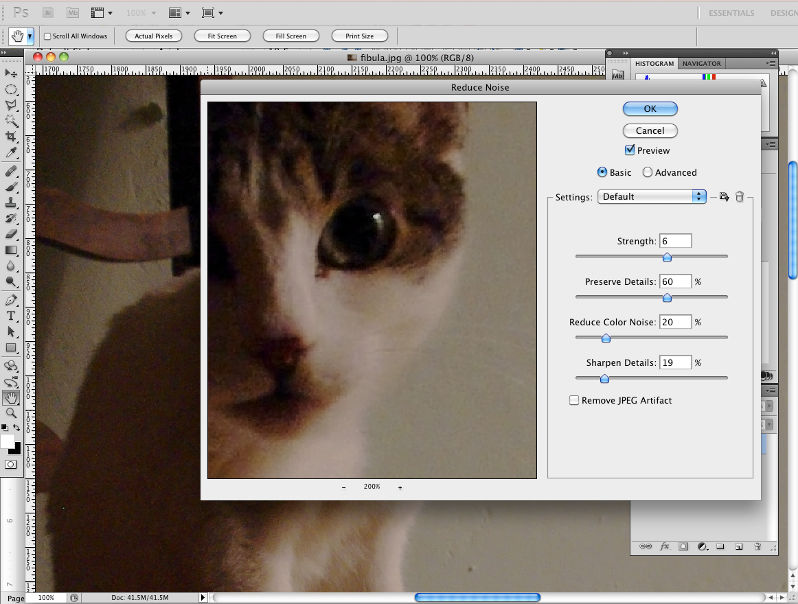
As you make adjustments to the settings of the Reduce Noise filter, you can view the effects in real time, either in the Reduce Noise dialog or on the photo itself.
To view changes directly on your photo, you need to ensure that the Preview check box is ticked. The power of your computer and the size of the photo may affect just how fast updates are made to the main photo, but they are applied in as near to real time as possible.
On a slower machine, you may find it best to turn the Preview setting off and view changes in the preview window in the dialog. You can zoom in and out of this preview using the – and + buttons below it and you can click and drag the preview to change the view of what you are looking at. You can also click onto the photo and the preview box will automatically center on that point.
How Do You Use Presets?
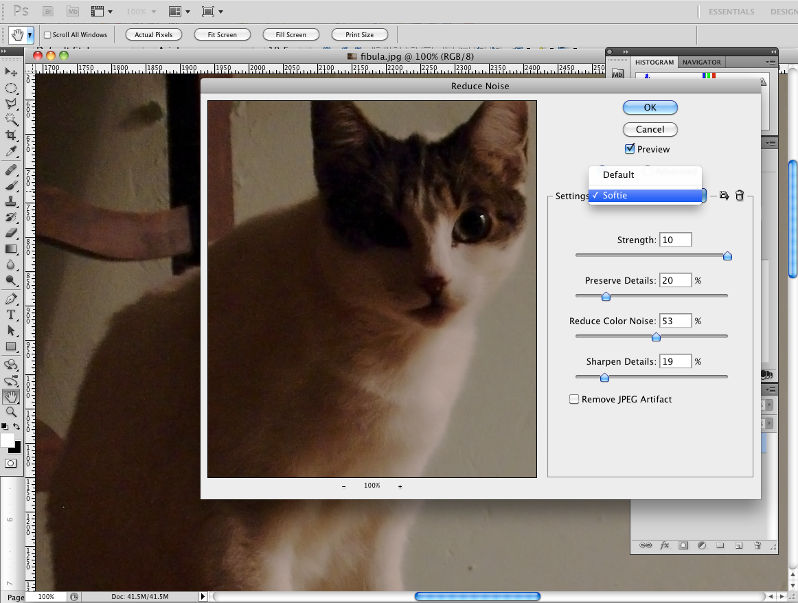
At the top of the Settings panel is a drop down menu that is set to Default and you can use this to quickly apply previously saved settings to your images. If you have not saved any presets, this drop down will be empty apart from Default, but in the screen shot, you can see that I’ve previously saved some settings and labelled them Softie and I can apply these settings to any photo by selecting it.
You can easily save settings for later use by clicking the floppy disk icon next to the drop down and giving them a name.
What Do the Different Controls Do?
The various controls have different effects that can reduce noise and detail and you need to find a balance between them that reduces noise without losing too much detail and sharpness from your photos.
- Strength – this targets luminance noise across the three color channels.
- Preserve Details – the higher this setting, the more fine detail and edges will be preserved, but it will reduce the effect that the strength slider has when set to a high value.
- Reduce Color Noise – this reduces the appearance of random color patterns that can particularly affect shadow areas.
- Sharpen Details – you can use this slider to increase the amount of sharpening, though you may prefer to offset any softening by applying a separate Smart Sharpen filter afterwards.
- Remove JPEG Artifact – if you’re working on an image that has been saved as a JPEG with slightly too aggressive compression, this will help to reduce the appearance of blocky artifacts.
What Does the Advanced Setting Do?
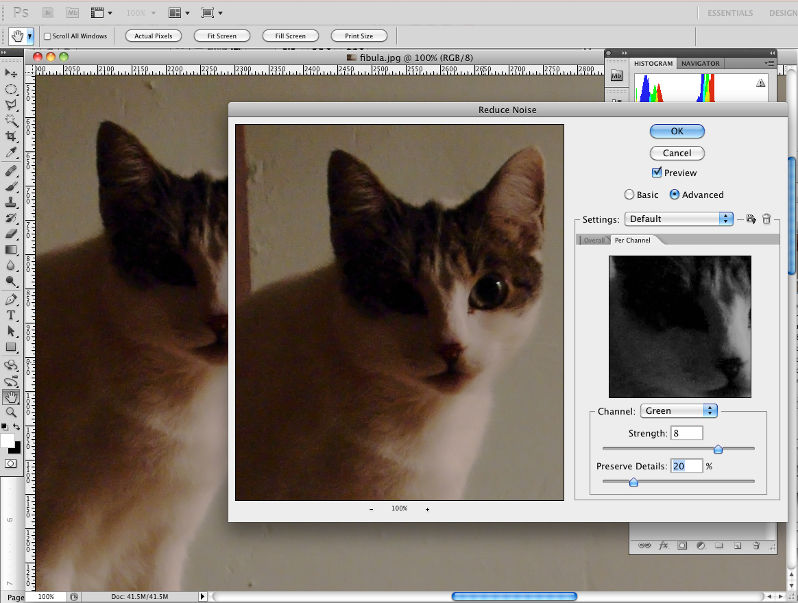
By default, the Reduce Noise filter opens in Basic mode, but there is also an Advanced option. When this radio button is selected, the settings that appear in Basic mode are displayed in a tab labelled Overall and a second tab labelled Per Channel. This new tab allows you to select from the Red, Green and Blue channels and adjust the Strength and Preserve Details settings specifically for one or more channels. For example, in a landscape photo you could target the blue channel to apply more aggressive noise reduction to the sky.
Conclusion
While noise is becoming less of an issue with modern sensors, as you push up ISO settings, you may find that the Reduce Noise filter is a handy tool for those occasions when noise is interfering with your image quality.
See more articles in the Photo Editing 101 series.

