Free Photography Bundle ($180 value): PS actions, LR presets, photo overlays, & print templates!
Get it here.
This article is a part of our series Photo Editing in Lightroom 101. Throughout the series we’ll cover the details of Lightroom’s library and develop modules and how you can use Lightroom to improve your own photos. As new articles are published they will be added to this page. If you don’t want to miss future articles in the series, please subscribe to our RSS feed or our email newsletter.
Almost every digital photo can benefit from sharpening and noise reduction. The key is to apply the appropriate amount, but avoid going overboard and creating an unrealistic photo. If you’re not zoomed in to see the photo at 100% it may even be difficult to notice the change made by some subtle sharpening and noise reduction.
Sharpening a Photo in Lightroom
Let’s start with sharpening. Both sharpening and noise reduction can be found in the “detail” section to the right side of the develop module.
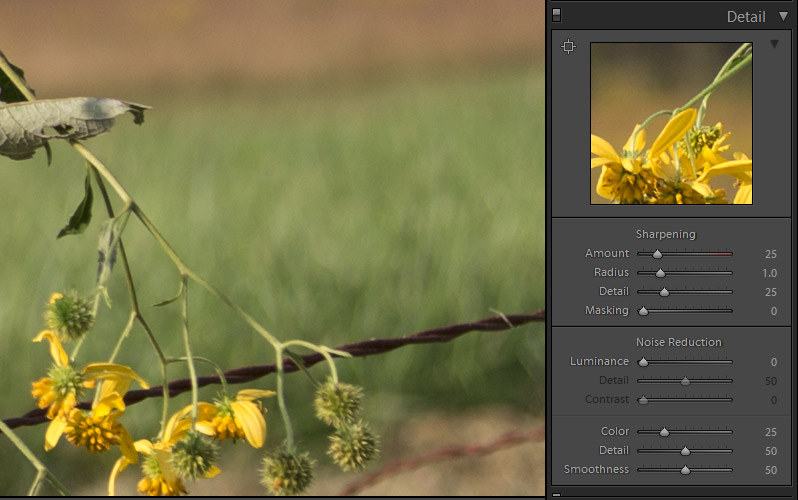
There are four different sliders for sharpening, and unlike many of the other sliders throughout the develop module, some of them have a value other than “0” by default. You can see the default settings for sharpening in the screenshot below (notice that the values are greyed out when they are in the default settings.

Now, let’s talk about the 4 different sliders and what they control. The “amount” slider controls the intensity or the amount of sharpening that is being applied. By default it is set at 25, and in many cases you will want to increase that for the best results. But if you take it too far it can also start to sharpen the noise in the photo. The “radius” slider controls the amount that it sharpens based on where the edges are. The “detail” slider controls how much detail is brought back in to the photo. The “masking” slider determines what areas of the photo are sharpened and what areas are not sharpened.
In general, the ideal radius and detail settings are usually low numbers, usually to the left of the slider for the amount. Each photo is different though, and with sharpening you will need to use the settings that work best for your specific photo. When you’re adjusting the sharpening you’ll want to make sure that you are zoomed in to view the image at 100%. To do this you can double click on the focal point or the spot in the photo that you want to be sharp.
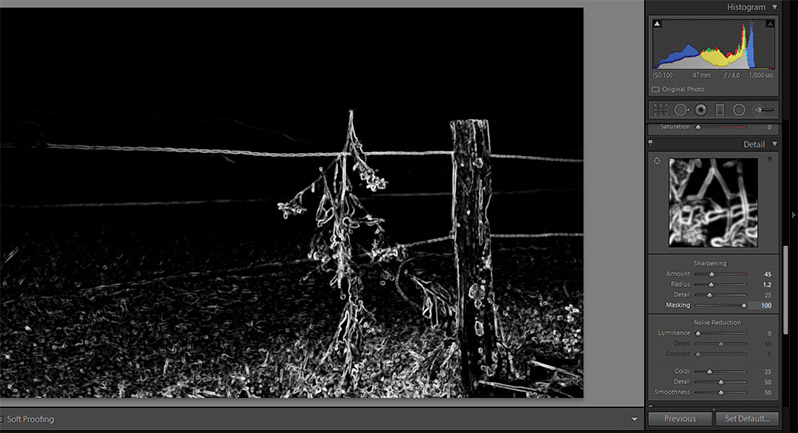
When you are working with the 4 sharpening sliders you can hold the alt key for a little extra help. With the amount slider the alt key will show the photo in black and white, which sometimes will make it a little easier to gauge how much sharpening is needed. The image below shows this in action.
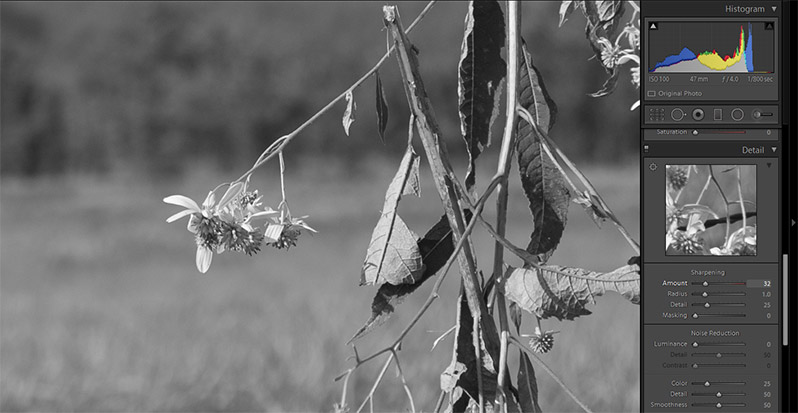
In the case of this sample photo I am going to set the amount to 45. Next, let’s take a look at the radius slider. If you hold the alt key while adjusting the radius slider it will add a mask that may be helpful for you to get the right setting.
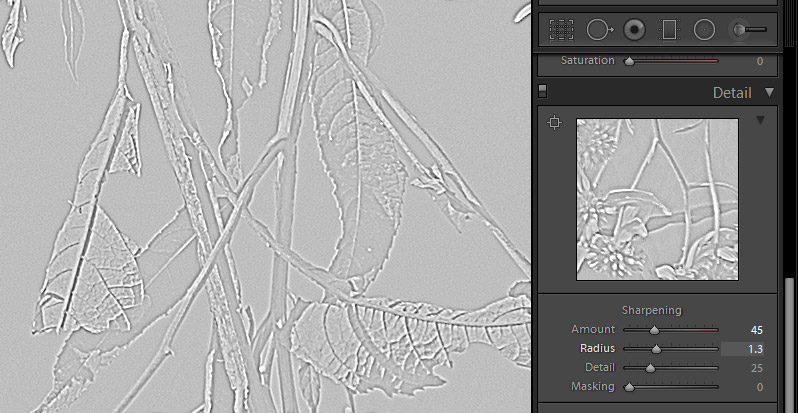
For this sample photo I am going to set it to 1.2.
When you’re adjusting the detail slider you can hold down the alt key to see a mask.
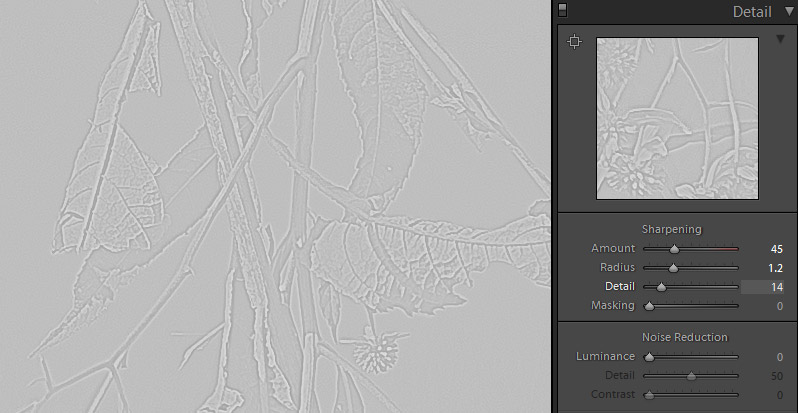
If you move the slider to far to the right you’ll see noise being introduced. For this sample photo I am going to leave the detail setting at the default amount of 25.
When you’re adjusting the masking slider hold down the alt key and you’ll see a mask. Only the areas that are shown as white will be sharpened, the black areas will not be sharpened. So this allows you to selectively sharpen the areas that you want. Move the slider to the extremes and you’ll see how it works. When I move the slider all the way to the right with the sample photo only the foreground elements like the plant and the fence are white, and the background is black. So this will apply the sharpening to these foreground elements in the photo without sharpening the background, which is what I want.
If I move the masking slider all the way to the left the entire photo is white, so everything will be sharpened.
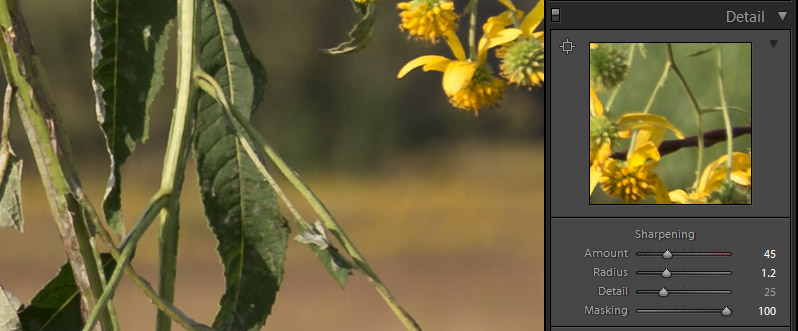
So the settings I am using for the sample photo are shown below.
Noise Reduction in Lightroom
Now, let’s move on to noise reduction. Many digital photos, especially those taken in low light or with a high ISO setting, will benefit from some noise reduction. The noise reduction settings are just below the sharpening settings in the “detail” section of the develop module.
The first 3 sliders, luminance, detail, and contrast go together. The luminance slider is used to smooth out digital noise. The further you move it to the right, the more the noise will be smoothed. Moving it too far to the right will not only remove the noise, but it will also soften the photo and give it a blurry look. If the photo includes a person, the skin will usually look very unrealistic with too much noise reduction.
By default luminance is set to “0”. Let’s take a look at a sample photo. I’m zoomed in at 100% to be able to see the noise.
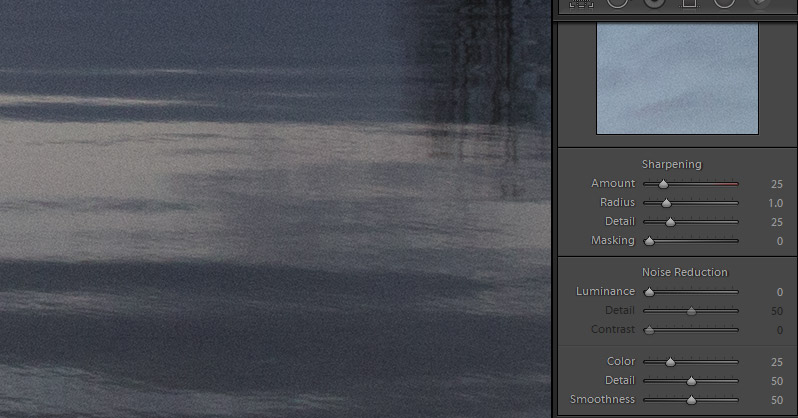
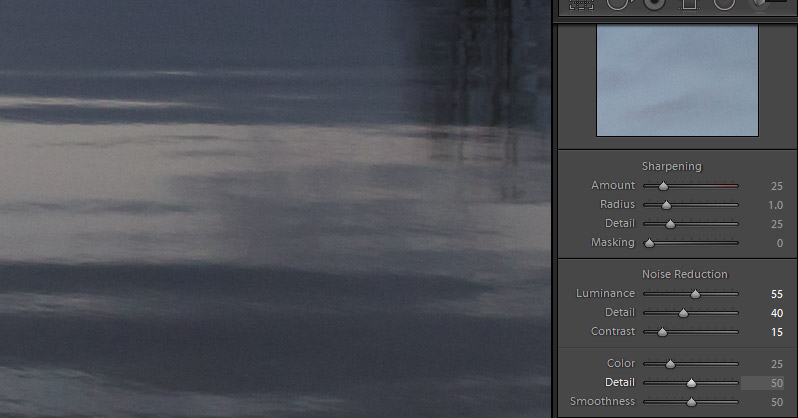
This is a photo of a lake at sunset and there is a good bit of noise showing up in the water. The screenshot above shows it with luminance set at “0”. Just to show the opposite extreme, here is what it looks like with luminance set at 100.

You can see that the noise has been removed, but it also has a very softened look. So I want to find a spot in the middle where the majority of the noise is removed, but without giving the photo a soft and unnatural look. I’m settling at a setting of 55 for the luminance.

Each photo will be different, so you’ll need to experiment to find the ideal setting. The detail slider allows you to bring back some of the detail that you might be losing through the use of the luminance slider. I typically use a detail setting that is less than the luminance setting. In the case of this sample photo I’m setting the detail at 40.

The contrast slider allows you to add some contrast. It is set at “0” by default, and in many cases I leave it there. Typically I use a contrast setting that is less than the detail setting. In the case of this sample photo, I am using a contrast setting of 15.
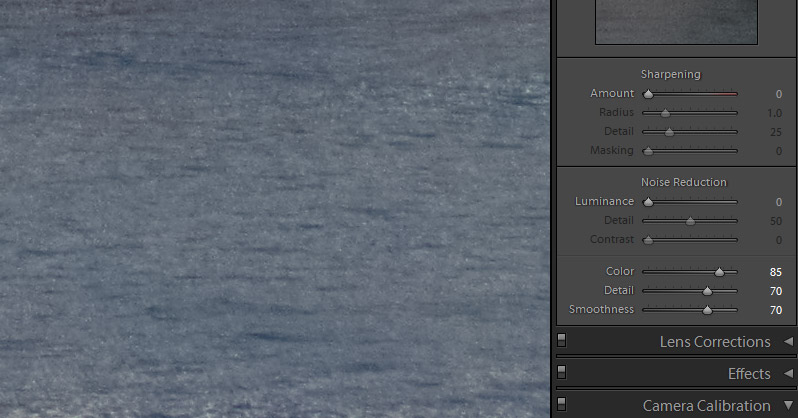
Below the 3 sliders that we just discussed, you will find another 3 sliders that can be used for noise reduction. Sometimes you will notice that a photo has colored bits of noise. You can use these 3 sliders to help with this issue. In the sample photo below you can see that there is some color in the noise on the water.

The screenshot above shows the photo with the default settings. The photo below shows it with color set to 85, detail set to 70, and smoothness set to 70. You can see that while there is still some noise in the photo, the colored noise has been reduced.
That covers the basics of sharpening and noise reduction. Remember that every photo will be unique and you’ll need to experiment a little to find the best settings for each photo.
If you don’t want to miss the other articles in this Photo Editing in Lightroom 101 series, please subscribe to our RSS feed or our email newsletter. As new articles are published they will be added to the series page, which will serve as an index for the entire series.

