Free Photography Bundle ($180 value): PS actions, LR presets, photo overlays, & print templates!
Get it here.
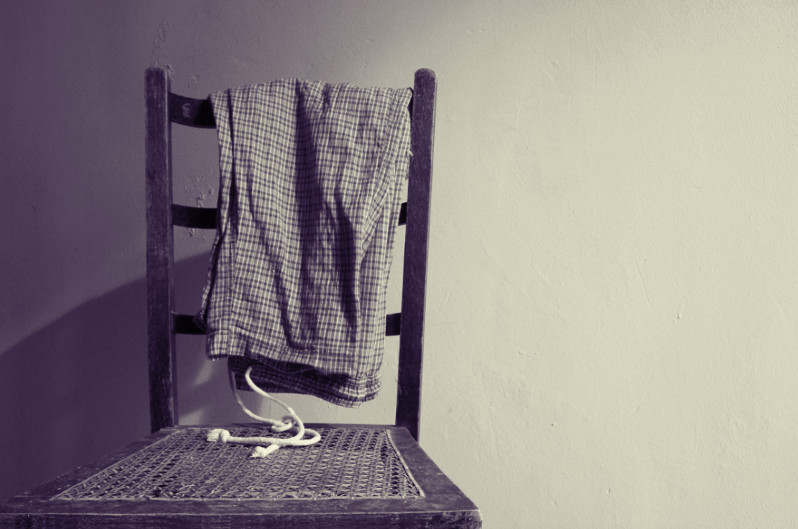
Split toning is a technique that harks back to film photography, but it’s very easy to create a similar split tone effect using Photoshop. This technique applies different color tones to the shadow and highlight areas to produce a twist on a simple black and white image.
You can find a variety of ways to achieve this effect in Photoshop. If you’re working on a RAW file, you have a split toning option in ACR while converting for use in Photoshop and it’s also possible to use ACR to work on JPEG files. However you do have a little more control using the Gradient Map method that I’m going to describe here.
Convert Your Image to Black and White
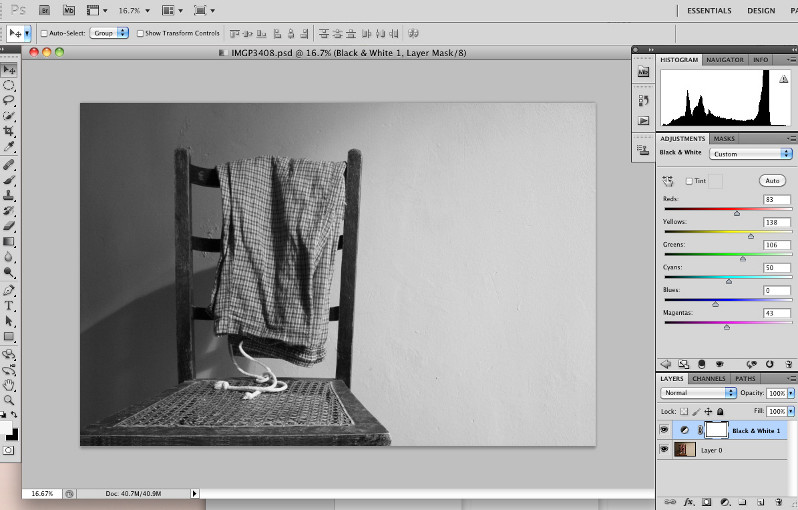
The first step in adding a split tone effect to a photo is to convert it from color to black and white. There are a variety of ways to do this and you can use your favorite method to achieve this. I’ve added a Black and White adjustment layer and tweaked the settings manually.
Set Your Foreground and Background Colors
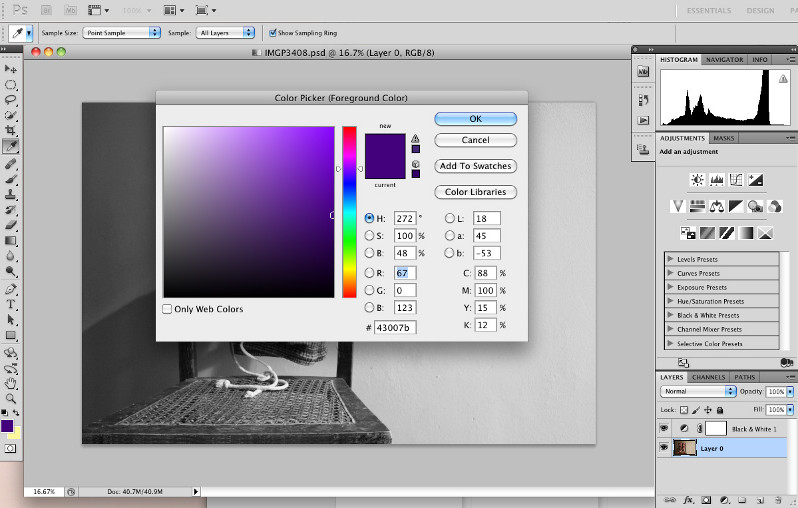
Next up is to set your foreground and background colors as desired. I selected a shade of bluey purple for the shadows and a cream or pale yellow for the highlights. This generally works best with complimentary colors, but do feel free to experiment with different color combinations to see what works best for you and specific images.
You can continue to tweak the colors after you’ve applied the Gradient Map layer, so setting your colors right now is just for convenience and your choices won’t be set in stone.
Do note that the foreground color will be applied to the shadow areas of your photo and the background color to the light areas.
Add a Gradient Map Adjustment Layer
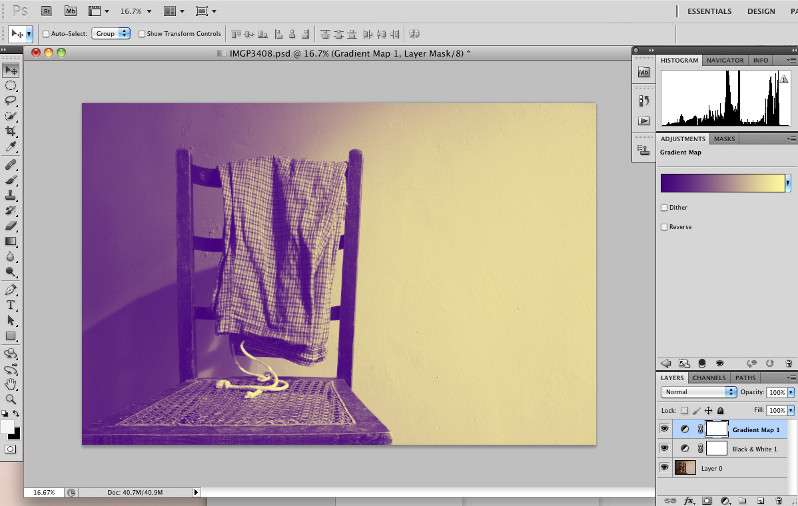
There is more than one way to add the Gradient Map, but if you’re not familiar with this feature, it’s probably easiest to go to Layer > New Adjustment Layer > Gradient Map. The immediate result will be a photo that is very strongly and unnaturally colored, but the effect will be toned down considerably by the time that we’ve finished.
Edit the Gradient
I personally feel that this step adds a little more depth to the finished image, but you could skip this step if you like and use the gradient straight out of the tin.
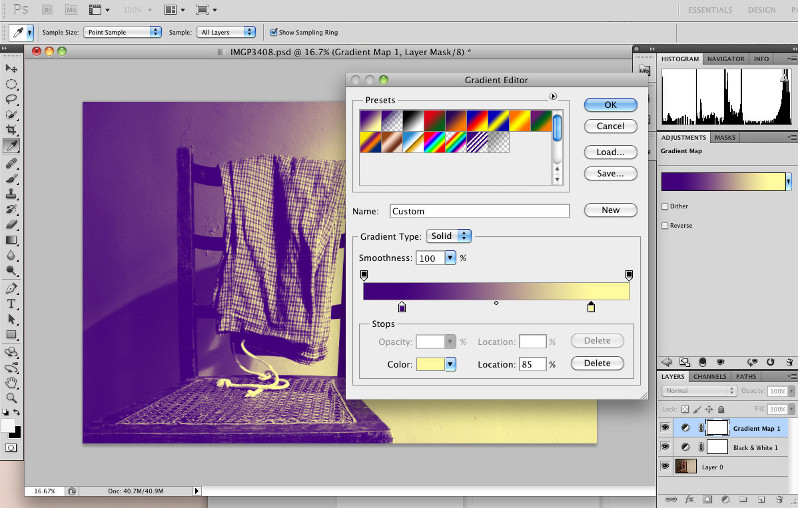
If the Adjustments palette isn’t open, go to Window > Adjustments to open it. As the last layer you added was the Gradient Map, that should be active in the Adjustments palette. Now click on the color gradient to open the Gradient Editor.
At this point, you’ll see that there are two color stop slider controls on the underside of the gradient control – the shadow color at one end and the highlight color at the other. If you move each of the stops in a little, you will increase the intensity of the two colors a little. I moved the shadow stop in to set the location to 15% and the highlight slider to 85%. If you think you may want to use this gradient again on other images, you can click the Save button so that you can easily apply the same effect to other photos.
Adjust the Gradient Map Blending Mode and Opacity
Unless you’re a big fan of Pop Art, you’re probably not sold on this effect right now, but the next couple of tweaks will tone it down and make it look a bit more subtle.
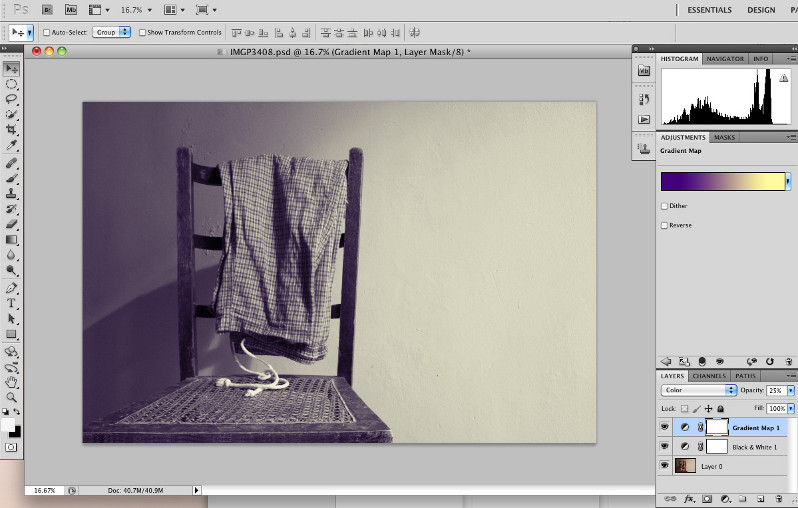
First up is to change the blending mode of the Gradient Map layer to Color from Normal. The blending mode drop down is at the top left of the Layers palette. To the right of the blending mode drop down is the Opacity slider and reducing this will also help to bring the effect under control a little. I brought the setting down to 25% in my case, but you’ll want to adjust this as looks right for your photo.
There you have it. It’s a pretty quick and easy technique for adding some interest to photos that seem a natural fit for a mono conversion. While I’ve made this example quite strong, it can also be very subtle to the point that you might not notice the effect until you put the final image side by side with a straight conversion to black and white.

