Free Photography Bundle ($180 value): PS actions, LR presets, photo overlays, & print templates!
Get it here.
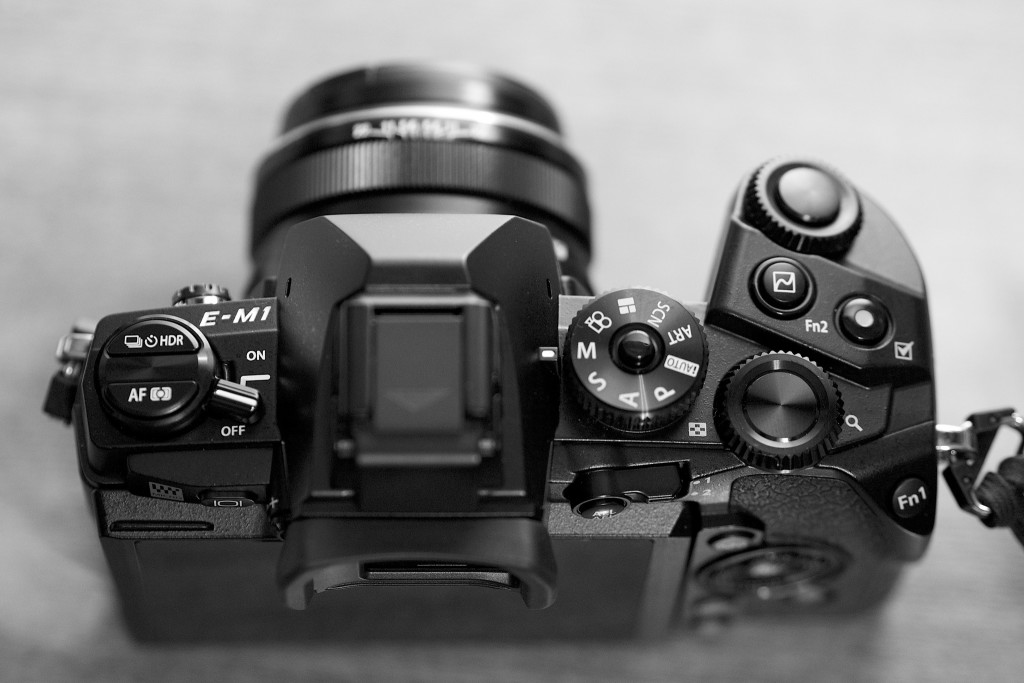
Photo: Something New by Austin Kirk.
Aperture and shutter priority modes are the perfect bridge to get you from shooting in auto mode to manual mode. They still give you some creative control, but also provide a bit of safety net to help make sure you’re getting properly exposed photos. Even professionals who are more than competent shooting in manual mode, will sometimes fall back on these priority modes to make things a little easier. So, it’s not so much that shooting in priority mode is a bad thing, but knowing how to shoot in fully manual mode when you need to is definitely worth setting aside some practice time to learn.
Luckily, since you’re already comfortable in priority modes, making the transition into manual really won’t be that difficult! Let’s take a look at the fundamental settings you’ll need to know to make the transition smooth and pain free.
Shutter Speed
A fast shutter speed can help you freeze action and motion.
If you’re already shooting in priority modes, you probably already know a thing or two about shutter speeds. But, just to serve as refresher, the shutter speed measures how long the shutter of your camera is open and exposing light to the sensor. The smaller or faster the shutter speed, the less amount of time light is allowed through. A longer shutter speed, the more light will be able to pass through the shutter.
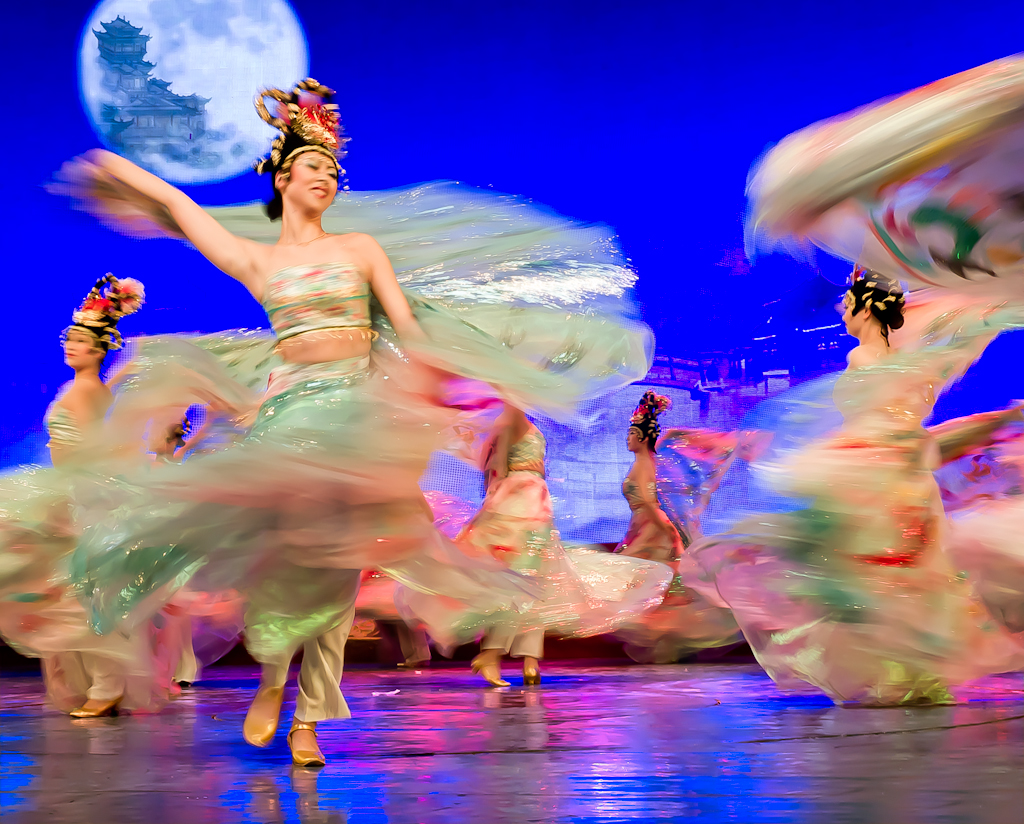
Slower shutter speeds are great for low light and/or showing movement.
However, the amount of light you are working with isn’t the only thing that will dictate which shutter speed you need to be shooting on. Shooting sports, or other fast moving subjects will mean you’ll need a fast shutter speed to avoid motion blur. Or, maybe you’re trying to capture motion blur so help show movement in your photo, in that case, you’ll want to use a slower shutter speed. This is when knowing about aperture (and ISO) will come in handy…
Aperture (aka F Stop)
Think of shutter speed and aperture as a team, they work together beautifully to help you make perfectly exposed photos. They’ll sometimes need the help of ISO, which we’ll talk about next, but aperture and shutter speed are pretty friendly players to start. We know that shutter speed is how long the shutter stays open, but aperture measures how wide the shutter will open to. A smaller aperture number–like f 1.8–will be a very large opening. Larger aperture numbers–like f 16–will be very small openings. The larger the opening (or smaller the f stop), the more light will be able to pass through. Smaller openings, will of course, allow less light through. Take a peak at this diagram below to give you a visual representation of aperture/f stops.
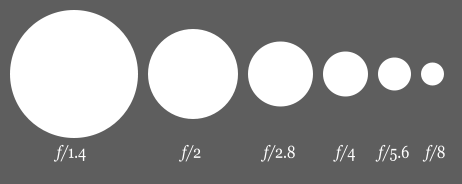
Aperture setting diagram by Cbuckley on Wikipedia.
Another thing to consider about apertures is the depth of field. A small f-stop number like f1.4, will provide a very shallow depth of field. For example, you could take a headshot of a person at f1.4 and the tip of their nose will be in focus, but their eyes and ears will be out of focus because of the shallow depth of field. On the other end of the spectrum, landscape photographers often shoot at larger f-stop numbers, like f-16 so they can get the foreground, mid-ground, and background in focus. That’s why it’s important to consider what your depth of field needs to be, before adjusting your aperture.
Adjusting your aperture (or f stop number) will allow you to let in more light (smaller f-stop number) or less light (larger f-stop number), but the depth of field will also be compromised.
That being said, we should now begin to see how we can use aperture to help us achieve the shutter speed we need to shoot with (or even vice versa). If you want to shoot with a fast shutter speed, but the lighting is a little low, you can adjust your aperture to a smaller f-stop setting to allow more light to pass through. Or, if you need to shoot with a slower shutter speed to capture motion blur, for example, but your subject is brightly lit, you can use a larger f-stop number to decrease the aperture opening–thus allowing less light to pass through. Now, once you’ve got your aperture and shutter speed working together to capture the perfect blend of speed and depth of field, but are still getting over or underexposed photos, you can adjust your ISO to pinpoint your exposure settings.
ISO
If you’ve been wondering, ISO stands for International Standards Organization–it’s essentially a universal standard of measurement in regards to light sensitivity. In other words, ISO is a measurement of how sensitive your digital camera’s sensor is to light. As you probably know already, the ISO is adjustable. Most cameras have an ISO that starts at around 100 and goes upwards, sometimes into the 10’s of thousands.
Shooting on ISO 100 means the camera’s sensor is at it’s lowest sensitivity to light making it more difficult to capture low light settings. The higher the ISO, the more sensitive the sensor is to light (making it easier to shoot in low light).
I put ISO last on this article because, this is usually the thing I will change only as a last resort to nail the perfect exposure. As a rule of thumb, I always try to start on the lowest ISO as possible to help minimize digital noise (or grain). Let’s take a look at the quality of the image degrades the higher the ISO goes:
ISO 200 
ISO 800
 ISO 6400
Of course, different cameras will perform better (or worse) at higher ISO settings so it’s important to know your gear’s limitations.
To help me determine which ISO I need to shoot at, I first establish which aperture and shutter speed I need to shoot on. If I’m shooting something fast moving and need a fast shutter speed to avoid motion blur, I then ask myself if I can afford to shoot on a wider aperture to allow more light to get through to the sensor. Once I’ve reached the max aperture I’m comfortable shooting with, if I’m still not getting enough light to properly expose my photo, then I increase my ISO a stop at a time until my exposure looks just right.

