Free Photography Bundle ($180 value): PS actions, LR presets, photo overlays, & print templates!
Get it here.
This article is a part of our series Photo Editing in Lightroom 101. Throughout the series we’ll cover the details of Lightroom’s library and develop modules and how you can use Lightroom to improve your own photos. As new articles are published they will be added to this page. If you don’t want to miss future articles in the series, please subscribe to our RSS feed or our email newsletter.
Continuing on with our exploration of Lightroom’s develop module, we come to the tone curves tool. Working with tone curves can be a little confusing at first, but once you have a grasp of it, there is a lot of potential.
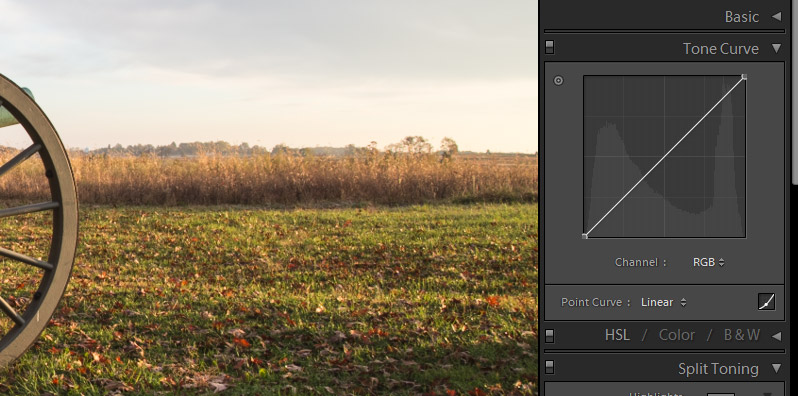
The tone curve represents the shadows, darks, lights, and highlights from left to right. If you hover your mouse over a spot on the curve it will highlight one of these areas that you will be impacting if you adjust the curve. In the screenshot below I was hovering the darks area.
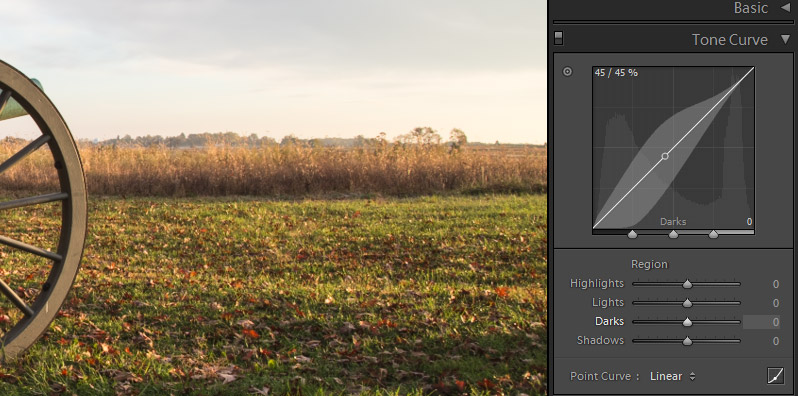
You’ll see 4 sliders below the curve for highlights, lights, darks, and shadows. If you’re just getting started with curves you’ll probably find it easiest to adjust the sliders, and the curve will adjust itself accordingly. For example, if you want to lighten the shadows you could move the slider to the right. It will then raise the curve at the left side, which corresponds to the shadows.
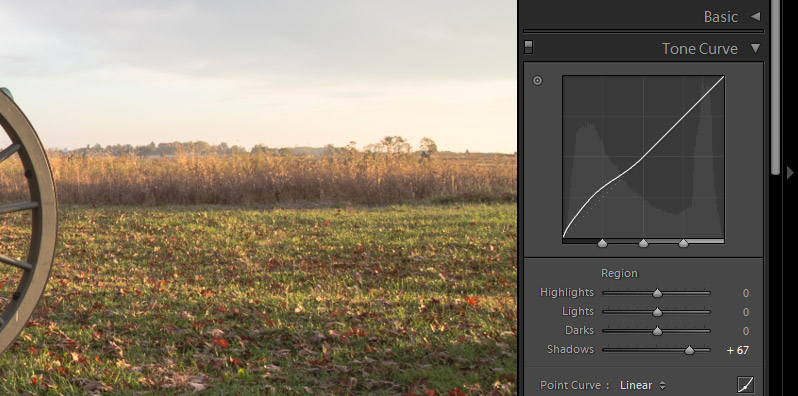
And if you want to darken the shadows you would move the slider to the left and the curve would drop down in the shadows area.

If you’re a Photoshop user you may be noticing that this is different than the way curves work in Photoshop. If you want something that more closely resembles the curves functionality in Photoshop, click on the little icon in the lower right corner.
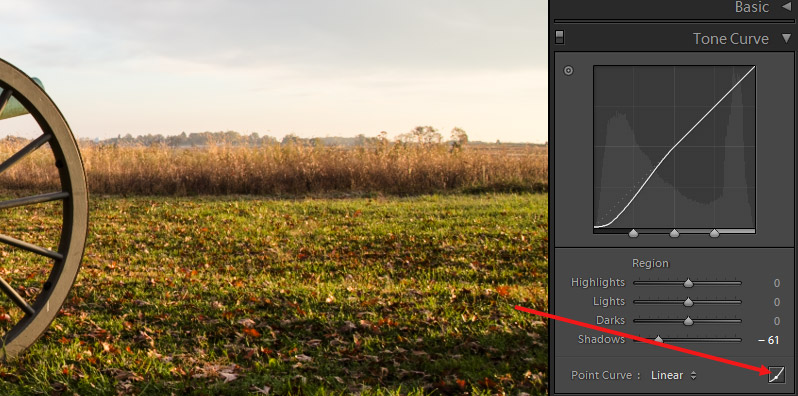
You’ll now be using the point curve and you’ll notice that the 4 sliders are gone. In order to edit the curve you’ll click on it to create a point and either raise it or lower it.
The first thing to point out here is that Lightroom offers a few options that you can apply easily. By default it will be set to linear, which simply means that the tone curve is a straight line. But if you click on the little arrows next to linear you can select medium contrast or strong contrast.
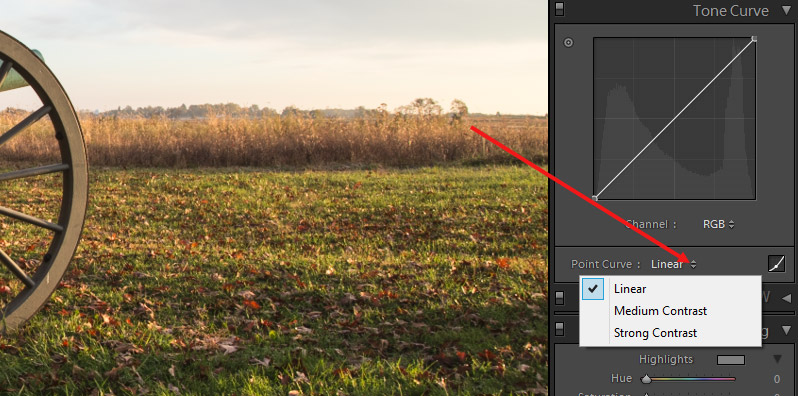
So if you want to use the tone curve to give your photo a contrast boost you can use one of these options.
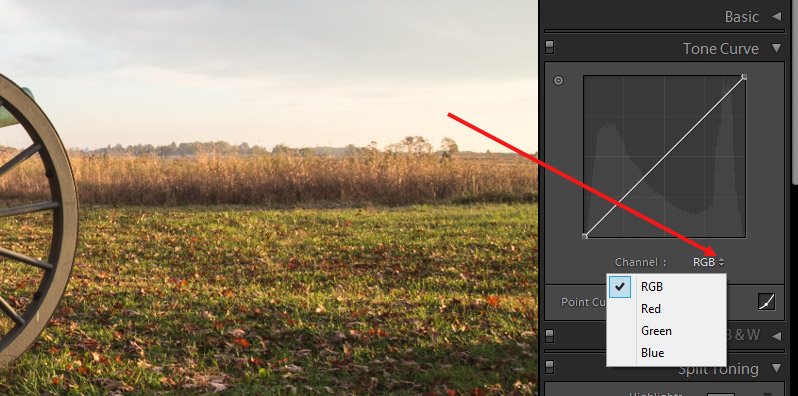
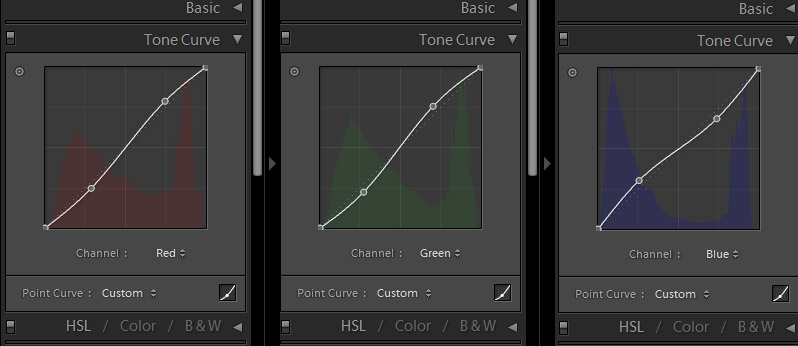
Another thing that you can do with the point curve is work with specific color channels. By default you will be working with the RGB curve, which impacts all colors. But if you click on the little arrows next to RGB you can select the red, green, or blue color channel.
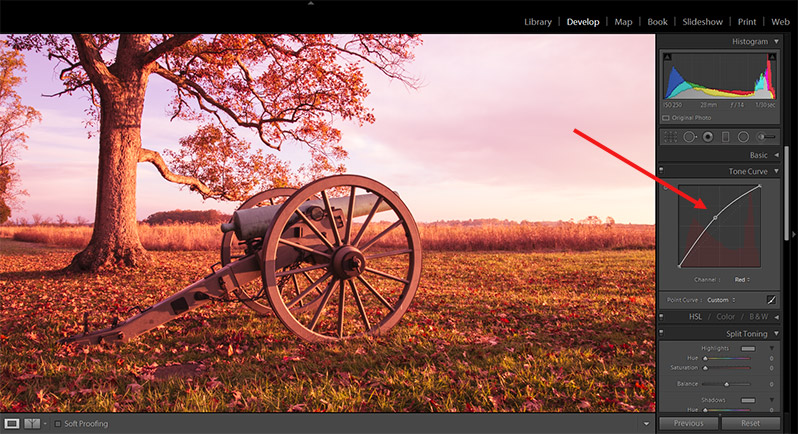
Working with the different color channels gives you a great deal of control. In the screenshot below you’ll see how lifting the red tone curve adds more red to the photo.
Ok, so now let’s look at a few different effects that you can create with tone curves. First, we’ll create a cross processed effect by applying a slight S-curve to the red and green channels, and reversing it for the blue channel.
And here is how the sample photo looks.

Next, I can create a matte effect by using the curve below.
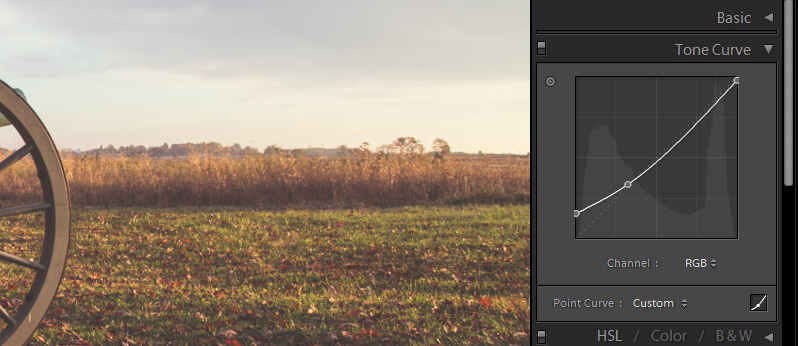
And the sample photo will look like this.

Next, I can give it a hazy effect with a tone curve like the one below.
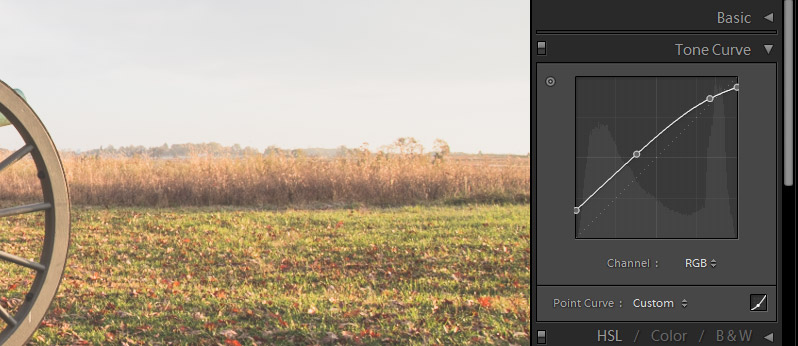
And the sample photo looks like this.

As you can see, there is a lot of potential with tone curves. The best way to get familiar with it is simply to experiment on your own. Before long you’ll be comfortable with the tool and how it works.
If you don’t want to miss the other articles in this Photo Editing in Lightroom 101 series, please subscribe to our RSS feed or our email newsletter. As new articles are published they will be added to the series page, which will serve as an index for the entire series.

