Free Photography Bundle ($180 value): PS actions, LR presets, photo overlays, & print templates!
Get it here.
Lightroom is an extremely powerful tool for both organizing and editing your photos. Ever since I started using Lightroom several years ago I have been using Photoshop less and less because there is just so much that you can do in Lightroom, and the workflow can be quicker. In this article we’ll take a look at 17 specific things you can do in Lightroom to enhance and improve your photos.
1. Lens Profile Correction
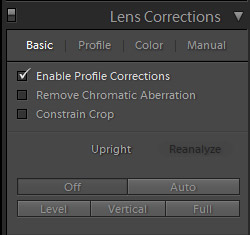
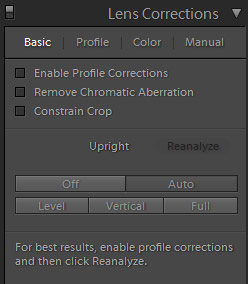
The options in the “Lens Corrections” settings can help to fix various issues related to the lens. The first check box is for “Lens Profile Correction”, and most photos can be slightly improved through the lens profile correction. It’s usually subtle, but can help to remove distortion and vignetting from the lens.
2. Remove Chromatic Aberration
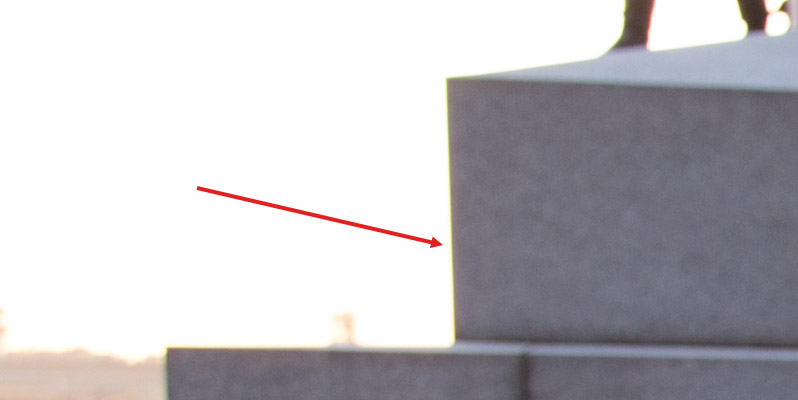
Also in the Lens Corrections settings is the option to remove chromatic aberration. Chromatic aberration is colored fringes that will sometimes appear at the edges of objects, usually where dark and light colors meet. Lightroom makes it really easy to fix chromatic aberration, you just need to check the box.
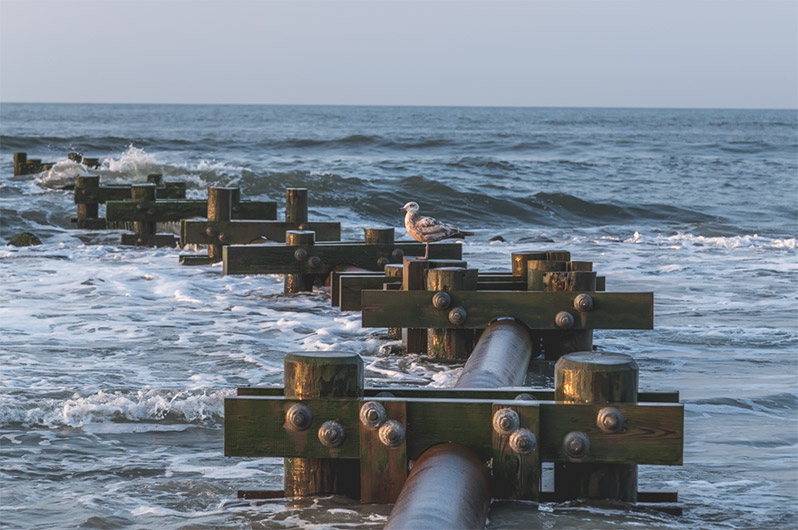
Here is an example of a photo with chromatic aberration.
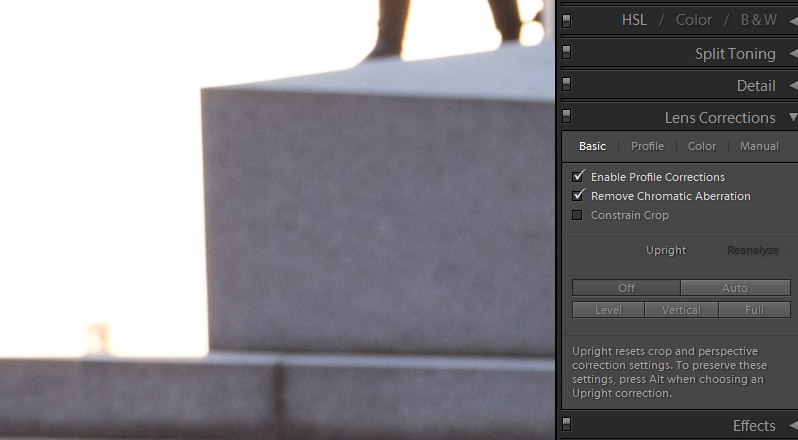
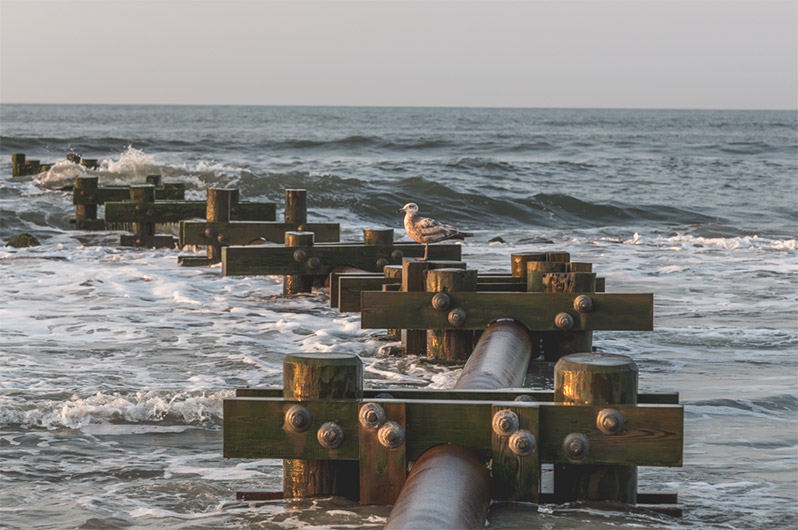
And here is the photo after the box has been checked.
3. Crop
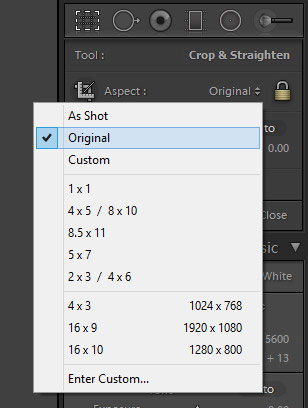
Ideally you’ll want to get the composition just right in the camera, but in reality there will be times when you need to crop a photo. This could be to remove distracting edges, to get closer to the subject, or just to improve the composition. You may also need to crop when you are preparing to print a photo in a specific size. Lightroom’s crop tool is pretty easy to use, and even includes some handy presets for cropping in different aspect ratios.
You can use the keyboard shortcut “R” to access the crop tool. Then you can select the aspect from the dropdown.
For a more in-depth look at the crop tool and the various options please see How to Crop & Straighten in Lightroom.
4. Straighten
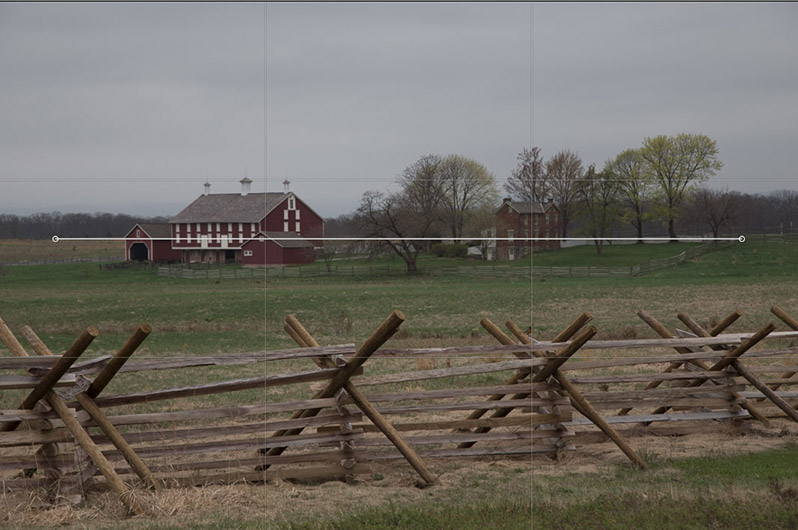
Straightening a photo can also be done within the crop tool. If you have a landscape or nature photo and the horizon is crooked, you can easily straighten it with the help of Lightroom. With the crop tool open, click on the straighten icon (shown below).
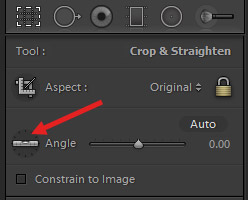
Then click on one end of the horizon, drag to the other end, and release the mouse. Lightroom will automatically straighten the photo for you.
5. Upright Tool
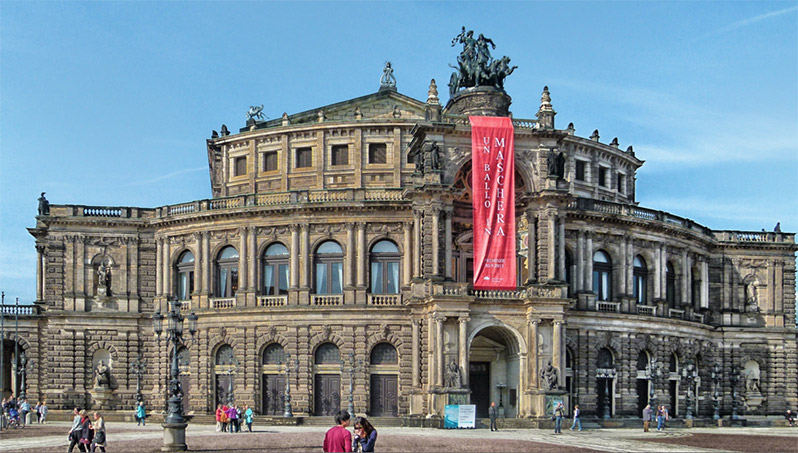
The upright tool is also a part of the Lens Corrections settings. This tool can help to fix distortions, and it is often useful for photos that include buildings or architecture. It’s common for these photos to have some distortion that prevents the building from being completely upright, and Lightroom can help. Here is a before version of an example photo.
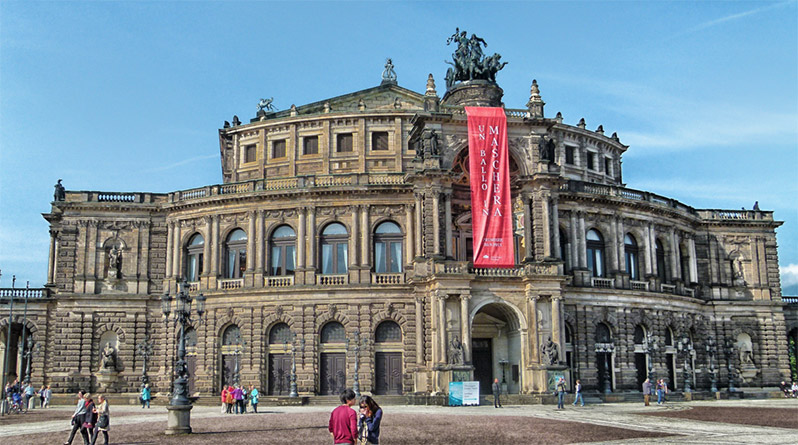
If you look at the sides of the building you can easily see the distortion that makes the bottom of the building look wider than the top of the building. Lightroom has several different options for upright tool, including “auto”, which is a good one to try first.
Here is the sample photo after clicking on “auto”.
Another useful option is “vertical”, which will attempt to make the vertical lines straight up and done. In the case of this sample image vertical produces a very similar result to auto, but that won’t be the case with every photo.
6. Correct White Balance
Having the correct white balance for your photos is critical. Most modern cameras will do a pretty good job with auto white balance in natural light, but you’re more likely to need to adjust white balance under fluorescent light or some other lighting conditions. White balance can also be a creative choice, so there may be times when you want to adjust the white balance to cool down or warm up a photo.
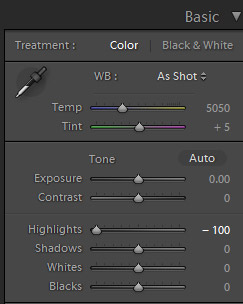
At the top of the Basic section you’ll find two sliders for white balance: temperature and tint.
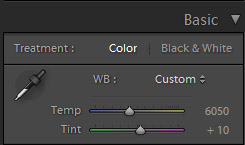
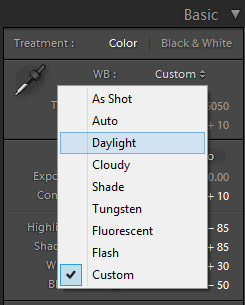
You can also select one of the presets (auto, daylight, cloudy, shade, tungsten, fluorescent, or flash) from the dropdown.
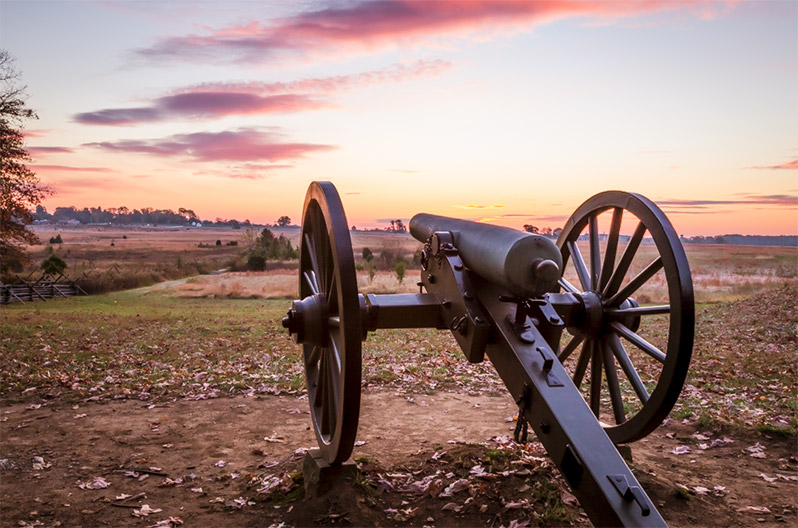
This sample photo was taken shortly after sunrise, but with the current white balance it feels too cool.
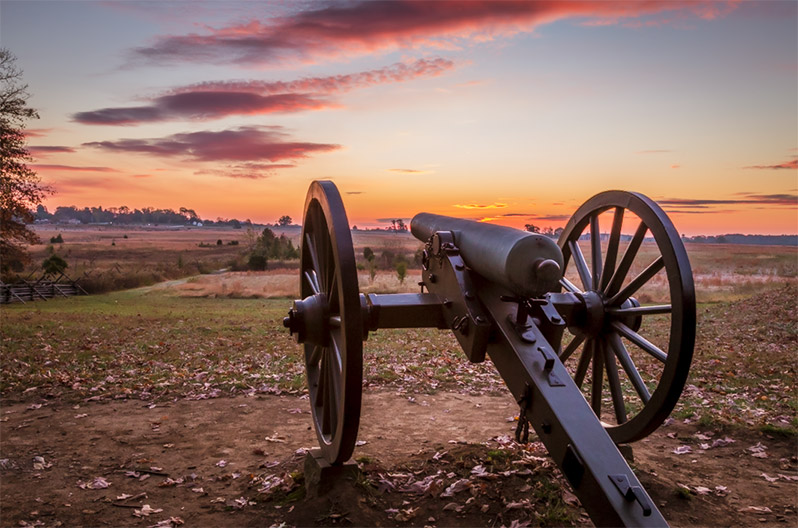
By increasing the temperature I can warm it up to more accurately represent the scene as I remember it.
7. Recover Highlights
One of the benefits of shooting in RAW format is that you will have better ability to improve the highlights and shadow areas of your photos. Lightroom won’t be able to fix totally blown out highlights, but it can help with improving highlights that are too light but not totally blown out.
This sample photo suffers from a lack of detail in the sky.
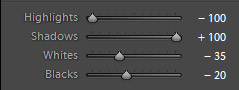
If I move the highlights slider all the way to -100 it looks like this:
The highlights slider is located in the Basic section just below exposure and contrast.
Of course, moving the slider to -100 is an extreme example. Use whatever setting works best with your photo to recover highlights without making them too dark.
8. Boost Shadows
Right below the highlights slider you will find the shadows slider. Many photos will benefit from lightening the shadows to bring out more detail in the darker areas of the photo. To lighten the shadows you’ll just move the slider to the right.
Let’s look at the same sample photo with shadows set at 0.
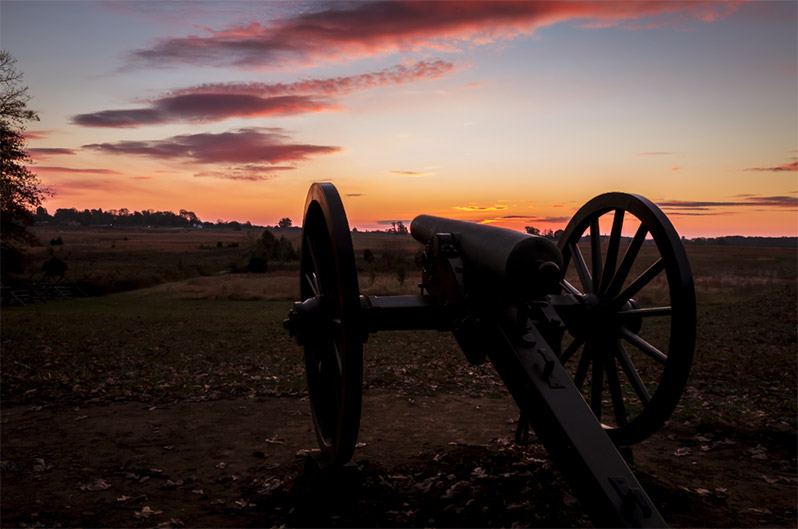
Much of that darkness can be corrected by moving the shadows slider to the right. Here is the photo with the shadows slider at +100:

9. Set Black and White Points
Directly below the shadows slider you will find the whites and blacks sliders. These sliders set the black and white points of your photo and will determine how much, if any, of your photo is pure black and pure white. Moving the sliders to the right will lighten the photo, and moving to the left will darken. So if you want brighter whites you would move the whites slider to the right. If you want to lighten the blacks you would move that slider to the right also. With most photos I like to move the blacks slider to the left to give the photo a strong black point that adds some boldness. The setting will vary from one photo to the next, but often somewhere between -15 to -50.
10. Boost Colors with HSL
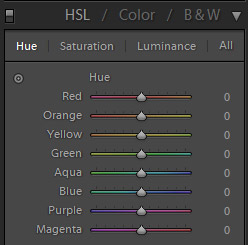
The HSL sliders are extremely powerful for allowing you to have fine control over the colors in a photo. HSL stands for Hue, Saturation, and Luminance, and you’ll have a slider for each color. You can impact just one color without impacting all of the other colors as well.
There are countless ways that you can use HSL, but let’s take a look at one example (you can see a more in depth look at Intro to HSL in Lightroom).
Here is the sample photo before any changes to HSL:
To enhance the blue sky I will increase the blue saturation and decrease the blue luminance, which will make it a little darker. I’ll use +40 for the blue saturation and -50 for the blue luminance. Here is the result.
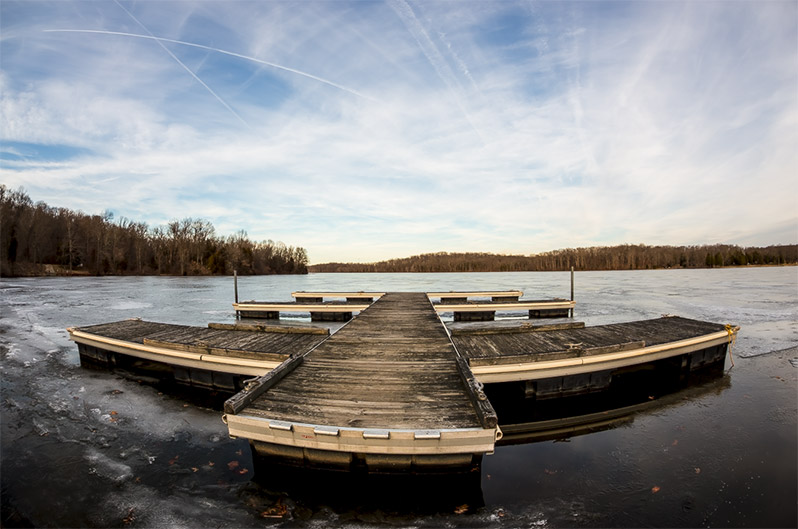
11. Split Tones
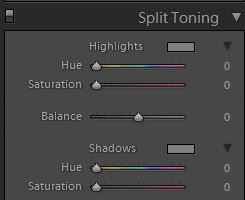
Split toning will apply color tones to the highlights and/or shadows. There are a lot of possibilities once you get familiar with the split tones sliders and how they work. There are 5 different sliders for split tones. There is a hue and saturation slider for both the highlights and the shadows, and then there is a balance slider that will determine how much it is weighted towards the highlights or shadows.
Let’s work with this sample photo to demonstrate:
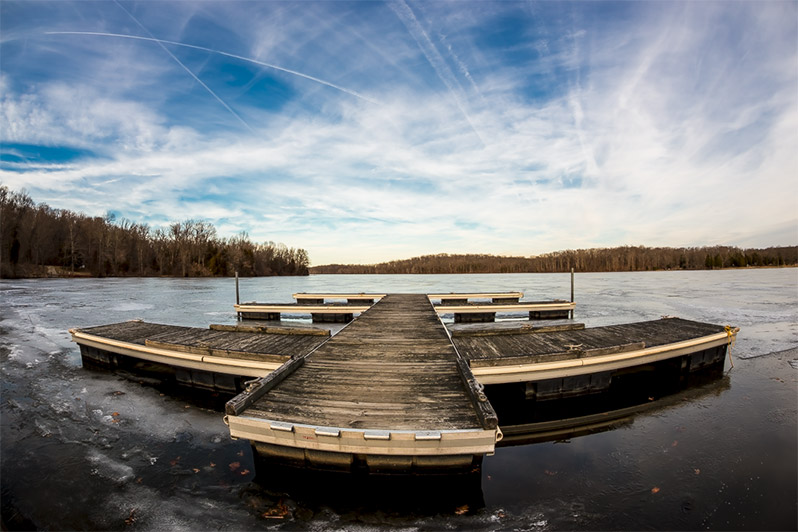
I’ll add some warmth to the highlights by setting a hue of 45 and saturation of 25 and a violet tone to the shadows by setting a hue of 280 and saturation of 25. Now the photo looks like this:
You can move the balance slider to the left or ride to get more of that shadow tone (left) or highlight tone (right).
Split toning can also be useful for giving a slight tint after converting a photo to black & white.
12. Sharpen
Most digital photos, especially if you are shooting in RAW format, will benefit from a little bit of sharpening. Lightroom has four different sliders for sharpening. The “amount” slider determines the strength of the sharpening that is added. Move the slider to the right to add more sharpness. The amount is set at 25 by default. In some cases you may want to increase this number, but be careful not to got too far. The “radius” setting determines the size of the area around the edges that are sharpened. The “detail” slider controls how much detail is brought back into the photo. And the “masking” slider determines which areas of the photo is sharpened.
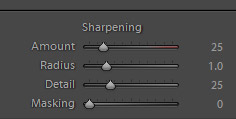
To apply sharpening you will want to view the focal point of the photo at 100% and start with the amount slider. Move it until it looks best, the move on to the other sliders. For a more detailed look at sharpening in Lightroom please see this article.
Boosting the clarity slider, found in the Basic section, will also give the appearance of sharpness by increasing midtone contrast.
13. Reduce Noise
Just below the sharpening settings you will find the noise reduction settings. Not all photos will need noise reduction, but some will. Photos that are shot in low light at high ISOs are especially susceptible to noise. There are several sliders for noise reduction, starting with luminance, detail, and contrast.
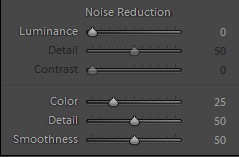
When you are applying noise reduction, start with the luminance slider and move it to the right until it looks best. Too much noise reduction will make the photo look softened. The detail slider can help to bring back some of the detail that may be lost as a result of the luminace slider. The contrast slider will do just that, add contrast. But in many cases it isn’t needed.
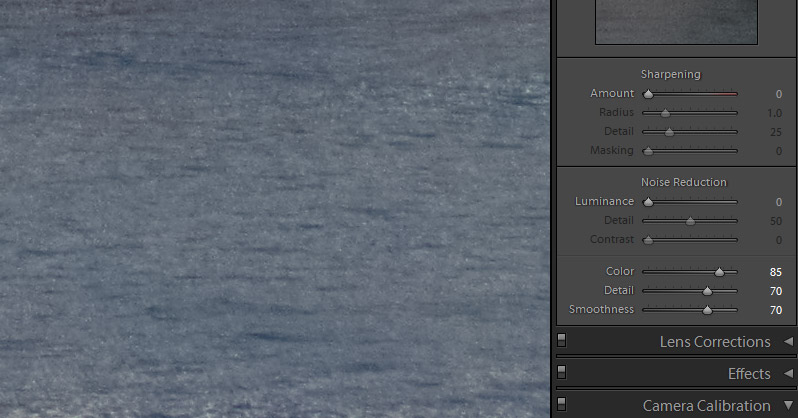
The next three sliders (color, detail, and smoothness) will be useful when the photo has colored noise, like the one shown below.

By adjusting these settings you can reduce the colored noise.
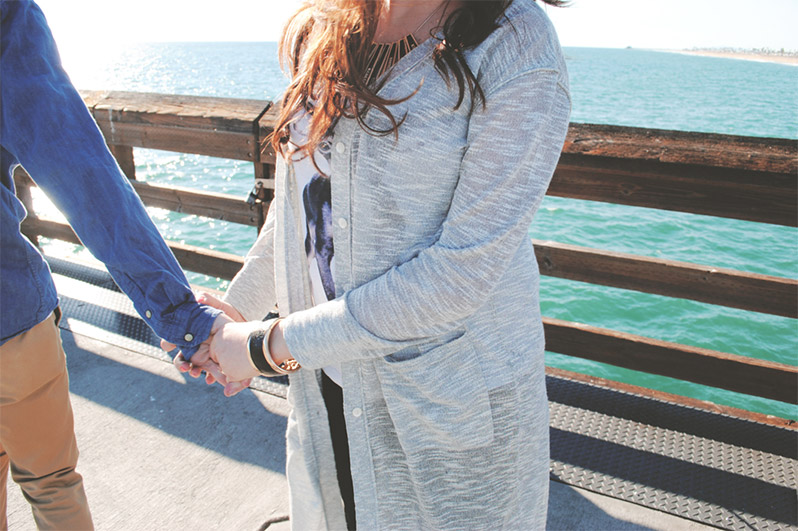
14. Remove Skin Blemishes
Photoshop is the typical software of choice for re-touching photos, but Lightroom also has some really helpful tools for removing blemishes and smoothing skin. If you’re already doing the majority of your photo editing in Lightroom it only makes sense to do as much as you can there, without taking the time to bounce back and forth between Lightroom and Photoshop.
Lightroom’s spot removal tool is easy to use and effective for removing/fixing blemishes. To access the spot removal tool use the keyboard shortcut “Q” or click on the icon shown below.
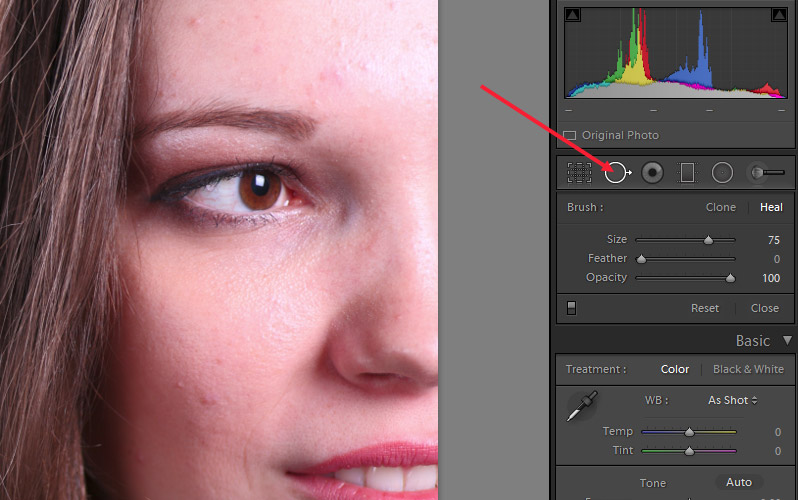
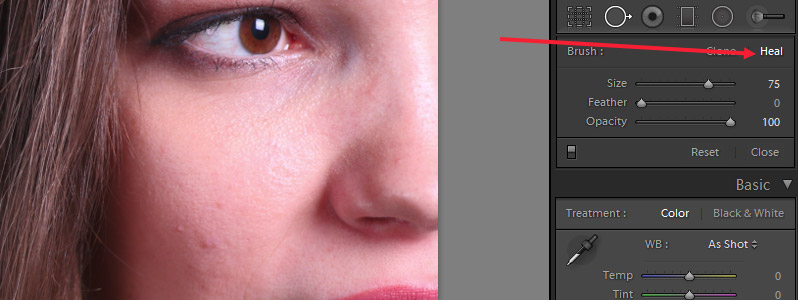
Be sure that “heal” is selected.
Adjust the size of the brush as needed, move the circle over the blemish that you want to fix and click the mouse. Then select a good area of skin and click the mouse again.
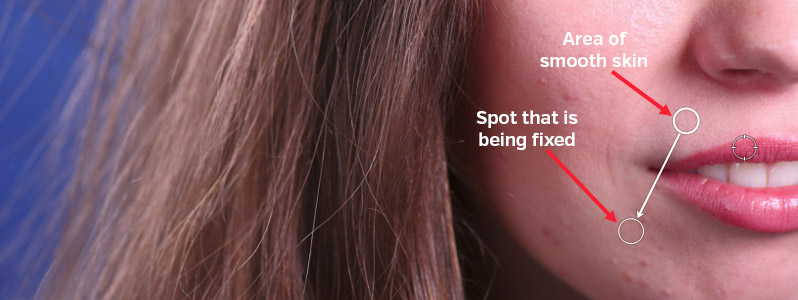
This can be a fast an effective way to improve portraits.

For a more detailed look at the subject please see How to Use the Spot Removal Tool in Lightroom.
15. Draw Focus with the Radial Filter
Lightroom 5 introduced the radial filter tool. You can use radial filters for a variety of different purposes like creating custom vignettes and drawing the viewer’s focus to a particular element in the photo.
To access the radial filter tool click on the icon shown below, or use the keyboard shortcut Shift+M.
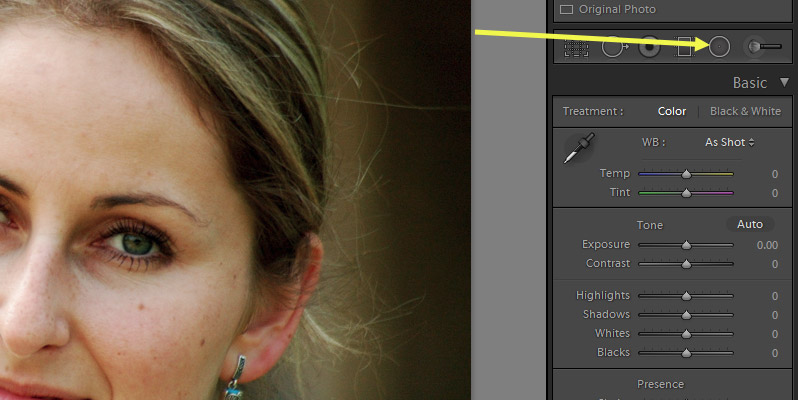
Once the tool is active, click and drag to place the radial on your image.
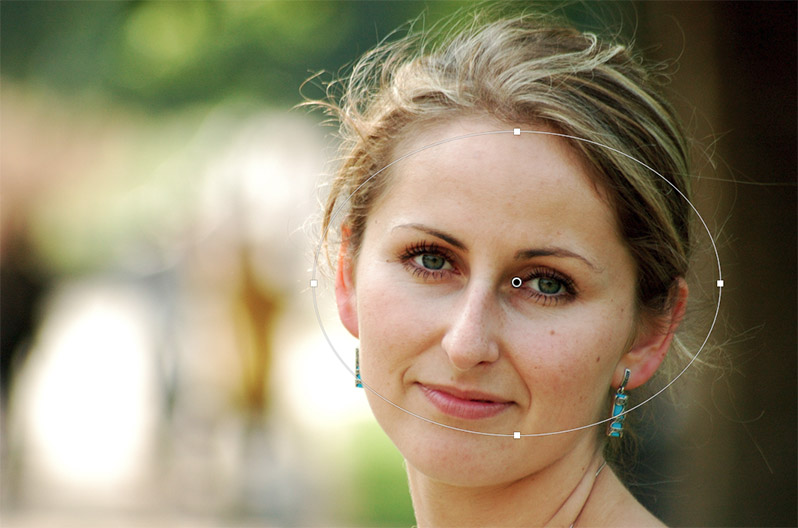
Then to move the radial click and drag the center pin (shown below with yellow arrow). To adjust the size or shape, click and pull any of the outer boxes (shown below with red arrow).

I’ve moved and adjust the radial to surround the subject’s face, and I’ve reduced the exposure to -1.00, which will darken the area outside of the circle, adding a custom vignette.
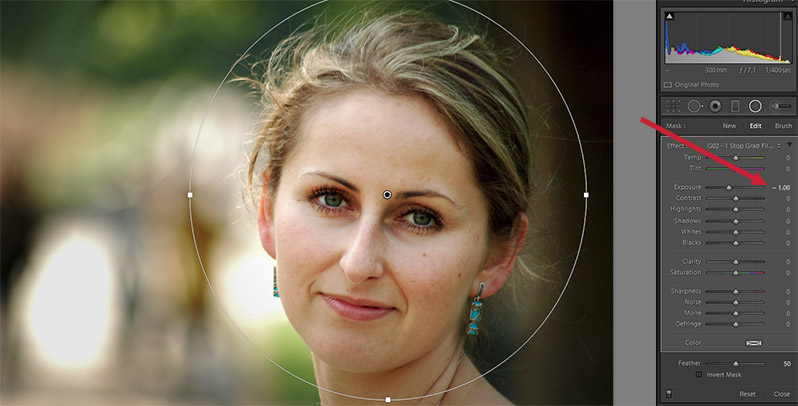
Lightroom has vignette sliders, but when your subject is not in the center of the photo you will need to use the radial filter to get an off-centered vignette.
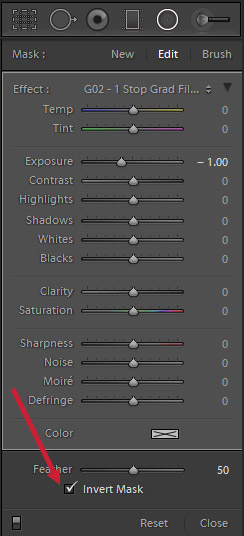
You can check the box for “invert mask” to reverse the effect so that your changes are applied inside the radial and everything outside is unchanged.
For a more detailed look at the radial filter please see How to Use Lightroom’s Radial Filter to Enhance Your Photos.
16. Add Film Grain
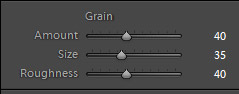
Film-inspired effects are very popular right now, and one characteristic of film photography is grain. In Lightroom you can add grain to your photos if you’d like, and you have control of the amount, size, and roughness of that grain. The grain settings can be found under Effects, along with the vignette settings and the dehaze slider (if you are using Lightroom CC).
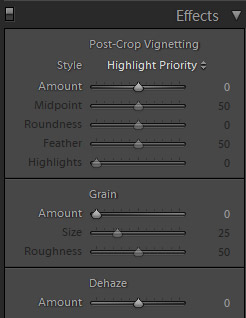
By default the grain amount is set to 0. If you do change that to any amount of grain, the default setting for size is 25 and the default setting for roughness is 50. The amount of grain you’ll want to add will vary from one photo to the next, as some already have more grain than others. A lot of times when using grain I will slightly increase the size and decrease the roughness.
17. Awesome Black & White Conversions
Converting color images to black & whites is very easy in Lightroom. All you need to do is click on “black & white” for treatment.
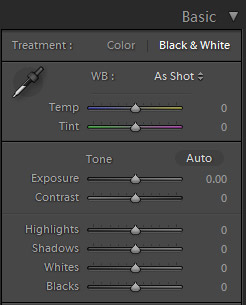
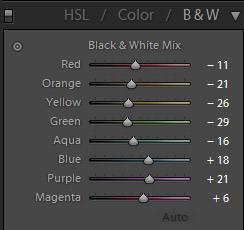
But don’t stop there! In addition to making changes to settings like exposure, contrast, and clarity, Lightroom also includes sliders for “Black & White Mix” that give you awesome control over your black & white images. The black & white mix settings are in the same section as HSL.
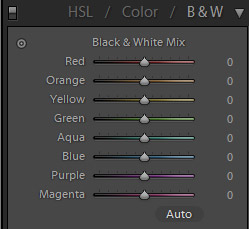
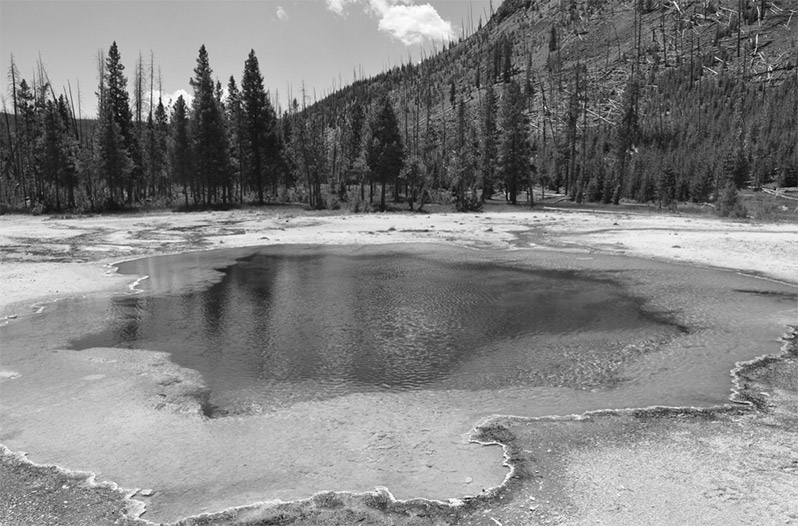
The black and white mix sliders allow you to control how light and dark individual colors are. Here is a look at a simple black & white conversion with all of the b&w mix sliders set to 0.
If you click on the “auto” button below the b&w mix sliders Lightroom will make it’s best guess at adjust the sliders for the best result. Here is the sample photo after applying the auto settings:
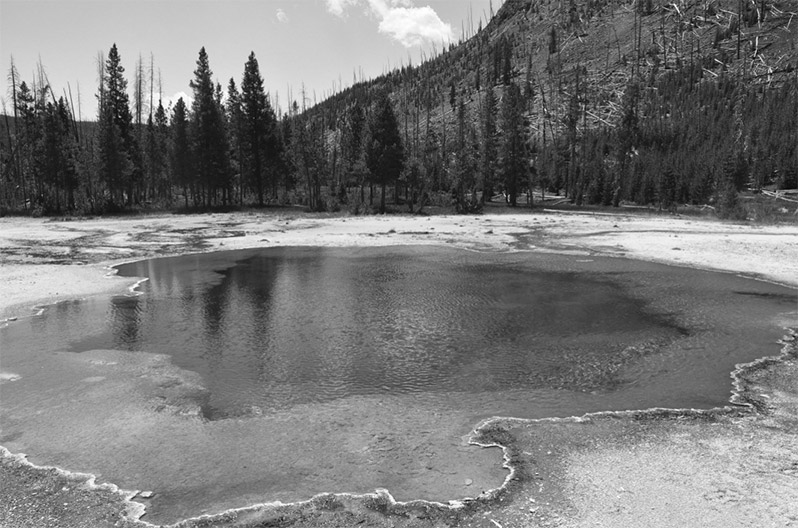
You can see the Lightroom darkened most of the colors, but lightened blue, purple, and magenta.
The auto settings are a nice option to have, especially as a starting point, but most likely you will want to take control. The necessary changes will depend on your specific photo, but you can experiment with the sliders to see what works best.

