Free Photography Bundle ($180 value): PS actions, LR presets, photo overlays, & print templates!
Get it here.
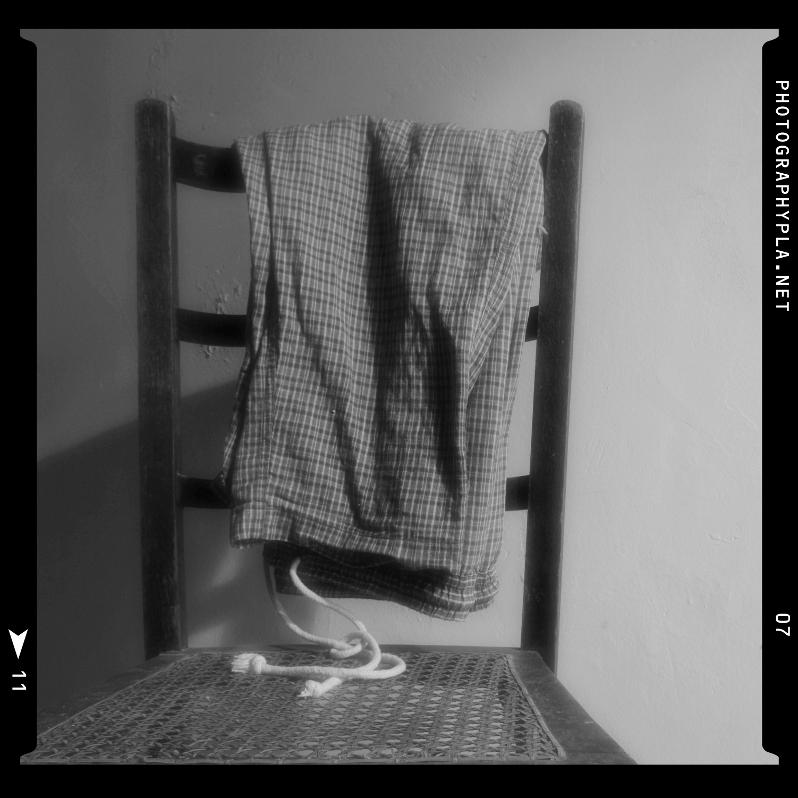
In this tutorial I’ll walk you through the process of framing a photo with a fake film rebate in Photoshop. It’s perhaps a little ironic that with the rise of digital photography, many users are keen to fake old analog effects, but if you’re looking for an interesting way to present your photos, you might be interested in this technique.
Over the following few steps, I’ll show you how to use Photoshop to produce this fake film photo image effect. If you’re lucky enough to have a scanner and some old processed film, you could produce your own film rebate template, but otherwise, feel free to download our free template.
Open Your Photo
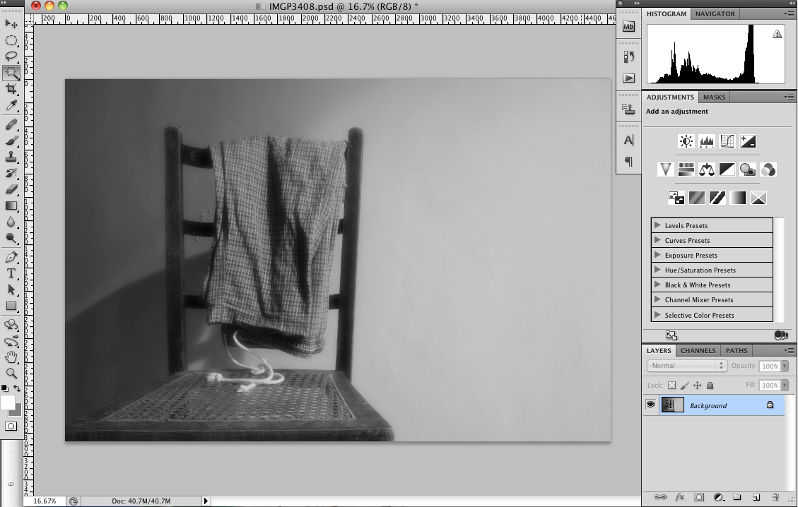
Your first task is to select the photo that you want to work with. Bear in mind that if you’re using our free film rebate template, you’ll need a photo with a subject that will fit in a square format. To open the photo, go to File > Open and navigate to the file and click Open.
I selected a black and white photo because it allows me to show one extra step, but you may choose to use a color image if you prefer.
Place Your Film Rebate Template
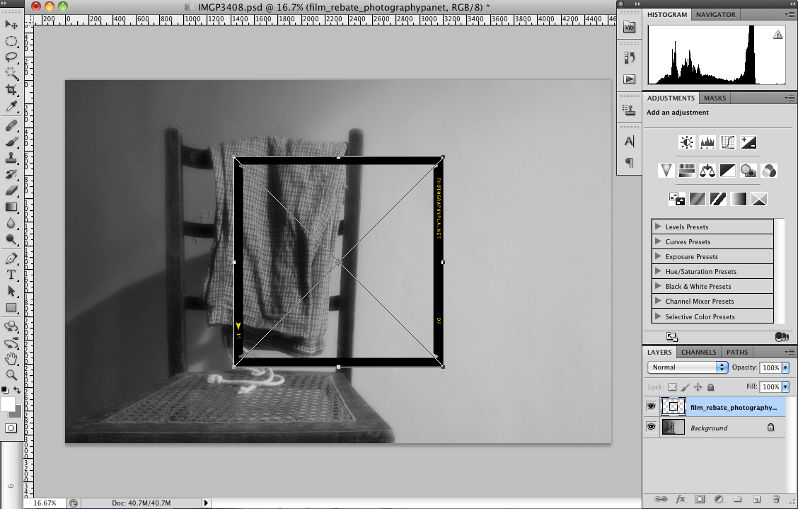
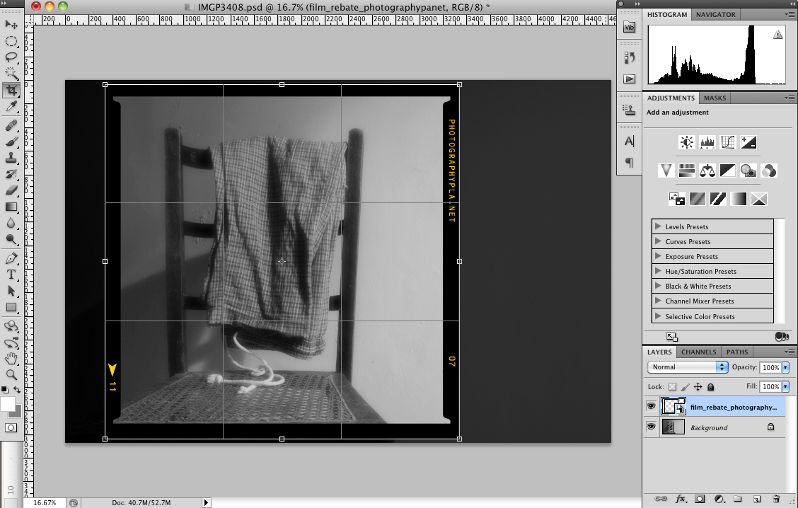
Now you can add your film rebate to the image. Go to File > Place and then navigate to the template file and click the Place button.
Re-size the Film Rebate as Necessary
You should see that the film rebate template has grab handles at each corner and, if necessary, you can click and drag on these to re-size the template layer. Make sure that you hold down the Shift key on your keyboard while you click and drag a corner handle to ensure that the film rebate maintains its proportions as you re-size it. When you are happy with the size, press the Return key to commit your re-sizing operation.
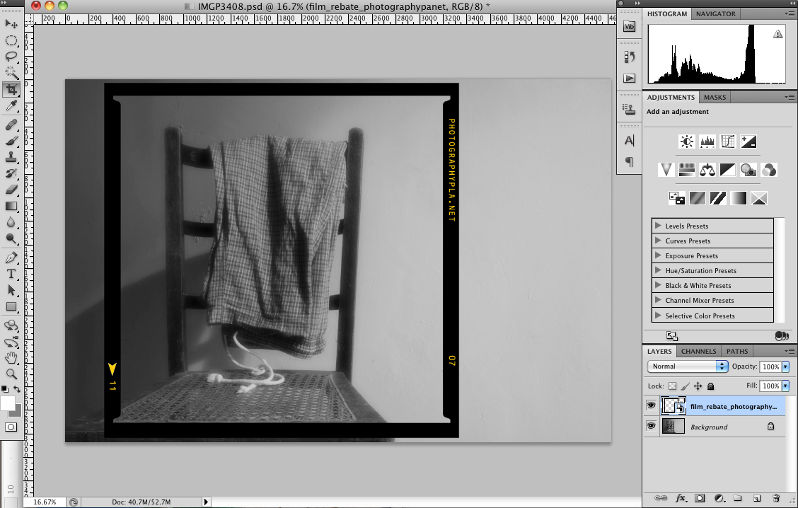
If you haven’t positioned the template, select the Move Tool from the top of the Tools palette and drag it to the correct position. You can also use the arrow keys on your keyboard to nudge the rebate into position.
Note that you should take care not to increase the size of the film rebate beyond its original physical size as this may lead to degradation of the image quality of the film rebate.
Crop Your Image to Match the Rebate
Thanks to the inbuilt behavior of the Crop tool in Photoshop, which is designed to automatically snap to the exterior edges of layers when the cursor is positioned close to them, cropping your image to match the rebate is very easy.
Just select the Crop Tool from the Tools palette and then place the cross-hair cursor near the top left corner of the rebate and click and drag down to a point close to the bottom right hand corner of the rebate and release the mouse button. You’ll see that the crop box snaps to the outer edge of the rebate in the process and you can hit the Return key to complete the cropping of your image.
Convert the Film Rebate to Black and White

This final step is only necessary if, like me, you have chosen to work on a black and white photo rather than color. In this case we need to convert the yellow text of the film rebate to black and white to match the theme.
Go to Layer > New Adjustment Layer > Black and White and click OK on the New Layer dialog that opens. You’ll see that the text has now changed to a gray shade. To finish the effect, in the Adjustments palette, move the Yellows slider all of the way to the right and you’ll see that the text changes to pure white.
Conclusion
This is a nice and easy way to add a frame to your photos. If you’re interested in more frames for your photos, why not check out our selection of frame packs here on PhotographyPla.net?

