Free Photography Bundle ($180 value): PS actions, LR presets, photo overlays, & print templates!
Get it here.
In this step by step tutorial, I’m going to describe the basics behind creating a mask in Photoshop using channels. One of the greatest or worst things about Photoshop is the fact that there are often multiple techniques for achieving the same thing. Creating masks is one thing that can be achieved in various different ways and different techniques tend to suit different subjects.
Using channels to create a mask is useful for subjects that have a lot of fine detail at the edges, however, it isn’t perfect in every occasion. You do need an image that has at strong contrast in at least one color channel for this to be successful. As you’ll see with my example image, it’s also best for the subject to be fully opaque as any transparency will allow the original background to show through.
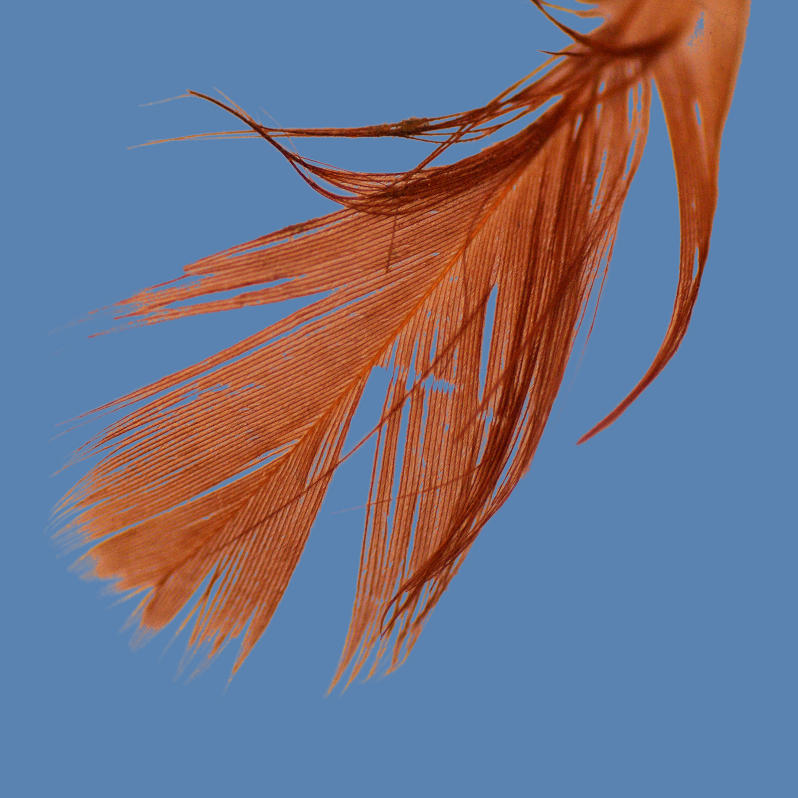
That’s slightly the case with my feather, particularly in the out of focus region, however, the fine filaments of the feather are quite a good way to demonstrate the basic concept.
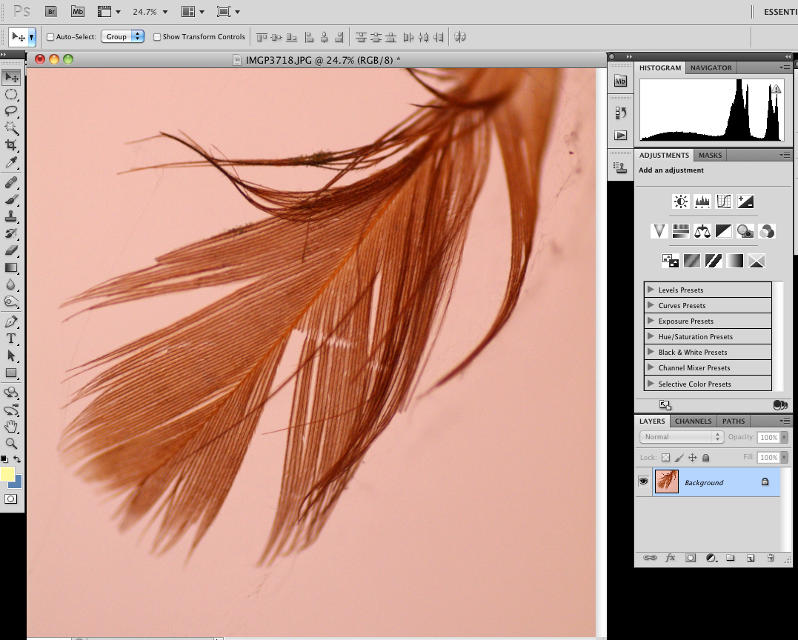
Open Your Image
As already said, some images are better than others and you may find you have to experiment to get a feel for what works best. Here you can see how the semi-opacity of the feather allows the background shade to show through, which isn’t ideal, but this technique will produce a better mask than could be achieved by most other methods.
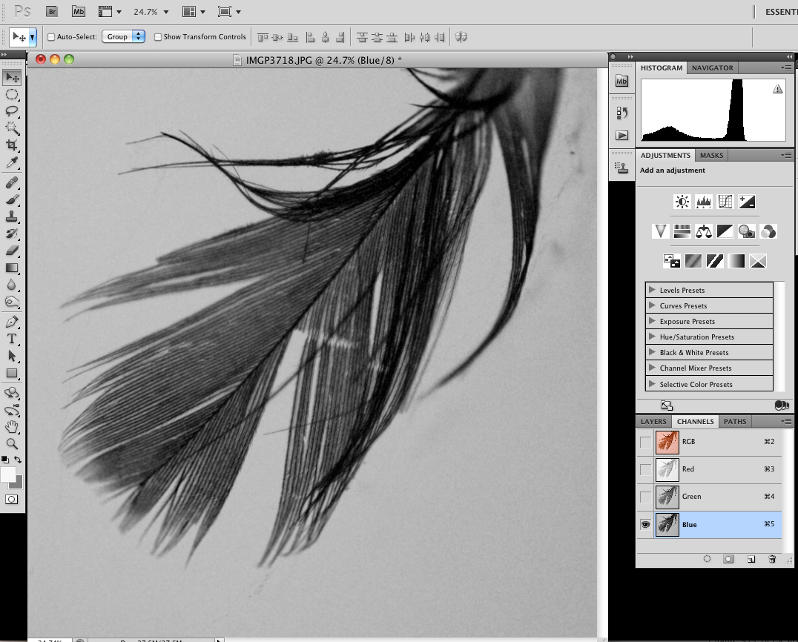
Find the Channel With Most Contrast
Now click on the Channels tab next to Layers and see which channel has the most contrast between the subject and the background. The thumbnail is a pretty good indicator, but you can click on a channel to the display your image in just that channel. In my case, the Blue channel offers most contrast.
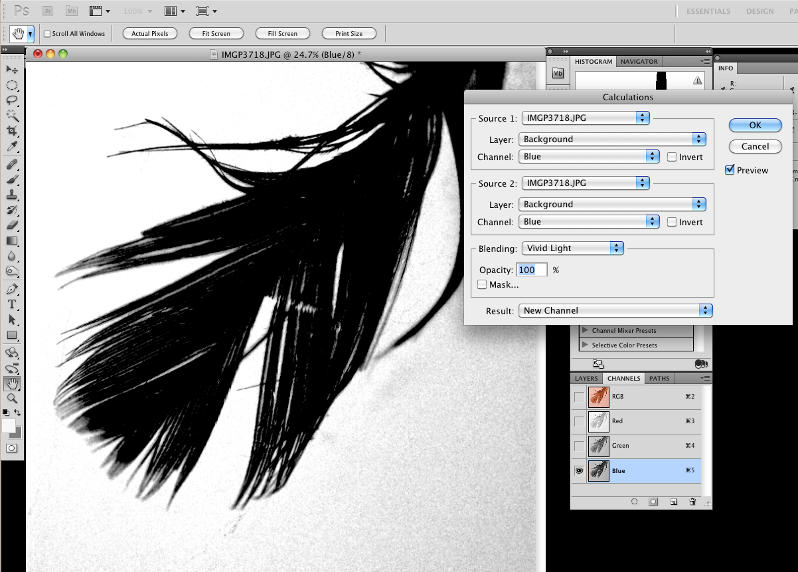
Increase the Contrast Using Calculations
Now go to Image > Calculations and change both the Source 1 and Source 2 Channel drop downs to the color that has the most contrast – in my case, Blue.
Finally you want to change the Blending mode drop down. You’ll notice that I’ve used Vivid Light, though there are several different options you could use here. If there is already strong contrast, Multiply may be a good option and this will often give a better quality edge. When you’re happy, check that Result is set to New Channel and click OK.
Increase the Contrast of the New Channel
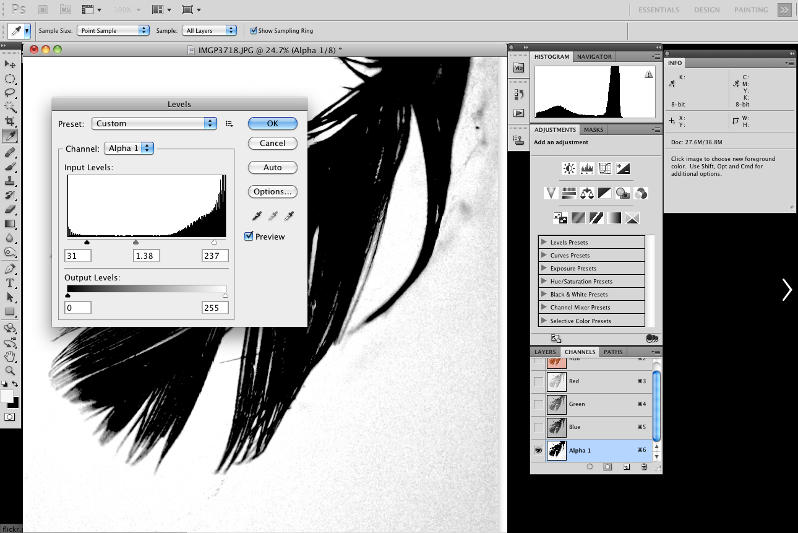
You’ll see that a new channel has now been added to the Channels palette. We want to get this channel to the point that all the pixels are either black or white, though some gray pixels at edges to facilitate fine feathering may be acceptable.
The first step that we’ll take is to go to Image > Adjustments > Levels and then we adjust the white and black points to increase the contrast further. I also tweaked the gray point position too. You’ll notice that I had the Info palette open so I could quickly see the color values at points across the image.
Refine the Channel
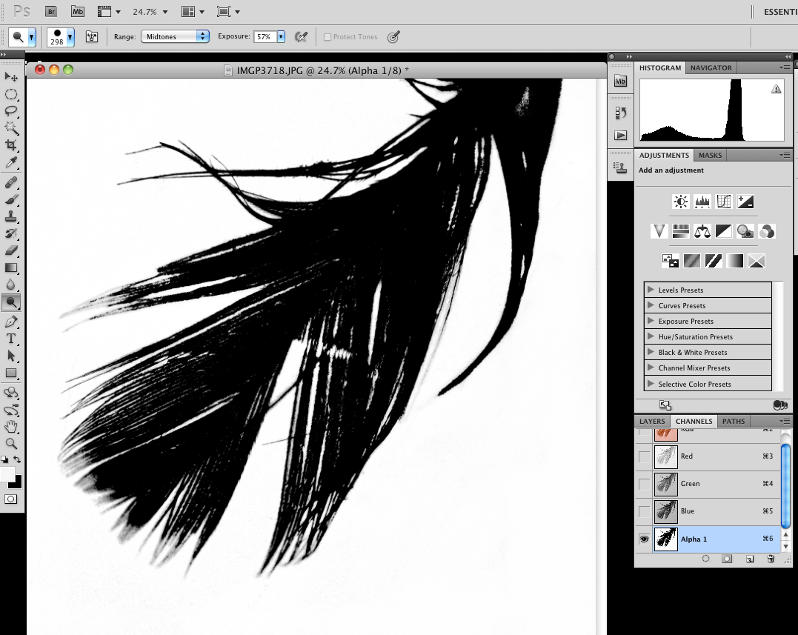
You will have seen in the previous screen shot that there is a noisy gray tone down the right hand side of the image which needs to be removed. To do this, I selected the Dodge tool, set it to a hard edged brush and the Range to Midtones. I initially had the exposure set to 100%, though that isn’t shown in the screen shot, and then I just painted over the gray area to turn it to white.
You’ll notice, if you try this, that you can paint over the black areas without having any effect, because the Range is set to Midtones. We can take advantage of this and paint over the subject to turn grays to white. You could also use the Burn tool to turn them to black, but because the grays are by the edges, I used the Dodge tool as this would prevent fringing of the background color, though at the expense of the edge quality.
If your subject is fully opaque, you could just use the brush tool with the foreground color set to black and paint over the non-black areas. As long you keep inside of the edges of the subject, you can paint very quickly and roughly.
Create Your Mask
When you’re happy that you’ve got a pretty accurate black and white channel, with the background pure white and the subject in black, you can use it to create a mask. First, click on the first little icon at the bottom of the Channels palette to load the channel as a selection. Now go to the Layers palette and double click on the background layer so that you can add a mask to it. Next, go to Select > Inverse and then click the Layer Mask icon at the bottom of the Layers palette – it’s the third from the left.
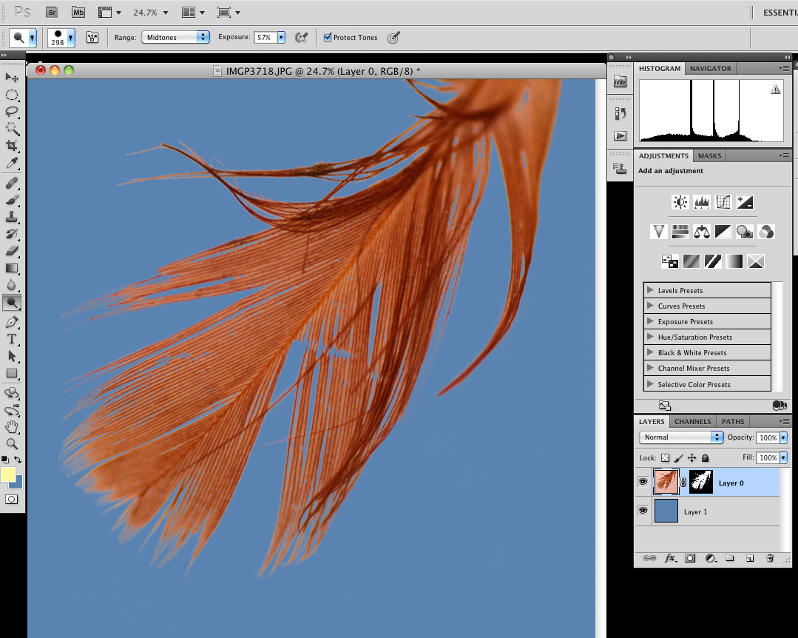
To better see your result, you can place a new layer below and fill it with a solid color. You may want to consider right-clicking on the mask and selecting the Refine Mask option to see if you can further improve your mask.
As you can see in this final screen shot and the first image on the page, the mask has matched a lot of the detail of the feather. The result here certainly isn’t perfect and I could improve some areas by painting directly on the new layer mask, but it does illustrate how you can quickly create intricate masks that would be very difficult to create using other techniques.

