Free Photography Bundle ($180 value): PS actions, LR presets, photo overlays, & print templates!
Get it here.
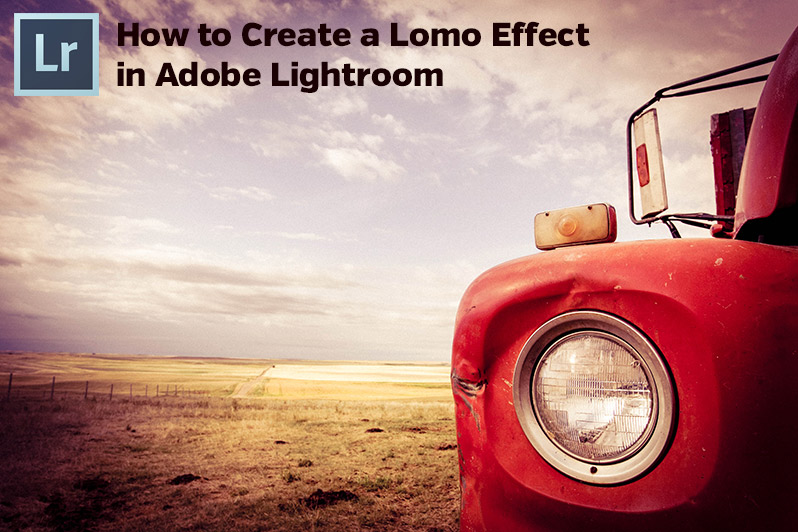
The lomography look can be replicated in Lightroom for creating fun, vintage-style effects for your photos. The colors and vignetting created by toy cameras result in a distinct look, and in this tutorial we’ll go through the process of creating a lomo-inspired effect in Lightroom. And if you want to save a little bit of time, you can also download a preset created in this tutorial and put it to use in your own work.
The effect that we’re creating in this tutorial can be applied to your photos with the Lavender Lomo preset.
If you would like to add this effect to your photos very easily you can download the Lavender Lomo Preset for Lightroom 4, 5, 6, and CC. If you are interested in more lomo effects please see our full collection of Lomo Lightroom Presets.
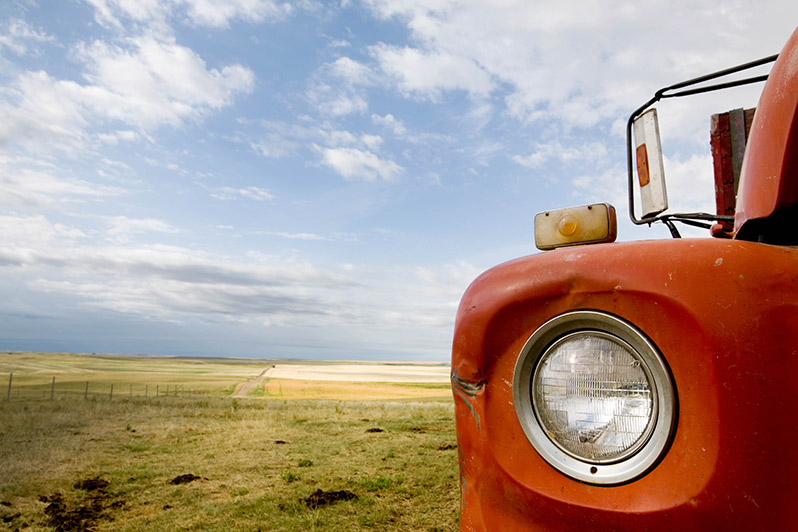
Here is a “before” look at the sample photo that I’m working with for this tutorial.
And here is a preview of the “after” image showing the lomo effect.

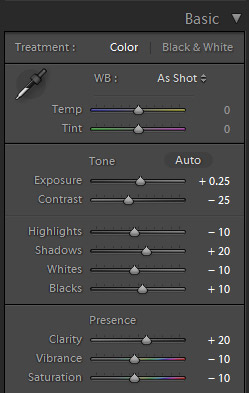
Ok, let’s get started by making some changes in the “basic” section of Lightroom’s develop module. The screenshot below shows the exact settings that I am using here. Please keep in mind that each photo will present its own unique scenario, so you may need to adjust or tweak some of these settings to get the best results with your particular photo.
I’m increasing the exposure slightly with a +0.25 boost. I’m decreasing the contrast by 25. For highlights, shadows, whites, and blacks I am using -10, +20, -10, +10. Under “presence”, I’m increasing clarity by 20 to give it a little bit of added intensity. Then I am using -10 for both the vibrance and saturation.
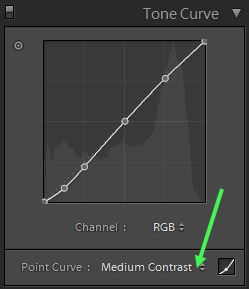
The next step is to edit the tone curve. Here, I am simply choosing the “medium contrast” option for the dropdown in Lightroom.
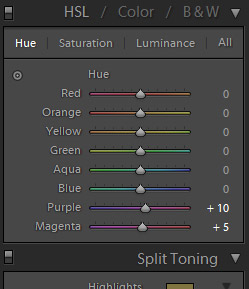
Next, we can add a slight hue. I’m using +10 for purple and +5 for magenta in the hue settings.
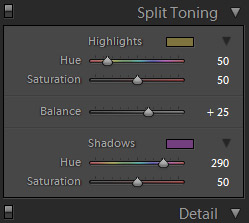
Now we’ll move on and add a split toning effect. For the highlights I am using a hue of 50 with a saturation of 50, giving a golden tone to the highlights. For the shadows I am using a hue of 290 and a saturation of 50, which helps to create the lavender lomo look. I’m also changing the balance to +25.
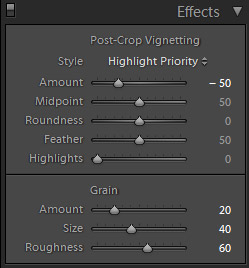
The last change that we’ll make is to add a vignette and a little bit of grain. Again, the strength of these effects will vary from one photo to the next, so you may want to adjust the settings for your photo. For the vignette I am setting the amount to -50 and leaving the other settings as is. This creates a moderately strong dark vignette. For the grain I am setting the amount to 20, size to 40, and roughness to 60. This adds some grain, but not an overwhelming amount of grain.
That’s it! And now we’re left with the end result.
If you would like to add this effect to your photos very easily you can download the Lavender Lomo Preset for Lightroom 4, 5, 6. and CC. If you are interested in more lomo effects please see our full collection of Lomo Lightroom Presets.

