Free Photography Bundle ($180 value): PS actions, LR presets, photo overlays, & print templates!
Get it here.
In this tutorial we’ll go through the steps of creating a vintage feel for a monochromatic image. We’ll first convert the photo to black & white and then use Lightroom’s sliders to get the vintage feel. The settings in this tutorial are taken from one of the presets in our set of Vintage Mono Lightroom Presets, so if you like the effect please see more about those presets (there are 20 different presets in the pack).
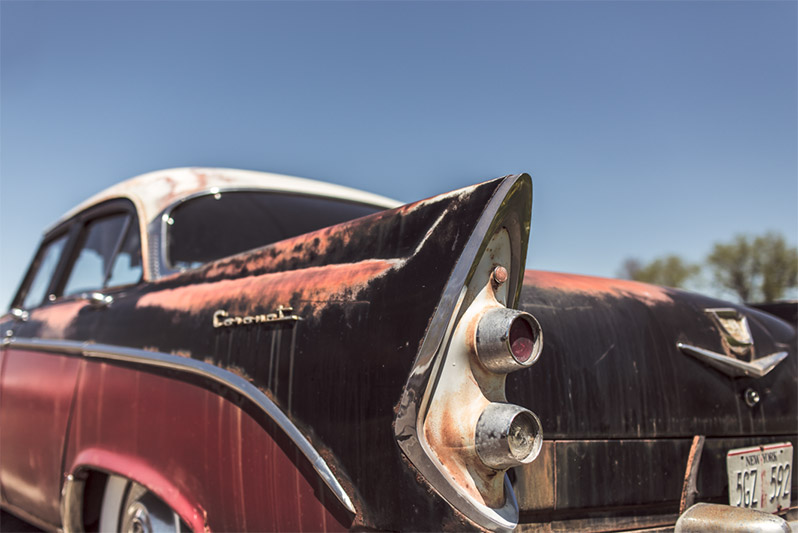
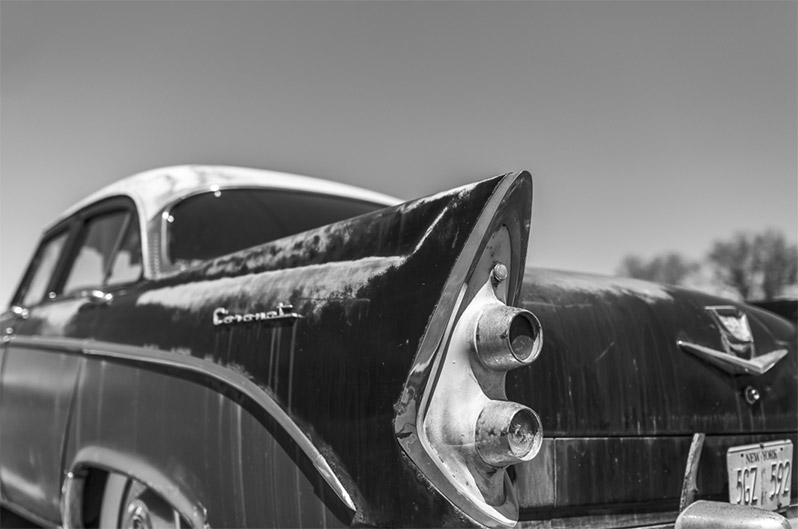
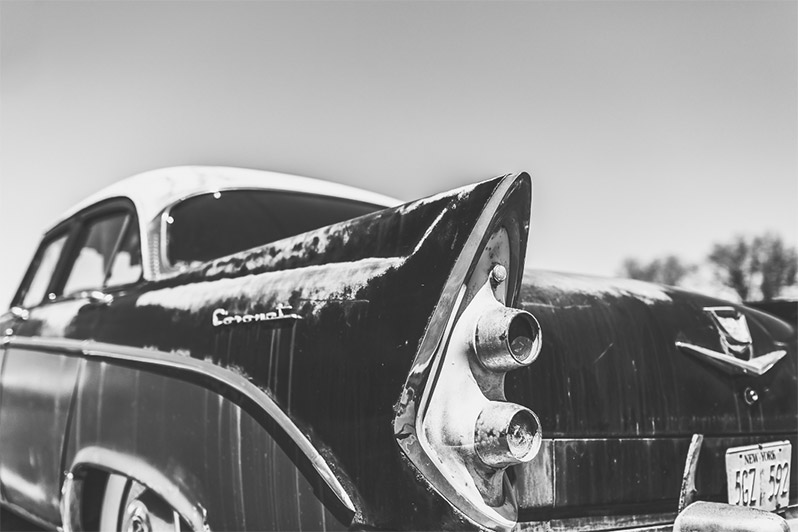
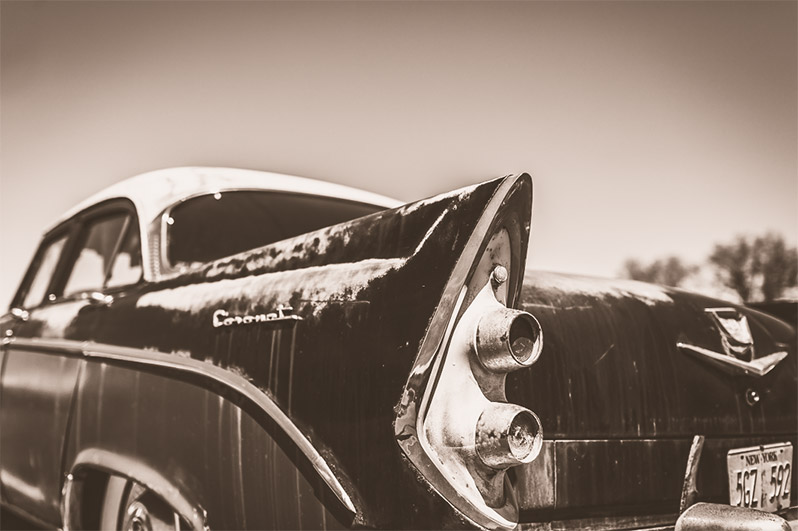
For the tutorial we’ll be working with this photo (you can download the photo for free at Gratisography if you want to follow along).
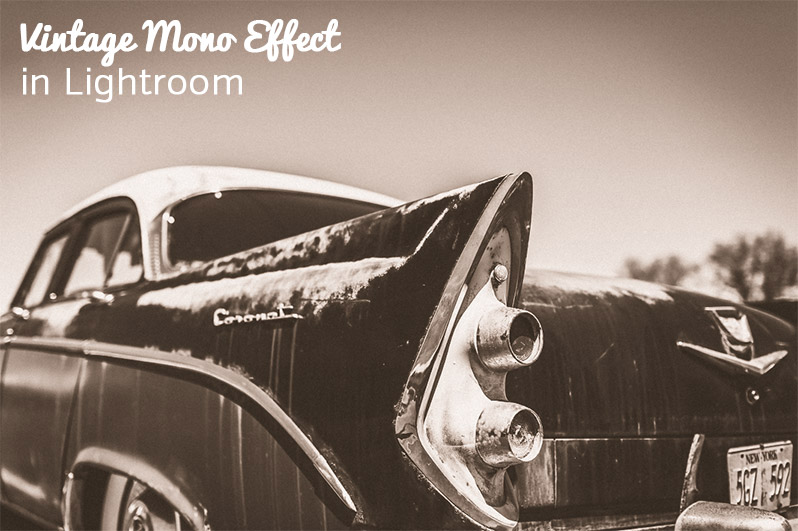
And here is a sneak preview of the effect that we will be creating.
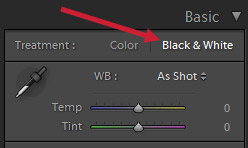
Ok, let’s get started. The first thing we’ll do is convert the color photo to black and white by clicking on “black & white” for the treatment.
After the simple black & white conversion our photo looks like this:
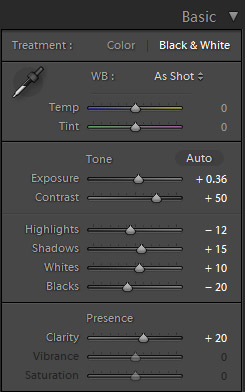
In the Basic section we’ll set the exposure to +0.36 to lighten the photo a little. Black & whites sometimes come out a little too dark, so a lot of times you may want to lighten them by increasing the exposure. We’ll also set contrast to +50 to give the photo a major contrast boost.
We’ll then set the highlights, shadows, whites, and blacks to -12, +15, +10, and -20 respectively. None of these settings are too drastic, but it will open up the shadows just a little, give the whites a boost, and set a strong black point for a bold look.
The last change we’ll make in the Basic section is to set clarity at +20, which will give the photo a bit of a sharper look.
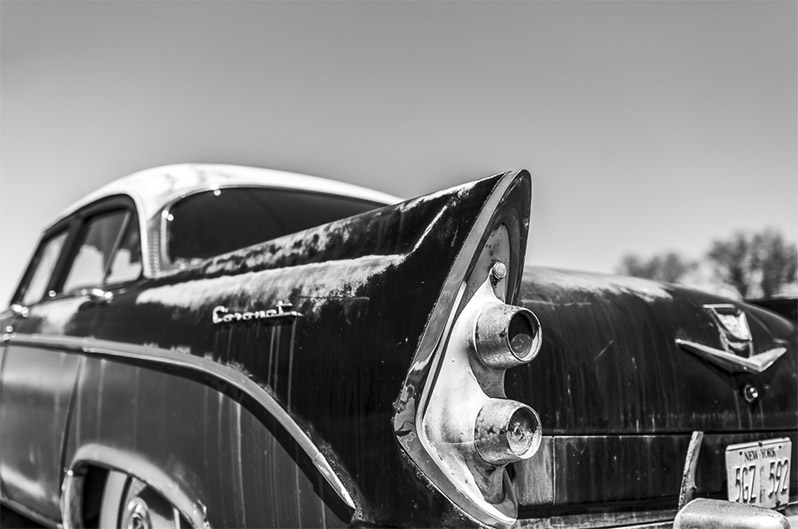
After making these changes our photo looks like this.
Next, we’ll adjust the RGB curve like the one shown below.
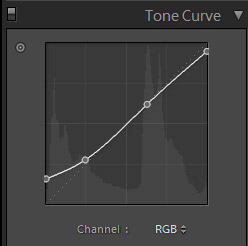
This curve will give the photo a bit of a matte film look, which helps to get the vintage feel that we are after. Now the photo looks like this.
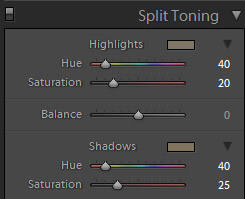
Now we’ll move on to split toning. We’ll use the split toning to get a sepia effect for our vintage look. For the highlights set hue to 40 and saturation to 20, and for the shadows set hue to 40 and saturation to 25.
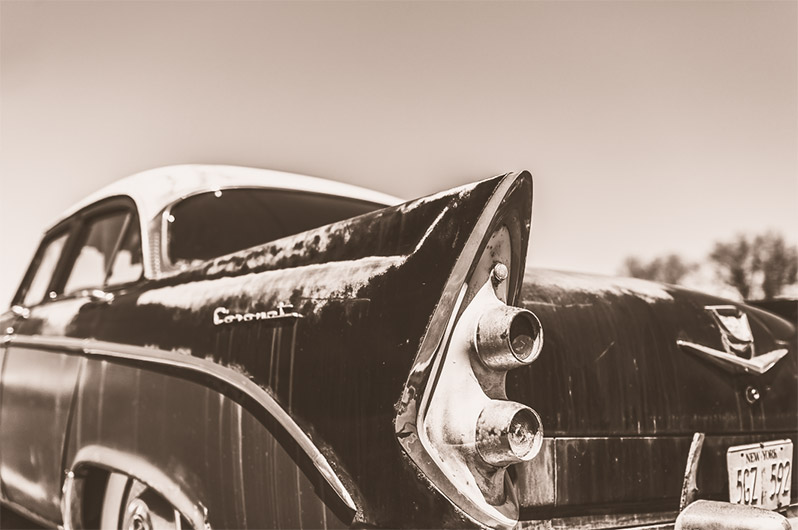
After the split toning the photo looks like this.
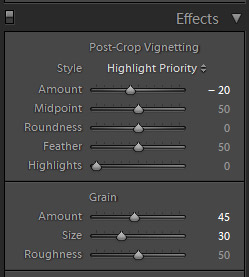
To finish our work we’ll move on to the Effects section to take care of the vignette and grain. We’ll apply a vignette by changing the amount slider to -20. For the grain we’ll change the amount to 45 and the size to 30.
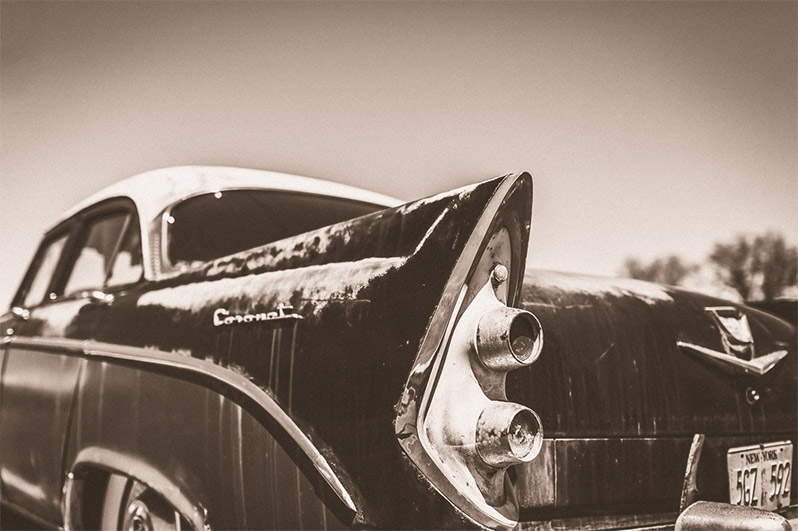
And we’re done! Here is the finished product.
If you like this look please be sure to check out our set of 20 Vintage Mono Lightroom Presets so you can get a wide variety of similar effects in just one click.

