Free Photography Bundle ($180 value): PS actions, LR presets, photo overlays, & print templates!
Get it here.
This article is a part of our series Photo Editing in Lightroom 101. Throughout the series we’ll cover the details of Lightroom’s library and develop modules and how you can use Lightroom to improve your own photos. As new articles are published they will be added to this page. If you don’t want to miss future articles in the series, please subscribe to our RSS feed or our email newsletter.
So far in this series we’ve covered Lightroom’s library module as well as the basics of editing photos in the develop module. Today we’re going to focus on develop presets and how they can be used to improve your workflow in Lightroom.
Presets apply certain settings to a photo in order to create some sort of effect or to improve it in some way. Lightroom comes with several presets already built in, you can download some presets for free, you can purchase professional presets, and you can create your own presets to re-use later. (You can see our own free Lightroom presets and premium Lightroom presets.)
As an example, the image below shows a photo straight out of the camera on the left side, and after applying a soft matte preset from our Master Workflow Lightroom Presets on the right.
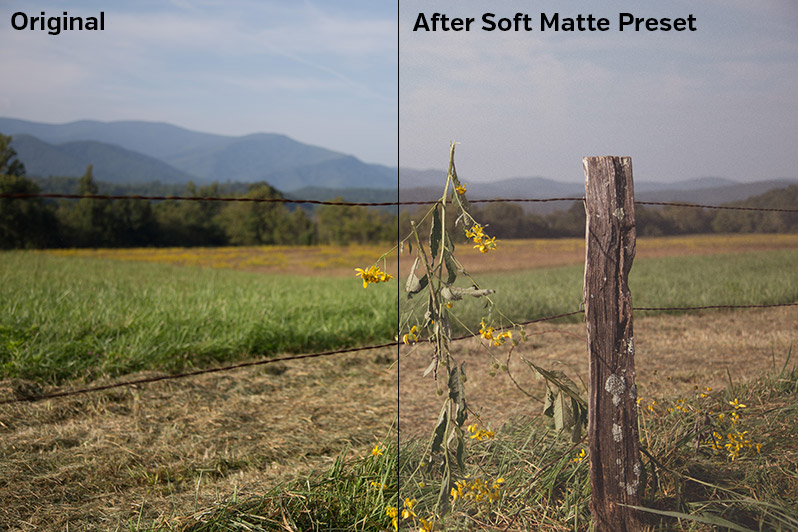
You can see this is a fairly subtle effect, but by simply applying the soft matte preset specific settings were instantly applied to the photo to get that matte look. The preset changed settings for highlights, shadows, whites, and blacks, it changed the setting for saturation, added a tone curve for the matte look, and added a small amount of grain.
There are a few things about presets that are important to point out:
1. Presets will work differently on different photos. What may look good on one photo may not look so good on another photo.
2. Presets should be seen as a starting point. Because each photo is different, you will probably need to tweak the settings a little bit after using a preset. Look at the preset as a starting point. A preset can save you some time, but it’s likely that you’ll still need to tweak a setting or two in order to get the best results.
3. There are different types of presets. Not all presets are the same. Most presets are intended to apply a specific look to a photo with just a single click, such as the soft matte example above. However, some presets are intended to be stacked together and combined with other presets. These are often referred to as workflow presets, and their purpose is to allow you greater flexibility and still allow you to get the look you want in just a few clicks. Several of our products include both one-click presets and stackable workflow presets, including Master Workflow Presets, Black & White Lightroom Presets, Wedding Lightroom Presets, and Dragan-Inspired Lightroom Presets.
How to Create Your Own Presets
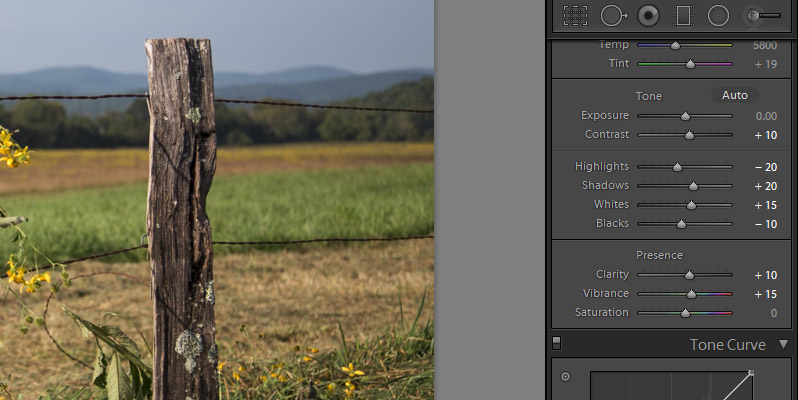
Saving your own presets to be used later is really not difficult. The first thing you want to do is adjust the settings in the develop module on a sample photo. For this example I want to create a general preset that will give a photo some basic improvements, but nothing intense. The sceenshot below shows the settings that I am changing. I’m adding a small amount of contrast, clarity, and vibrance, and I am making some adjustments to highlights, shadows, whites, and blacks.
Now, to save these settings as a preset, click on the “+” icon at the left side of the develop module next to “presets”.
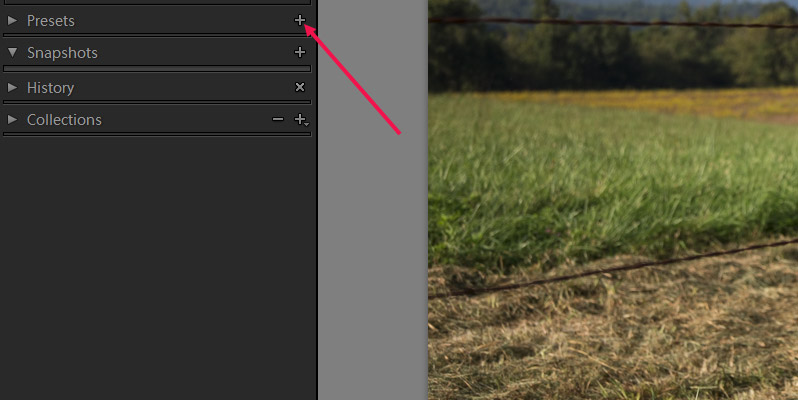
When you click the “+” icon it will open the screen with options for saving your preset. This screen is very important because it determines what the preset will impact and what it will not impact. Any box checked will be a part of the preset and any box not checked will not be part of the preset.
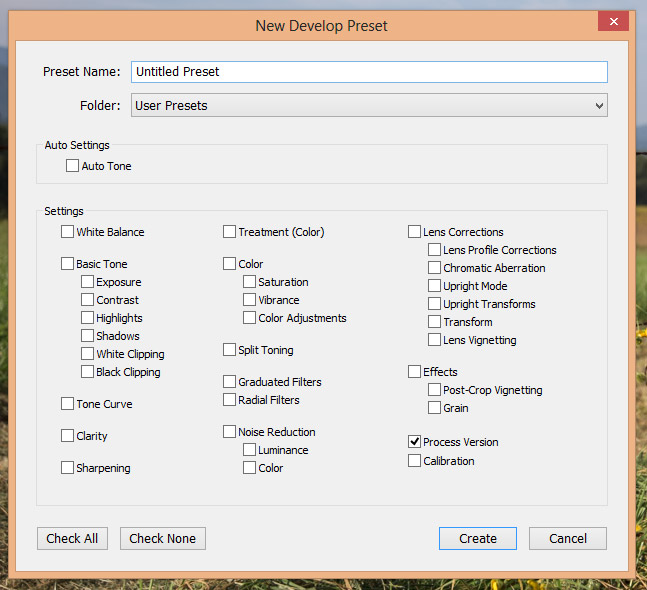
In this case I have made changes to contrast, highlights, shadows, whites, blacks, clarity, and vibrance, so those are the boxes that I will check. You also need to check the box for process version. By default if you are working in Lightroom 4 or 5 the process version will be set to 2012. You can change that to work with an older version of Lightroom, but generally you’ll want to use the most current process version, which is already selected by default.
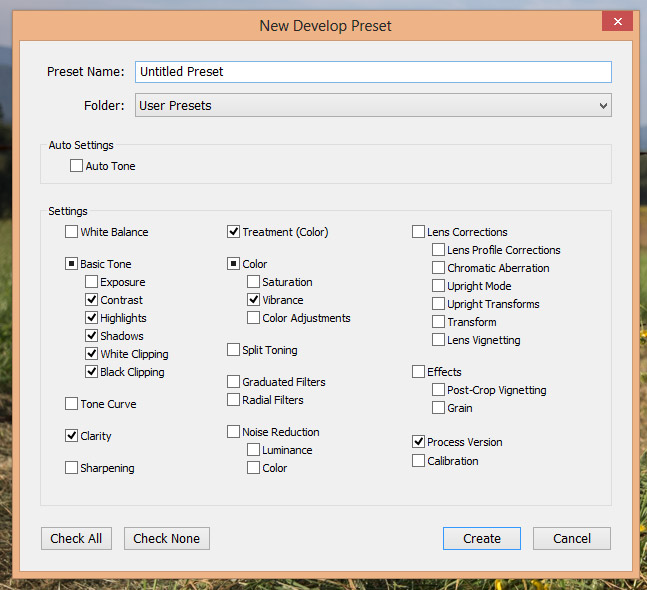
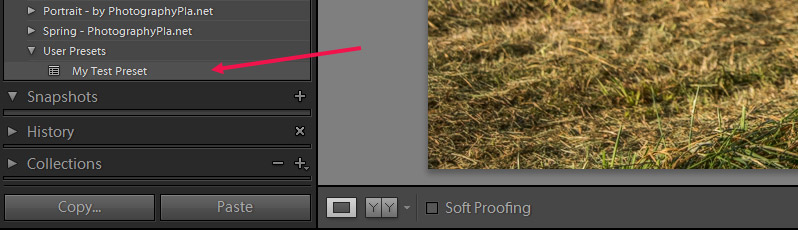
When saving it you’ll also give your preset a name and select a folder to store it in. You can select the user presets folder, or if you will be creating several similar presets you could create a folder for them. I saved this preset as “My Test Preset” in the user presets folder. Now, when I want to use it on a photo all I need to do is find the preset in at the left side of the develop module, and click on it to apply it to the photo.
Now, let’s talk about the settings that we excluded in the preset we just created. Any setting for boxes that we did not check when saving the preset will not be impacted. For example, we didn’t check the box for exposure so this preset will not impact exposure. So if I make an exposure adjustment of +1.00 on another photo and then apply My Test Preset the exposure setting will remain at +1.00. If I had checked the exposure box when saving the preset it would have saved the 0.00 exposure setting that was on the sample photo when I created the preset. If I had done that My Test Preset would set the exposure to 0.00 every time it is run. So it’s a good habit to only include the settings that you are changing in your presets to avoid making unwanted changes when applying your presets.
How to Install Lightroom Presets
Ok, so we’ve now covered how to save and use your own presets, but what about installing presets that you’ve downloaded or purchased? The process is not complicated, but it needs to be done properly if you want to be able to use the presets.
First you need to download a preset. If you need one to practice with, try any of our free presets. Unzip the file and save it somewhere on your hard drive. Next, open Lightroom and click on Edit > Preferences (on a PC) or Lightroom > Preferences (on a Mac). This will open the Preferences options that you see below.
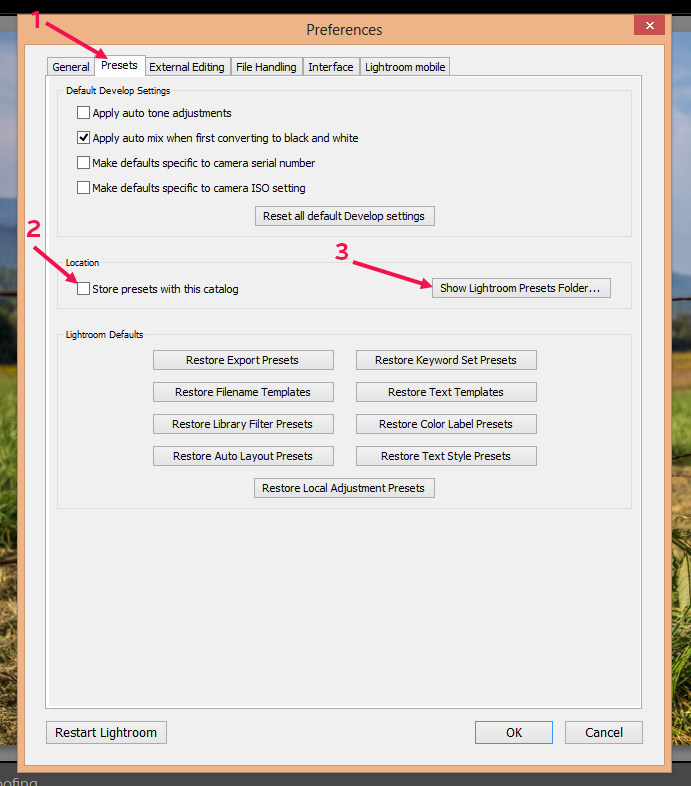
First, click on the “presets” tab, as shown by arrow #1 above. Make sure the box for “store presets with this catalog” is unchecked, as shown by arrow #2. And then click on the “shown Lightroom presets folder” button, as shown by arrow #3. When you click on that button you’ll see a screen like the one shown below.
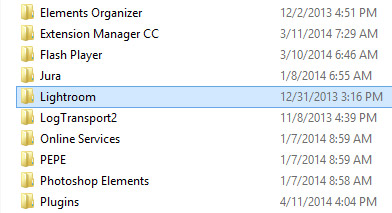
Open the “Lightroom” folder and you should see some folders like the screenshot below.
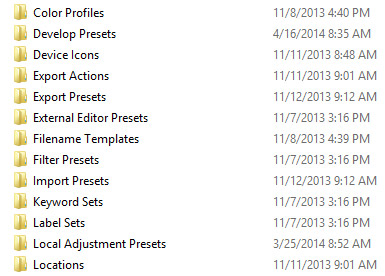
Open the “develop presets” folder. Here you’ll want to paste the folder that includes the .lrtemplate files for the presets, or you can paste the .lrtemplate directly if it is not stored in a folder.
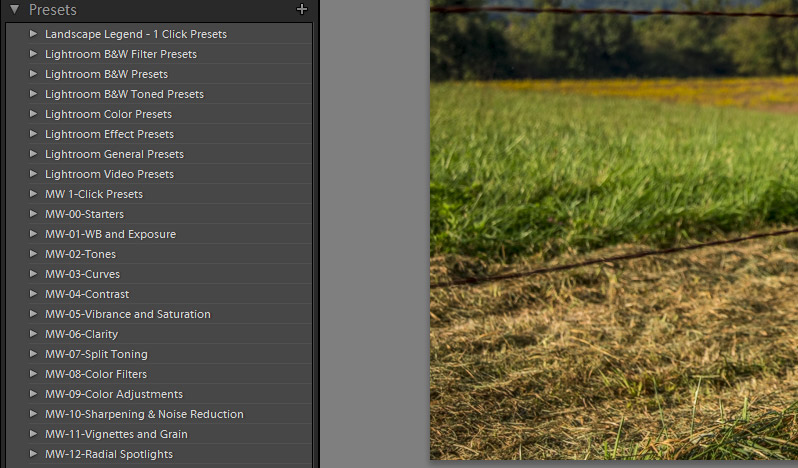
Next, you’ll need to close Lightroom and then open it again and the presets will be installed. Now if you look under “presets” at the left side of the develop module you should see the preset(s) that you just installed.
That’s all you have to do to start using Lightroom presets. In upcoming articles we’ll cover some addition tools in the develop module, like the adjustment brush, graduated filter, and others.
If you don’t want to miss the other articles in this Photo Editing in Lightroom 101 series, please subscribe to our RSS feed or our email newsletter. As new articles are published they will be added to the series page, which will serve as an index for the entire series.

