Free Photography Bundle ($180 value): PS actions, LR presets, photo overlays, & print templates!
Get it here.
This article is part of our series Photo Editing 101 by Ian Pullen. This series will cover all of the basics of using Photoshop for editing photos. If you’re just getting started with Photoshop or photo editing, or if you’re looking to improve your skills in this area, this series will provide an excellent foundation. If you want to make sure that you don’t miss future articles you can subscribe to our newsletter or follow us on Twitter, Google+, or Facebook. You can also find the articles that have already been published by visiting the Photo Editing 101 course page.
Enhancing eyes using Photoshop can be a relatively quick and easy way to improve the appearance of your portrait photos.
There are several ways that you can approach this and I’m going to describe some fairly easy techniques, though it’s possible that you already have a different way to do this.
Select a Photo
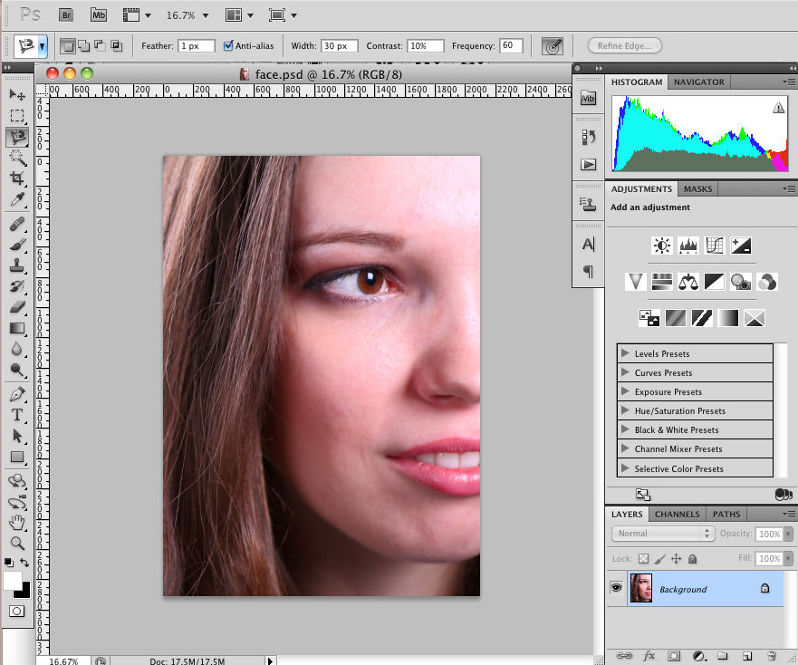
This technique is best suited to photos that already have a bit of detail in the eyes. If the shot is not too close in on the face, it may be difficult to make changes because the eyes are too small.
This stock photo that I’m using is closely cropped on the face and a good candidate for this technique.
Make a Selection Around the Eye
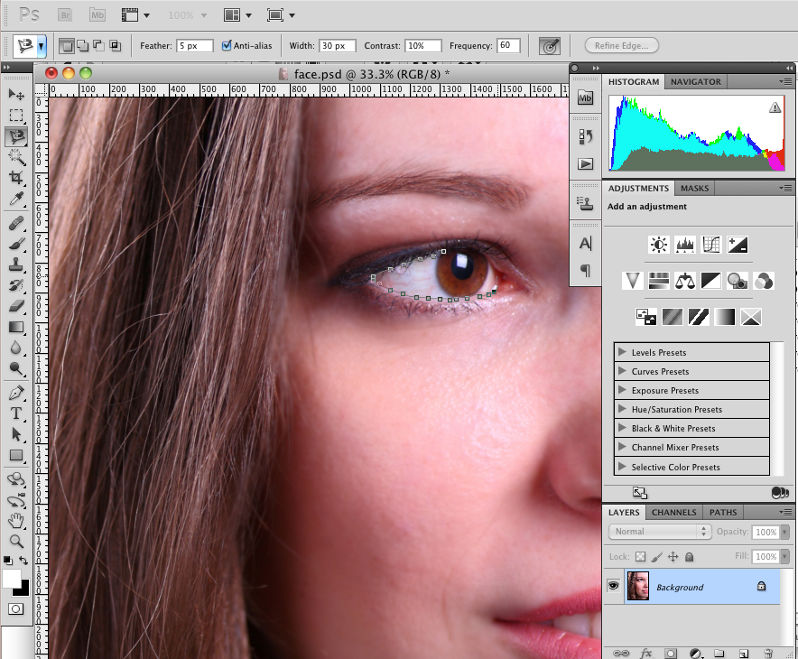
You could make a reasonable job of brightening the whites of the eyes with the Dodge tool, but I prefer the greater control that you can get from making a selection of the eyes first. There are several selection tools that you can choose from, but perhaps the easiest to use in this situation is the Magnetic Lasso tool. Our introduction to the Lasso Selection tools offers more information on how to use the Magnetic Lasso if you’re not familiar with it.
The first job with this tool is to make a selection right around the eye, within the lids, but before starting I set the Feather field in the tool options bar to 5px.
Add a Hue/Saturation Adjustment Layer
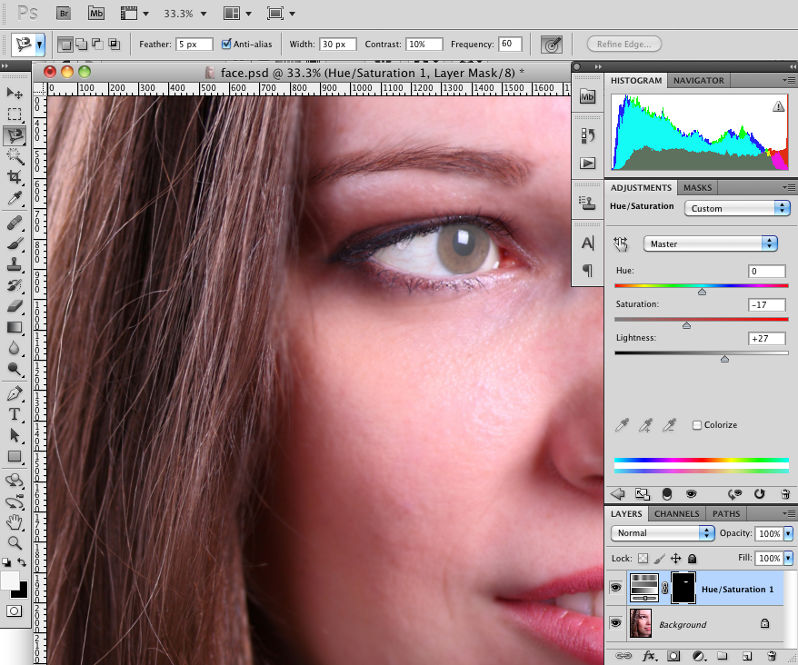
Go to Layer > New Adjustment Layer > Hue/Saturation or just click on the icon in the Adjustments palette to add a Hue/Saturation layer to the image. The selection will now disappear as it has been applied to the mask of this new layer. This means that any adjustments will only affect the area that was within the selection.
I first made some adjustments with the drop down set to Master, to lighten and reduce the saturation of the eye, before making some further adjustments to the Reds and Yellows to reduce the strength of these colors. Our introduction to Hue/Saturation adjustment layers will offer you more information on how to use this tool.
Make a Selection Around the Iris
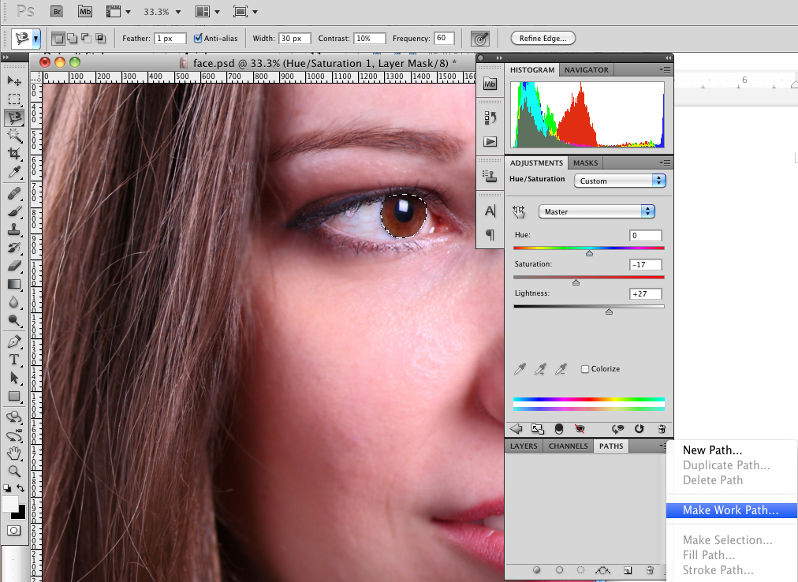
Obviously, we don’t want to affect the iris and pupil in the same way as the white of the eye, so now we need to make a selection around the iris. I again used the Magnetic Lasso tool for this purpose – you may see in the screen shot that I hid the Hue/Saturation layer to make it easier to see the eye. Because I need to use this selection twice, I saved it as a Work Path, so that I could make a selection from it when needed.
To do this, click on the Paths tab at the top of the Layers palette and then click on the small icon at the top right of the Paths palette and select Make Work Path from the fly out menu.
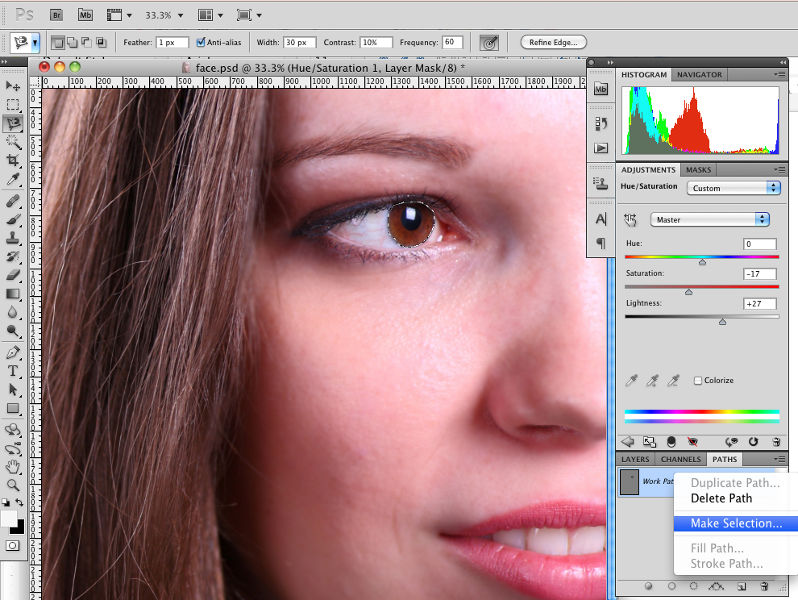
This will add a new path to the palette. If you now right click on that path and select Make Selection, another dialog will open and in that you can set the Feather value to 1px before clicking OK.
Edit the Hue/Saturation Layer Mask
If you hid the Hue/Saturation layer earlier, make it visible again now and then click on the layer mask icon – the almost completely black rectangle in the Layers palette. Go to Edit > Fill and in the dialog that opens, change the Use drop down menu to Black and click OK. You should now see that the iris is more brightly colored again, because the Hue/Saturation layer is no longer affecting it.
Sharpen the Iris
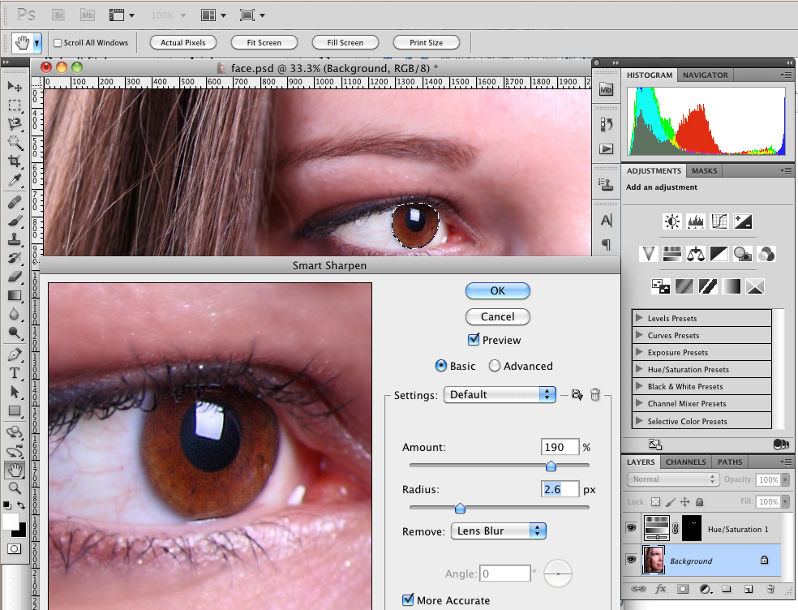
Go back to the Paths palette and make a selection from the work path again. This time we’re going to sharpen the iris and pupil area using Smart Sharpen, which you can open by going to Filters > Sharpen > Smart Sharpen. You can afford to be quite aggressive with your settings here as you’re affecting just a small area. You can see in the screen shot that I’ve been fairly heavy handed with both the Amount and Radius sliders. You might also want to apply a little noise reduction after this step, though I’ve not bothered as it’s quite a small area.
Add a Brightness/Contrast Adjustment Layer
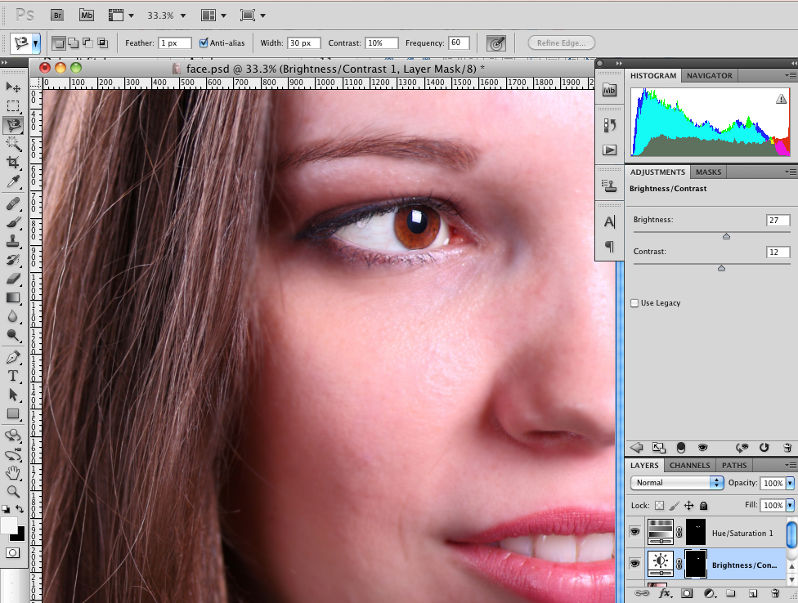
The final step is to increase the brightness and contrast of the iris and pupil. Go to Layer > New Adjustment Layer > Brightness/Contrast and slide both of the sliders to the right. The amount will vary depending on your photo, but do take care not to overdo this. As with all of the adjustments, you want to try and enhance the appearance of the eyes without making the results look unnatural.
Conclusion
As you can see, these techniques are quite easy to pick up, but used with care, they can help to lift your portrait shots and help to bring out the natural beauty of your subjects.
See more articles in the Photo Editing 101 series.

