Free Photography Bundle ($180 value): PS actions, LR presets, photo overlays, & print templates!
Get it here.
This article is a part of our series Photo Editing in Lightroom 101. Throughout the series we’ll cover the details of Lightroom’s library and develop modules and how you can use Lightroom to improve your own photos. As new articles are published they will be added to this page. If you don’t want to miss future articles in the series, please subscribe to our RSS feed or our email newsletter.
Lightroom’s graduated filter can be an extremely useful tool in the right situation. It allows you to impact one area of the photo without impacting others, and it applies the effect gradually like a gradient. In this article we’ll take a look at how the tool works, and we’ll also use it to make some improvements to a sample photo. In this sample we’ll use the graduated filter tool to lighten the lower portion of a photo, and we’ll also use it to enhance the sky.
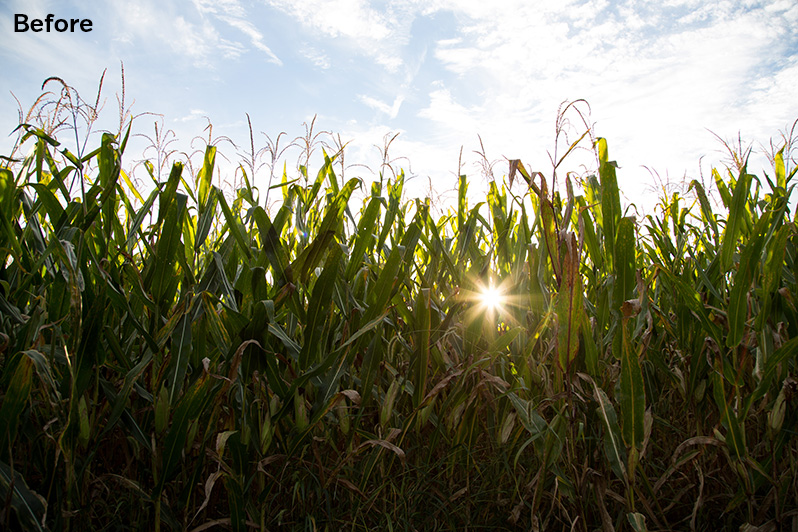
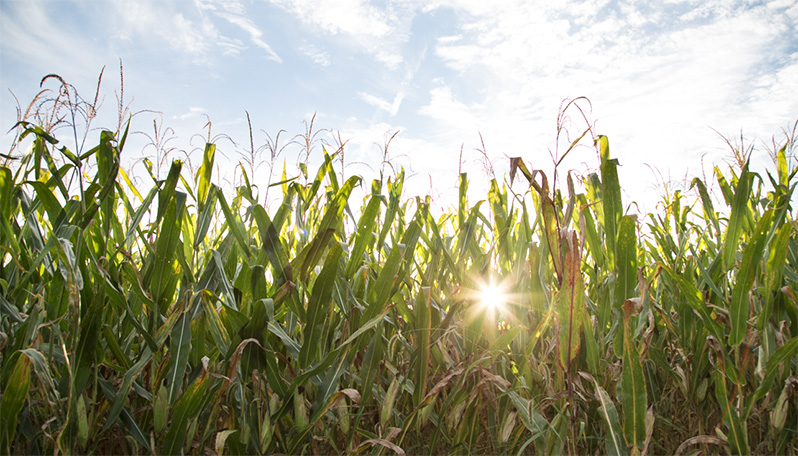
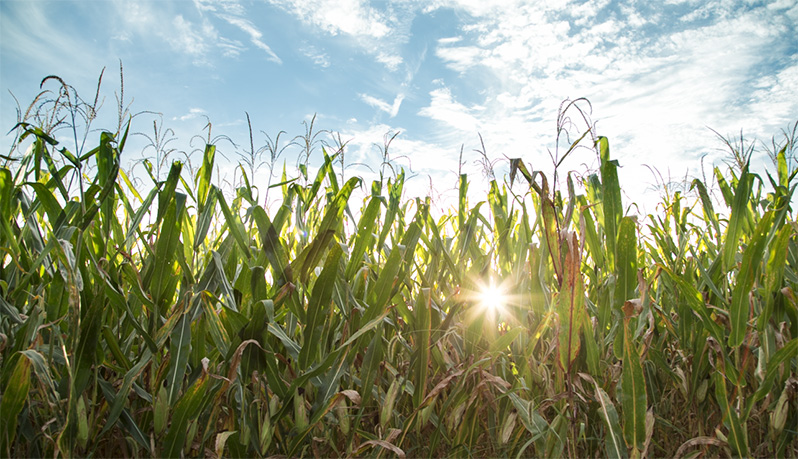
This sample photo was taken at sunset at the edge of a corn field. The lower area of the photo, the corn stalks, is dark and underexposed, and we can use the graduated filter to improve this. If you shoot a lot of landscapes you’ll probably love the functionality of the graduated filter. It works in a similar fashion to how adding a graduated neutral density filter to your lens would work.
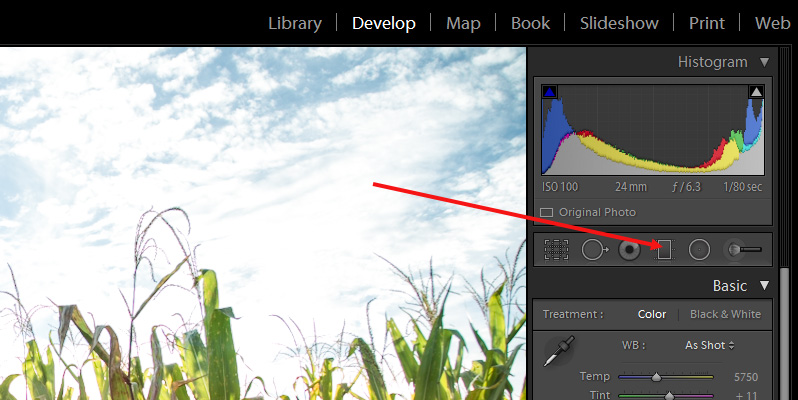
To get started, click on the icon for the graduated filter tool, or use the keyboard shortcut “m”.
To use the tool you basically click on a spot in the photo that you want to use as the starting point, and Lightroom will apply the pin for the graduated filter. Don’t worry about being precise, you can move the pin later. To adjust the exposure of the lower portion of the photo I will click near the top of the corn stalks and I’ll drag up a little bit into the sky.
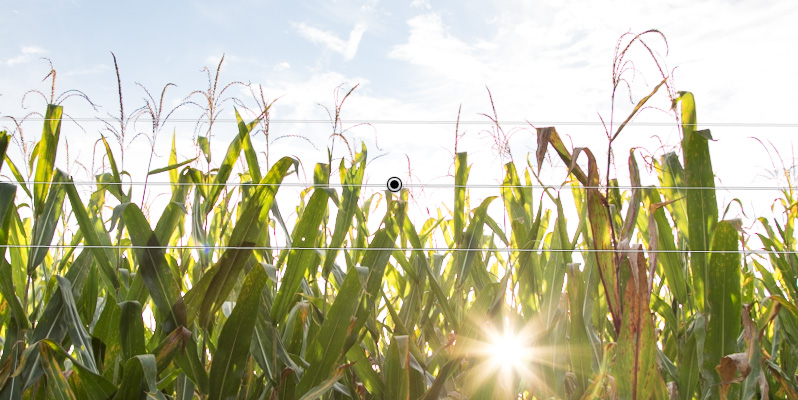
You’ll see that it creates a line at the pin, as well as a parallel lines above and below. The from the middle line to the outer lines control where the gradient is applied and how hard or soft that transition is. If you drag the parallel lines far out from the center line it will create a long, soft gradient that transitions gradually. If you leave a short distance between the center line and the outer lines it will create a harder and less subtle transition.
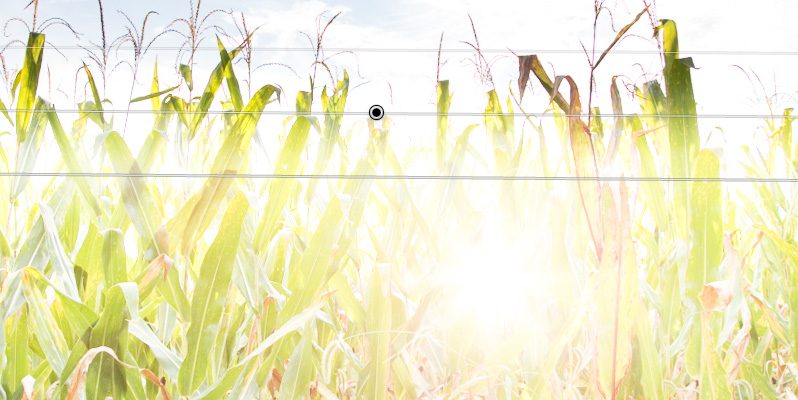
When I’m working with the graduated filter the first thing I typically do after adding it to the photo is adjust the exposure setting to an extreme to make sure that I have it in the right direction. In this case I am going to increase the exposure all the way and I can see that it lightens the lower part of the photo, which is what I want.
When I adjusted the exposure to the extreme, if it lightened the sky I would need to flip the graduated filter. If you hover your mouse over the center line you’ll see it turn to a curved line with arrowheads at either end. When it does this you can use the mouse to rotate the graduated filter.
Ok, so now that I know I have it facing the right direction I can go ahead and make the necessary adjustments. I want to lighten the lower area of the photo, so I am going to set the exposure to 0.80, and I’ll also set “shadows” at 10. And this is the result of that change.
Now, I want to add another graduated filter to work with the sky, so I’ll click on and area near the top of the corn stalks and drag down a little. For this one I’ll set the exposure to -0.33, the contrast to -80, and clarity to 25. I also want to add some color. To do this, click on the icon next to “color” near the bottom of the graduated filter settings.
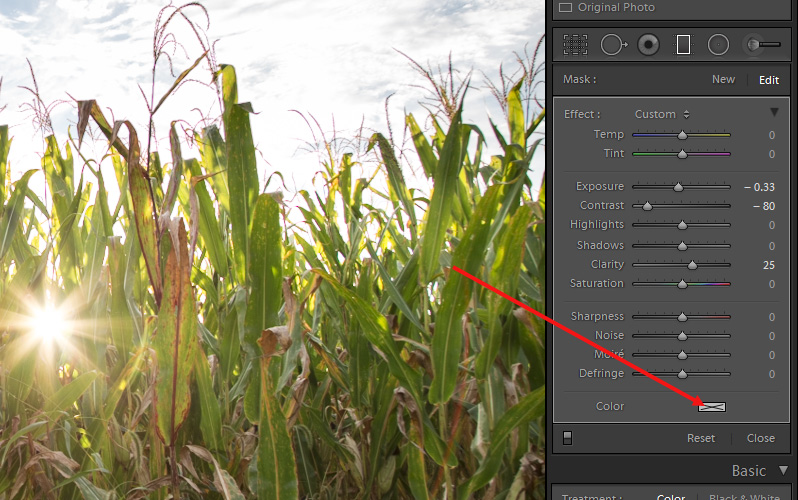
Next, you’ll click on the color that you want to use, and then you can use the slider at the bottom to darken or lighten the color.
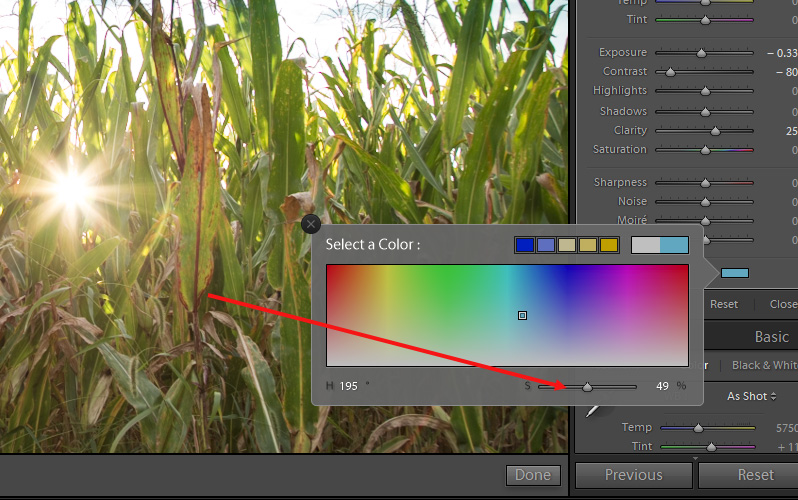
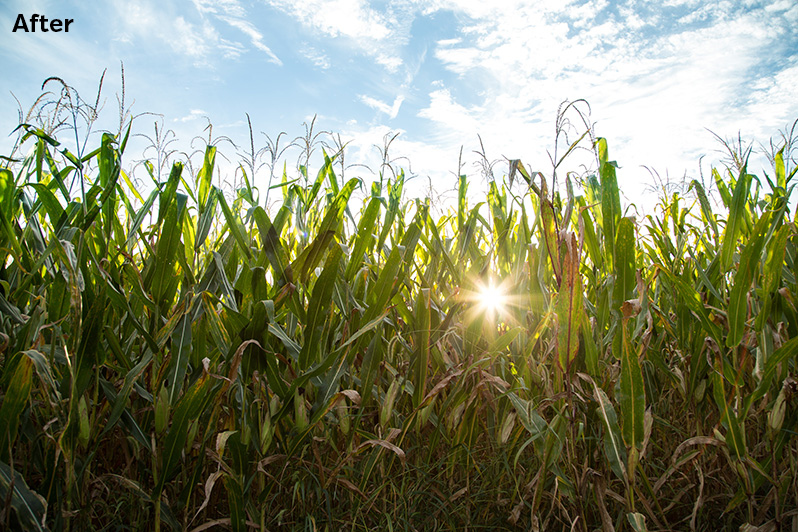
And here is the result:
That covers the basics of how you can use the graduated filter in Lightroom. It works best when you have straight lines, such as a horizon, where you need to make the adjustments. Of course, your photos won’t always have straight horizons or straight lines, and in these situations you can use the adjustment brush to make more precise adjustments. We’ll cover the adjustment brush tool in an upcoming article.
If you don’t want to miss the other articles in this Photo Editing in Lightroom 101 series, please subscribe to our RSS feed or our email newsletter. As new articles are published they will be added to the series page, which will serve as an index for the entire series.

