Free Photography Bundle ($180 value): PS actions, LR presets, photo overlays, & print templates!
Get it here.
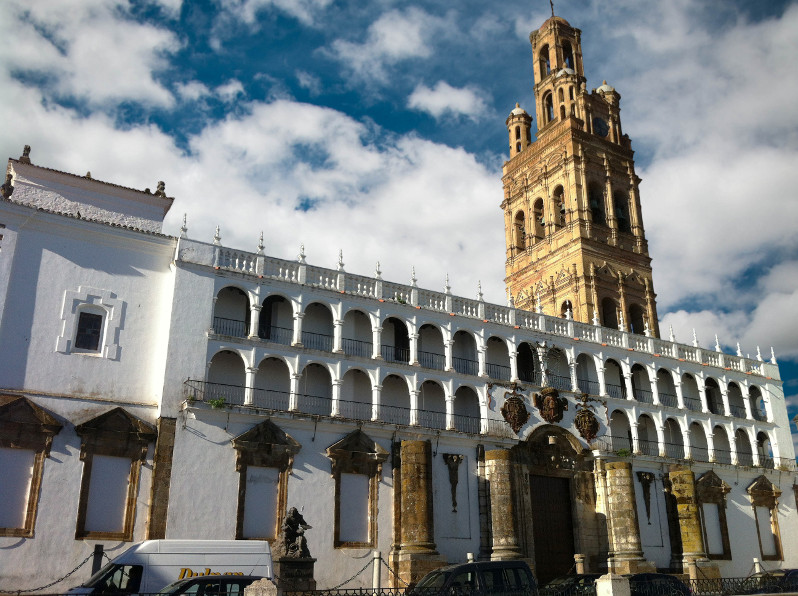
In this tutorial, I’ll show you how easy it is to use Photoshop to replace the sky of one photo with the sky from another. This may just be to make a photo more interesting, but it could also save a photo with an underexposed sky that is pure white in parts.
As you’ll see, the photo above didn’t start out with a cloudy sky.
Select Your Donor Photo
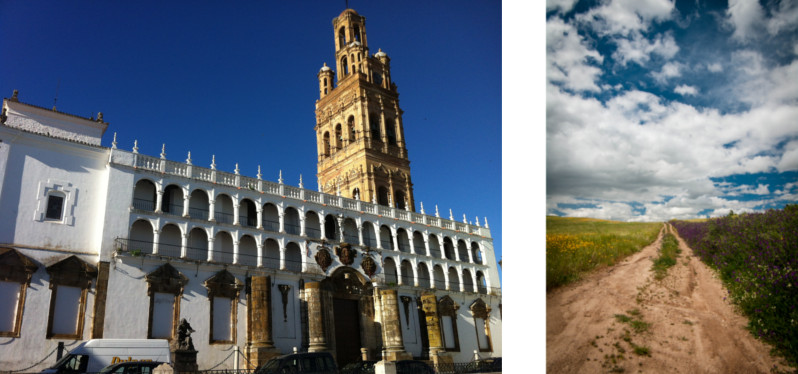
Before doing anything, the first step is to select the donor photo that you’re going to work with. You’ll want to ideally select an image that shares a similar tone to your main photo so that the final result looks as naturalistic as possible, though obviously the sky should be more interesting or better exposed than the original.
You also want to ensure that the donor photo is large enough to contain enough sky to cover all of the sky area in your original image. If the donor photo is smaller, the image quality will start to degrade if you start sizing it up. In my case the donor photo may look smaller, however it was shot with a DSLR while the main photo was with an iPhone 4, so the donor is quite a bit larger.
Select the Sky to be Replaced
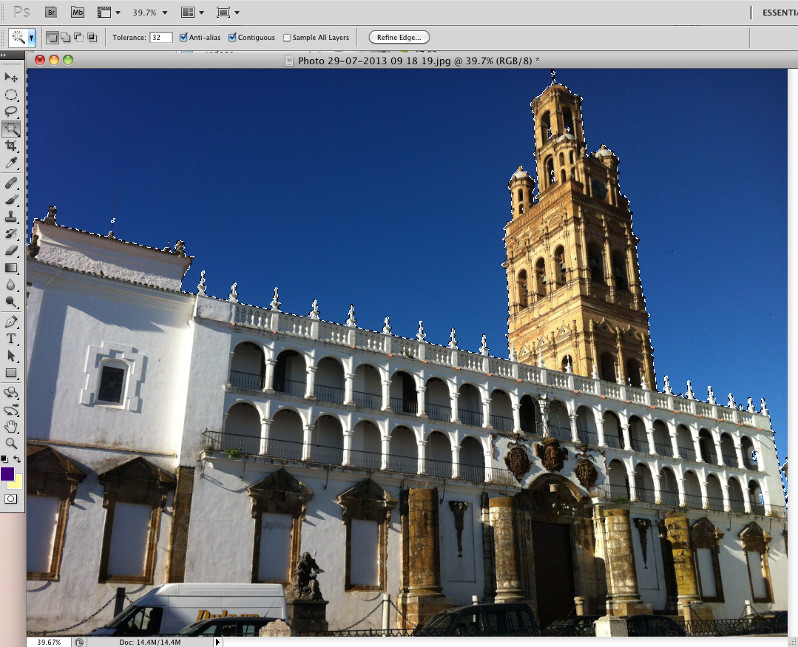
Now, focusing on the original photo, you need to select the sky area that you want to replace. Depending on how experienced you are with Photoshop, you may already have a favored way of carrying out this step. Some options include using the Magnetic Lasso tool, using color channels or, for the more patient and accurate user, the Pen tool. Often, the photo will determine which methods are suitable. However for the purpose of this tutorial, I’m going with the very quick and easy Magic Wand tool, which is the fourth tool down in the tools palette.
You then just click on an area of the sky and the Magic Wand tool will select areas that are a similar color. You probably won’t be lucky enough to select the whole sky with one click, so you can add other areas by holding down the shift key and then clicking on another area of sky.
There are a couple of settings that affect the way that the Magic Wand works. Firstly the Tolerance control affects the sensitivity. The higher this number, the larger an area will be selected, but in some photos this may result in more than the sky being selected, so do experiment.
The other is the Contiguous tick box. In my photo the sky is the only area containing the blue tones, so I could turn the Contiguous setting on to speed up the selection process. This means that all areas of the photo that contain colors similar to the color clicked on will be selected. Turn this setting off and only areas that are connected to the clicked color will be selected. Basically if you find that areas in your foreground are getting selected, you’ll have to turn Contiguous off.
Refine the Edge
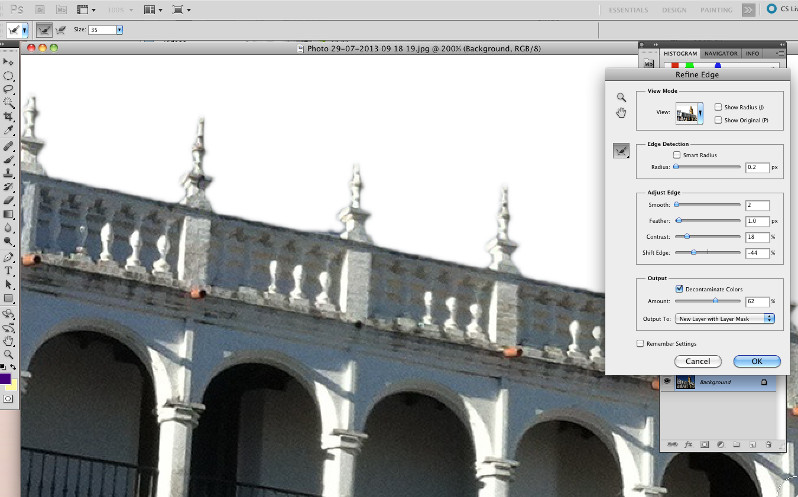
Once the selection is complete, you will need to refine the edge to remove fringing which will detract from the image. First zoom in so that you can see the edge of your selection quite clearly and the click on the Refine Edge button.
The Refine Edge palette has a number of controls and the exact settings that you need will depend on your photo, but as you make adjustments, you’ll see the changes applied in near real time. I usually use a Feather setting of just 1px as I consider that enough to soften the jaggies without losing the edge definition. You can see the settings that I used in teh screen shot, however use your eyes and trust your own judgment when tweaking with this tool.
When you’re happy with the selection’s edge, set the Output To drop down to New Layer with Layer Mask and click OK.
Place the Donor Photo
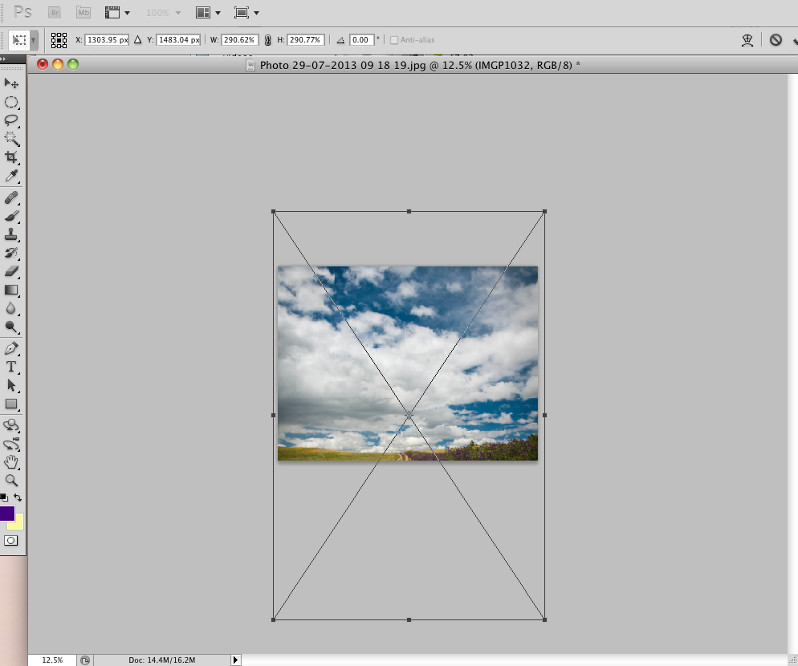
Now go to File > Place and navigate to your donor photo and bring it into your document. If it is too small to cover the sky area at it’s current size, zoom out of your image and then, while holding down the Shift key to keep it in proportion, click and drag a corner to increase its size.
Move the Donor Sky Down and Adjust Position
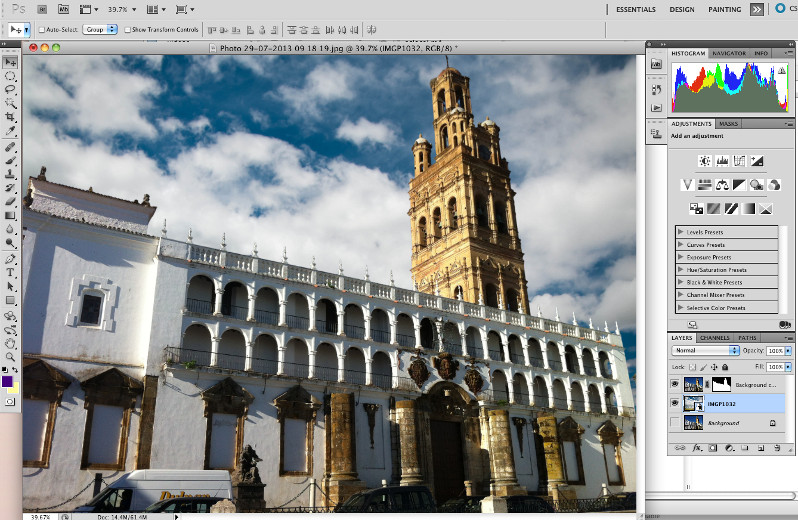
Now, in the Layers palette, click on the donor sky layer and drag it down so that it appears below the foreground layer with the masked sky area. You may also need to click on the donor sky and drag it to adjust the position as desired.
Balance the Image
This last step may not be necessary with your photo, however you should always give some consideration to whether the sky and foreground look natural.
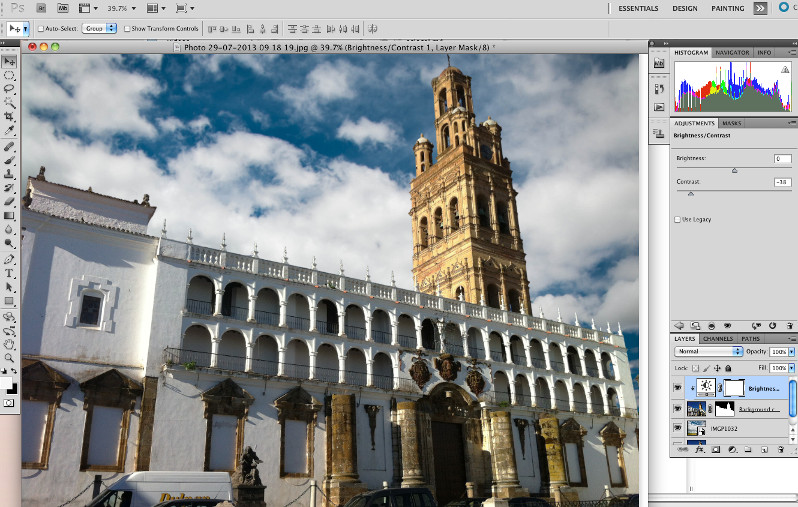
In my image, the foreground had been shot in bright sunlight and, while I could have brightened the sky, I chose to tone down the foreground a little. I just added a Brightness-Contrast adjustment layer and reduced the Contrast slider till I felt happy with the result. Ensure that the adjustment layer is only acting on the foreground layer by clicking the third button from the left in the bottom of the Adjustments palette.
There you have it, the final photo with a more dramatic sky to better suit the dramatic foreground subject.

