Free Photography Bundle ($180 value): PS actions, LR presets, photo overlays, & print templates!
Get it here.

Our collection of photo overlays includes several different sets of badge overlays, which are great for adding a stylish decoration to your photos. They’re great for decorating photos for your clients, especially photos that will be shared online and through social media.
In this post we’ll go through the process to show how you can use one of the badge overlays with your own photos. For the tutorial I will be using one of our Senior Badge Overlays, but the process is the same with any of the other badge overlays.
First, open the fonts.txt file and you will find a list of the fonts used in that set of badge overlays. You’ll need to download and install any fonts that you don’t already have, otherwise Photoshop will replace the missing font with one that is already on your computer. In the case of the overlay that we’re using for the tutorial, the fonts are Gravitas One and Bebas Neue.
Next, open the overlay file in Photoshop, and also open a photo that you want to use with the badge. Here is the photo I will be using:

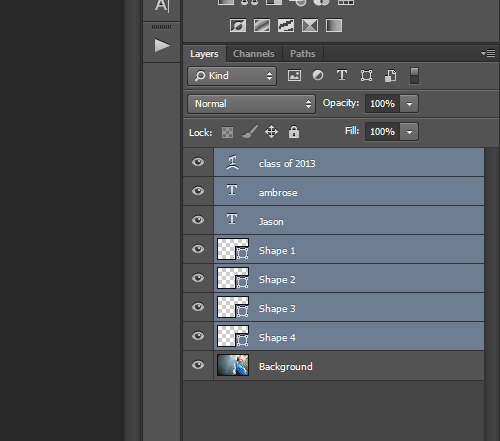
In the badge overlay file, select all of the layers in the layers palette except the background layer.

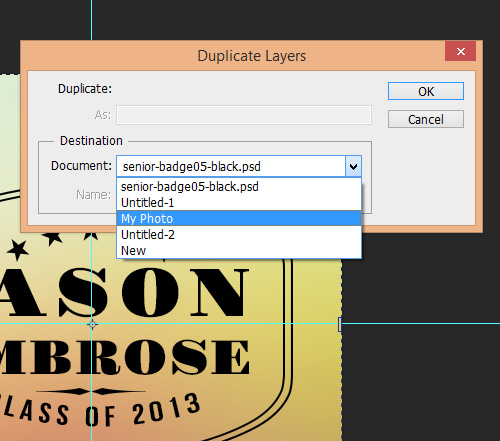
Go to Layer > Duplicate Layers. This will open a popup window, and in the drop down select the file name of the photo that you will be using and click “ok”.
This will duplicate the overlay layers on top of your photo. If you move over to your photo and look in the layers palette you should see that all of the overlay layers are selected.
With all of the overlay layers selected use the free transform tool (Edit > Free Transform) to re-size the overlay as needed and move it into place (wherever you want it to be on your photo).
To keep the proportions of the overlay when re-sizing it hold down the shift key and drag one of the corners in or out.
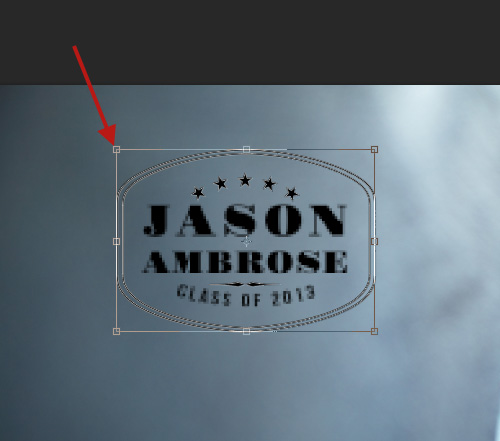
After sizing your overlay and getting it in place it will look something like this:
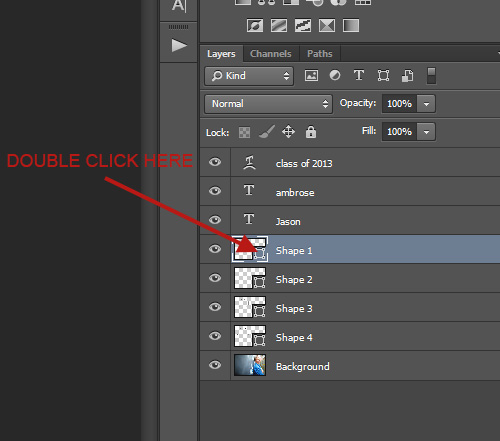
Next, use the type tool to change the text to suit your needs. After that is done you can change the colors of the elements. You can use the type tool to change the color of text. To change the colors of the shape layers double click on the icon in the layers palette and it will open the color picker.
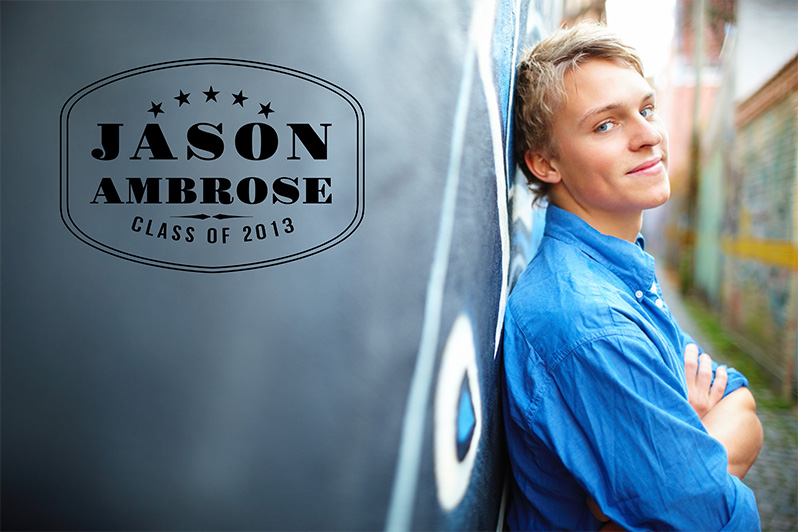
After changing the colors of the elements you are done! Here is a look at the finished sample photo:
Check out our Badge Overlays category to see what we have available.

