Free Photography Bundle ($180 value): PS actions, LR presets, photo overlays, & print templates!
Get it here.
This article is a part of our series Photo Editing in Lightroom 101. Throughout the series we’ll cover the details of Lightroom’s library and develop modules and how you can use Lightroom to improve your own photos. As new articles are published they will be added to this page. If you don’t want to miss future articles in the series, please subscribe to our RSS feed or our email newsletter.
In previous articles we’ve talked about how you can use tone curves, tone adjustments, and vibrance and saturation to impact the colors in your photos, and today we’ll look some additional options that Lightroom gives you for working with colors.
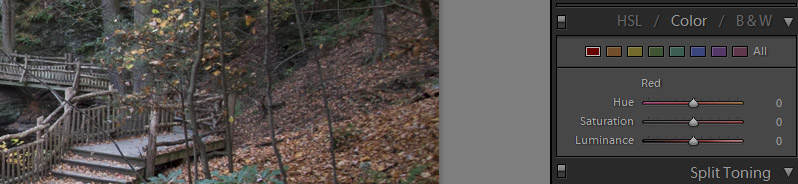
To the right side of the develop module, just below the tone curve, you’ll see HSL/Color/B&W. With the sliders here you have fine control over specific colors in your photo, without impacting the entire photo.

HSL
Let’s start with HSL, which stands for hue, saturation, and luminance. Here you can adjust the hue, saturation, and luminance of the specific colors in the photograph: red, orange, yellow, green, aqua, blue, purple, and magenta. By adjusting the hue you are making a change to the color. With the saturation slider you can adjust the intensity of the color. At the extreme left it will be completely desaturated with no color, and at the far right it will be saturated to maximum with a very intense color. With the luminance sliders you have control over the brightness of the color.
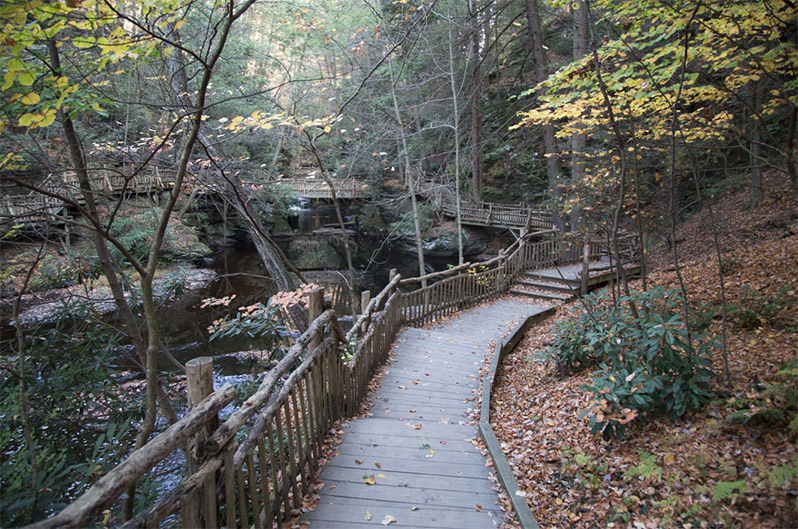
So let’s look at an example. This sample photo was taken during autumn, so typical fall colors like orange and yellow are heavily represented, as is green.
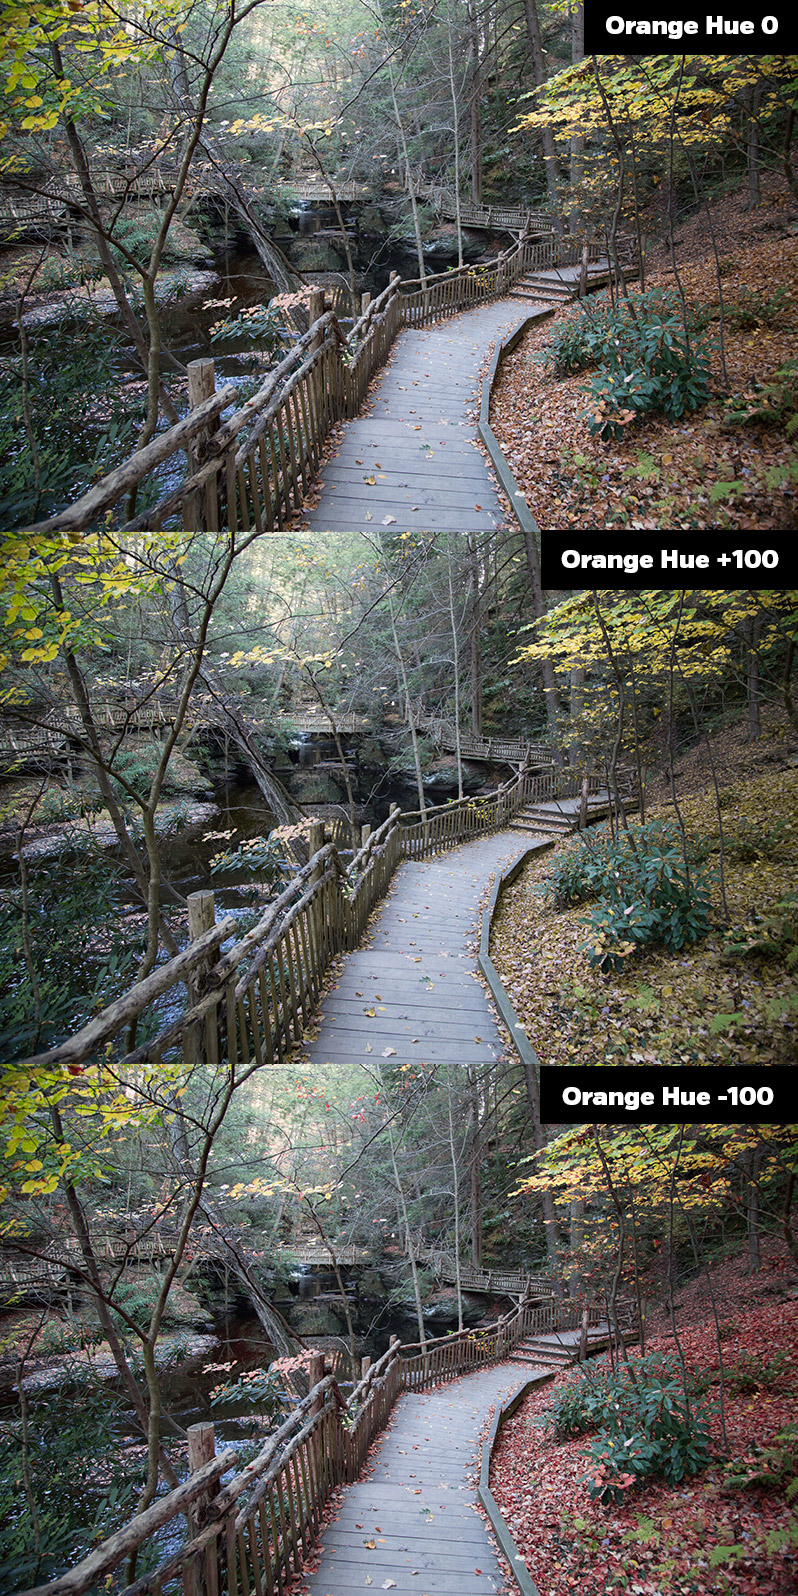
With the hue slider we can adjust specific colors in the photo. As an example, let’s take a look at what happens when we adjust the hue for orange. When I’m experimenting I like to move the sliders to the extremes so I can easily see how it works and what impact it is having. When I move the hue slider for orange all the way to the left the the orange colors in this photo (mostly the leaves on the ground) turn more red. And if I move the slider all the way to the right they turn more yellow.
Now, looking at saturation, we can control the intensity of the orange color of the leaves by adjusting the slider. If you move the slider to the left it will take out some of the color, eventually removing all of the orange color if you slide it all the way to the left. And if you slide it to the right it will increase the saturation and the intensity of the orange color. The image below shows it at 3 different stages of saturation for orange.
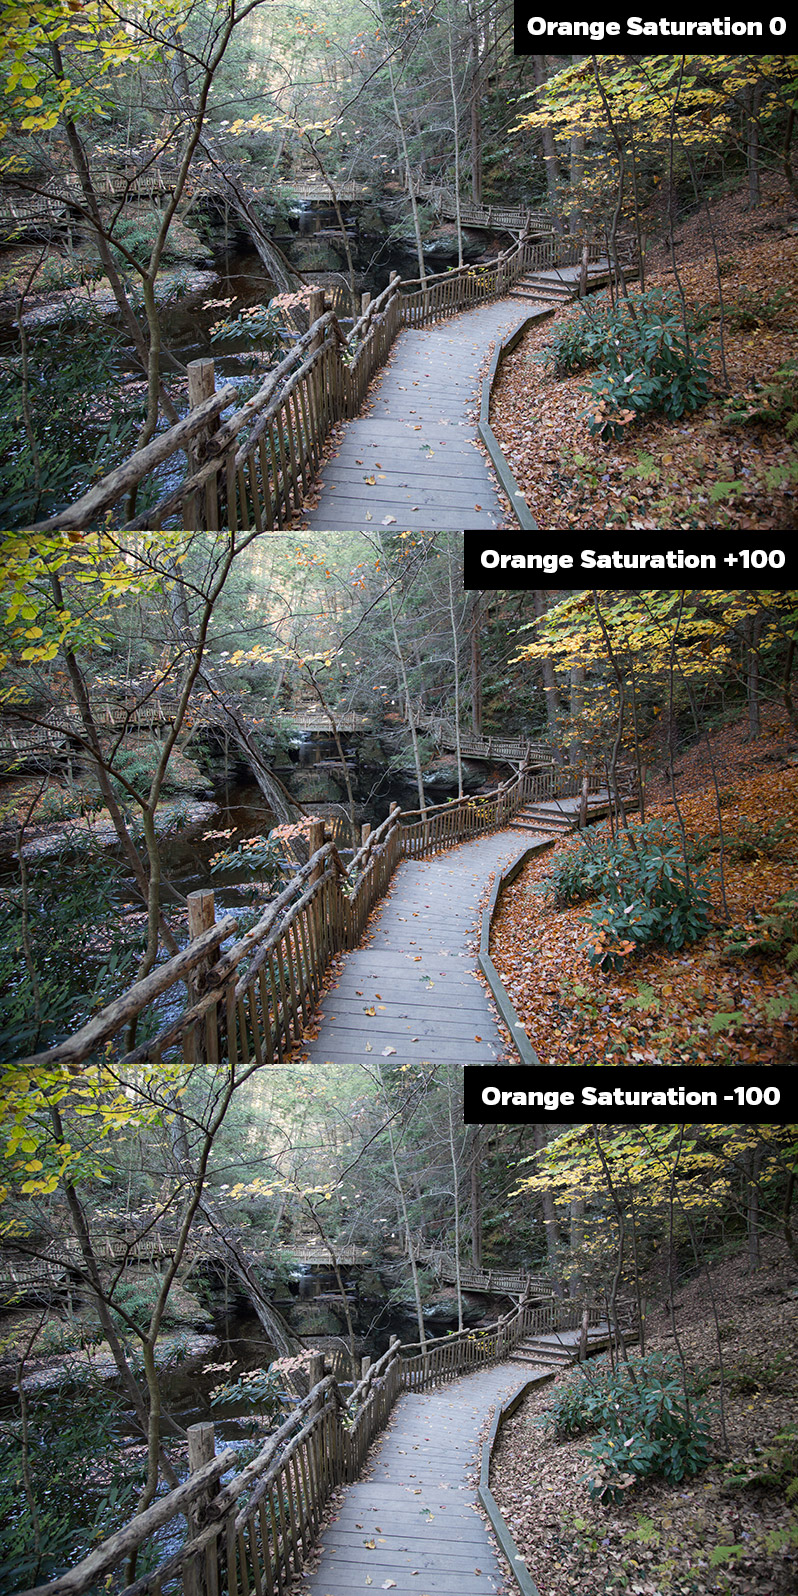
You’ll notice that with the orange saturation at -100 the leaves on the ground still have a little bit or color even though we have totally removed the orange saturation. We’re only impacting the orange colors, and the leaves actually include some other colors as well, like reds and yellows, and those colors are not impacted by the orange slider.
Moving on to luminance, we can impact the brightness of the orange leaves. The image below shows what the photo looks like with the orange luminance set to 0, +100, and -100.
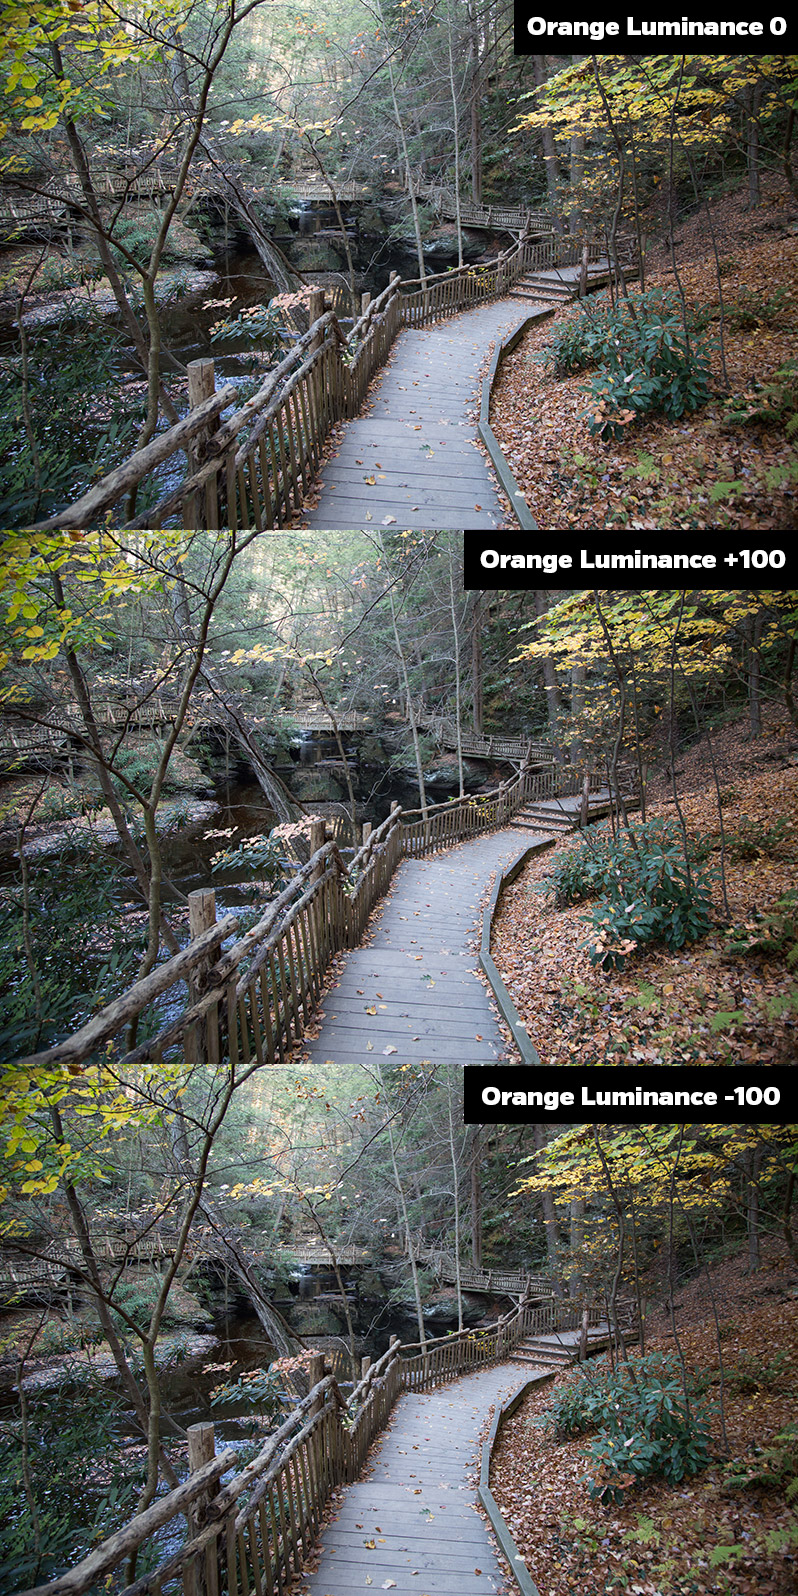
It’s a lot easier to see the impact by using a sample photo of your own and moving the luminance slider all the way from one extreme to another.
So far we’ve only looked at how you can make adjustments using the specific sliders, but there is another way that often proves to be more useful and efficient. This applies with hue, saturation, and luminance, but for the example we’ll work with saturation. There is a little icon that allows you to select a color in a photo and adjust it by dragging or scrolling.
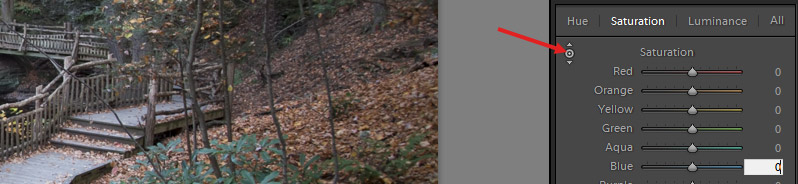
Click on the icon to activate it. Then go over to your photo a place your mouse over a color in the photo that you want to adjust. Then you can either use the scroll wheel of the mouse up or down to adjust the saturation of that color, or you can click on the spot and drag up or down.
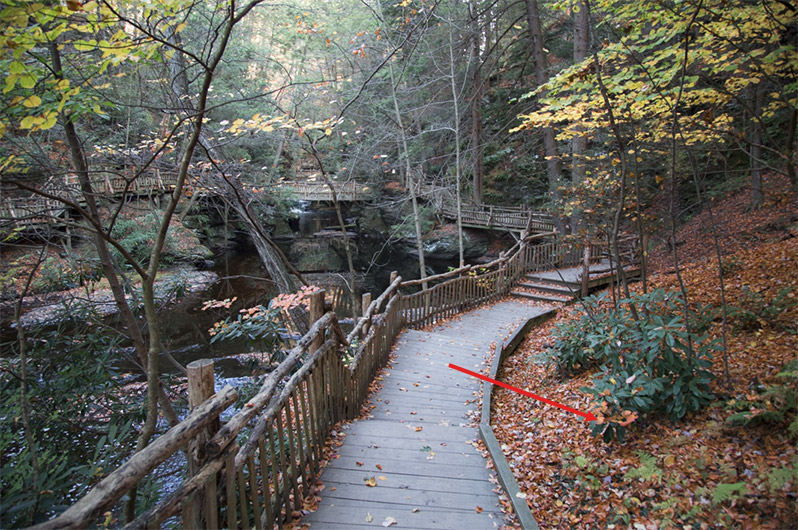
Let’s take a look at an example. I want to increase the saturation of the leaves that are on the ground, so I will click on an area of the leaves (where the arrow is pointing) and drag up to increase the saturation.
Now, let’s look at the sliders and see what has been impacted.
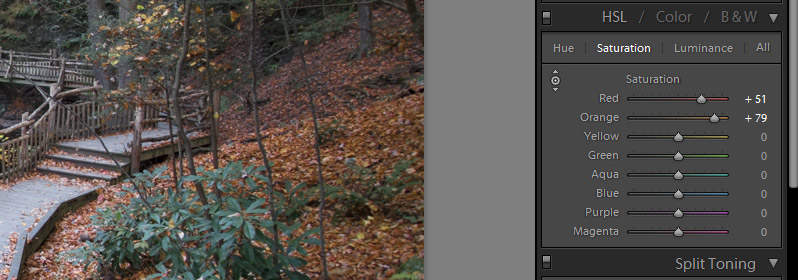
The saturation of both orange and red has been increased, because the area that I clicked included both red and orange. This is often the best way to impact the specific parts of the photo that you want to adjust.
Color
So that covers HSL. The Color sliders do really the same thing. The difference is how the sliders are displayed. With HSL you’ll looking at all the hue sliders for each color, all the saturation sliders for each color, or all the luminance sliders for each color. With Color, you’re looking at the hue, saturation, and luminance sliders together for a particular color, or for all the colors.
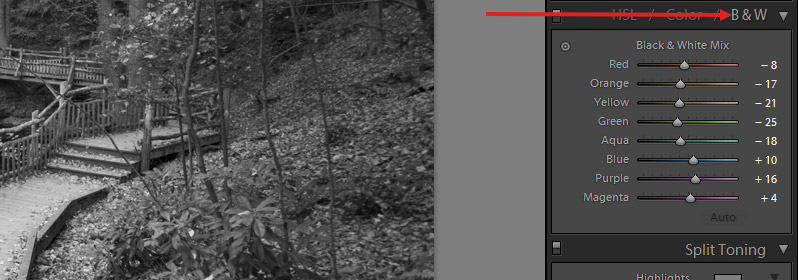
B&W
If you click on B&W it will convert the image to greyscale. The sliders in the B&W area allow you to add a little pop to the photo. The best way to work with these sliders is to experiment and play around a little, because each photo will be unique.
If you don’t want to miss the other articles in this Photo Editing in Lightroom 101 series, please subscribe to our RSS feed or our email newsletter. As new articles are published they will be added to the series page, which will serve as an index for the entire series.

