Free Photography Bundle ($180 value): PS actions, LR presets, photo overlays, & print templates!
Get it here.

I’m sure there have been plenty of times when you’ve been disappointed by the darkness in the shadow areas of a photo. Your eyes may see the scene very well, but in a photo the shadows are too dark and lacking detail. In these situations Photoshop does offer some help for improving the photo.
In this article we’ll look at two different approaches for increasing dynamic range. The first option is for situations where you are working with a JPG file, and the second option will use Camera Raw within Photoshop, which can be a good option for when you are working with a RAW file. If you’re a Lightroom user you may also be interested in our tutorial How to Create HDR Effects in Lightroom.
Photoshop’s Shadows/Highlights Adjustments
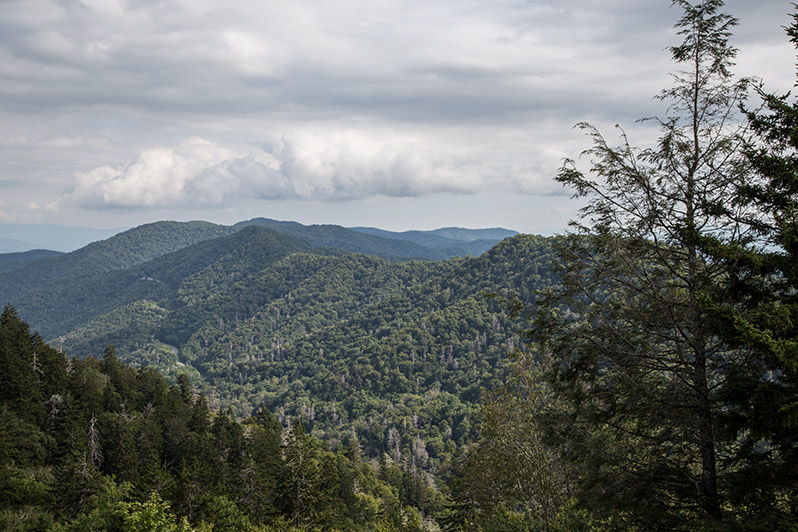
Photoshop offers a pretty simple way to adjust the shadow and highlight areas of any photo. In my opinion the results for working with the shadows are much better than working with the highlights, so I often don’t adjust the highlights at all. Let’s take a look at this sample photo.
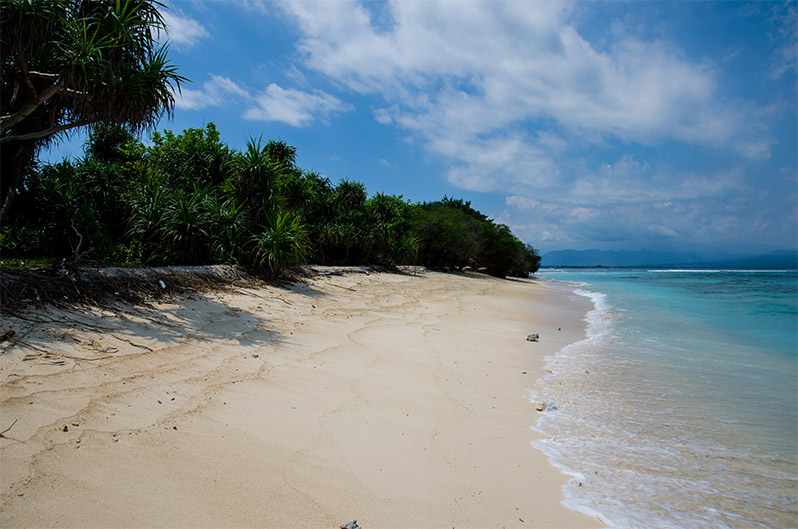
And after a small adjustment to the shadows it looks like this.
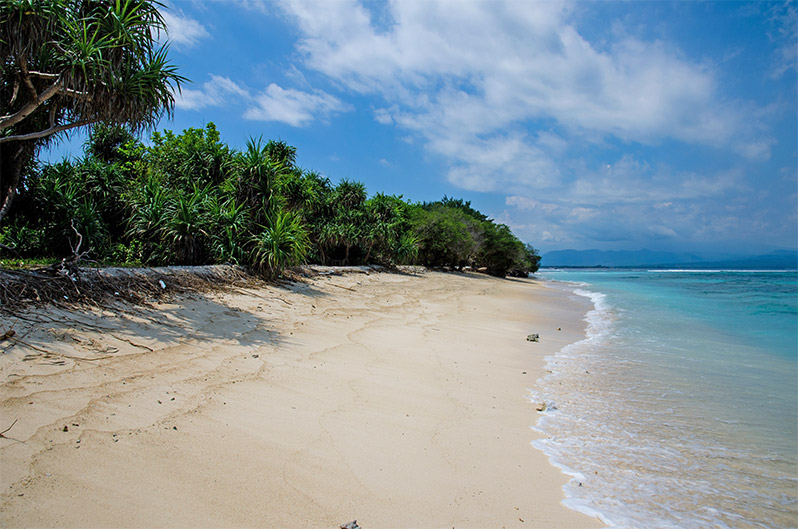
After the adjustment the shadow areas are considerably lighter, especially in the green leaves of the trees. It makes the photo much more vibrant. To adjust the shadows you simply need to go to Image > Adjustments >Shadows/Highlights, but I want to do it in a non-destructive way, so we’ll make a few extra steps first.
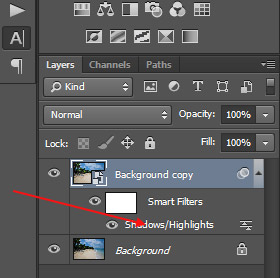
The first step is to duplicate your photo layer (go to Layer > Duplicate Layer). By working with a duplicated layer we can always get rid of it if we mess up, and if we save it as a layered .psd file we can always go back to the original at any time.
Working with a duplicated layer is good, but we can also take it one step further. Select the duplicated layer in the layer’s palette, right click, and select “Convert to Smart Object”. If you make shadow/highlight adjustments to a smart object you can go back at any time and adjust those settings, so it is just much more flexible.
Now, with the smart object layer selected go to Image > Adjustments >Shadows/Highlights. This will open a window like the one you see below.
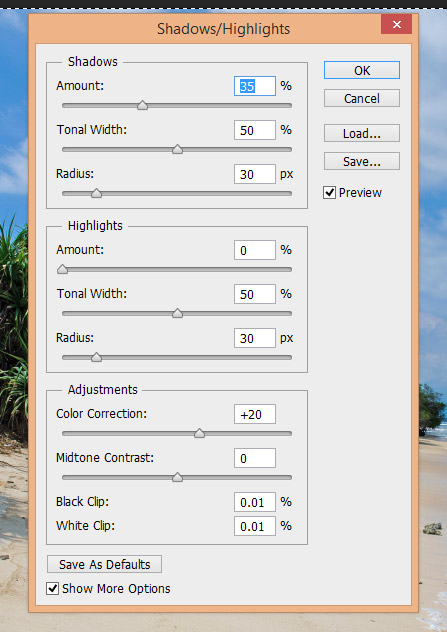
I am going to adjust the shadow settings to 40, 40, and 30 and I’ll leave all of the other settings as is. After that change our sample photo looks like this:
Now if you want to change those settings later you can just double click on the smart object in the layer’s palette and it will open the shadow/highlight settings.
If you’re looking for an easy way to apply some creative effects that make use of these shadow and highlight adjustments you may be interested in our Faux HDR Photoshop Actions – Vol. 2.
Adjusting Shadows and Highlights in Camera Raw
If you’re working with a RAW file you can make adjustments to the shadows and highlights in Camera Raw. The sample photo shown above is a JPG, so I’ll use a different sample here. This is a “before” version of the photo that I’ll be working with.
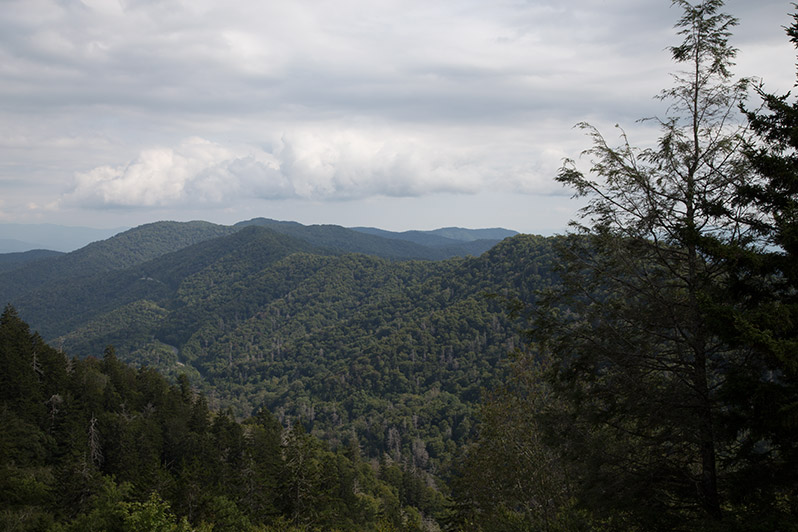
When you open a RAW file in Photoshop it will automatically open in Camera Raw, as shown in the screenshot below.
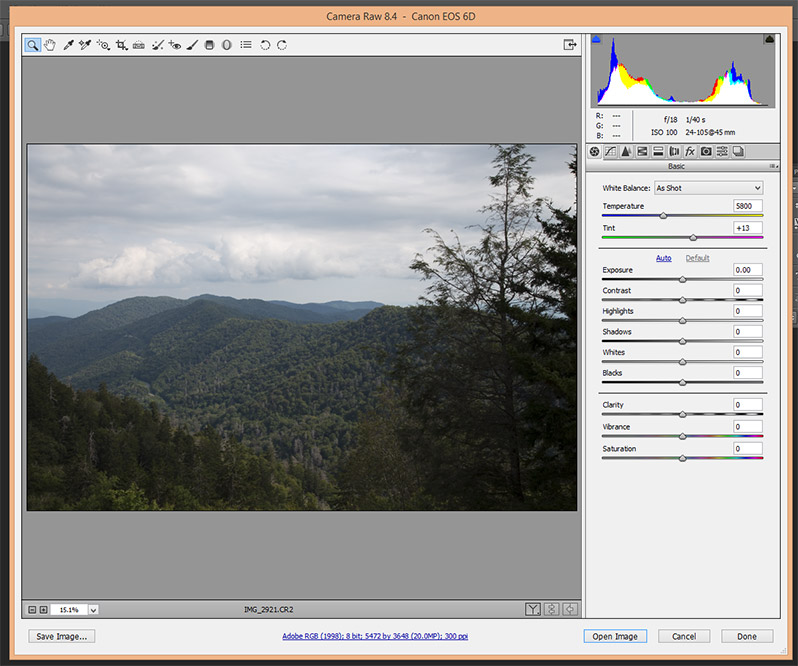
You can increase the setting for shadows to lighten the shadow areas and decrease the setting for highlights to try to recover some highlight detail.
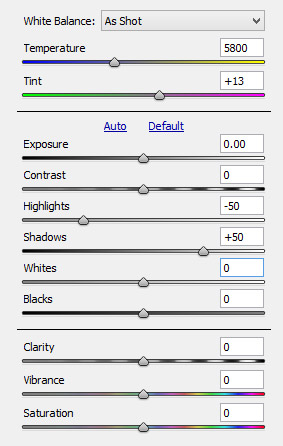
After changing highlights to -50 and shadows to +50 the sample photo looks like this.
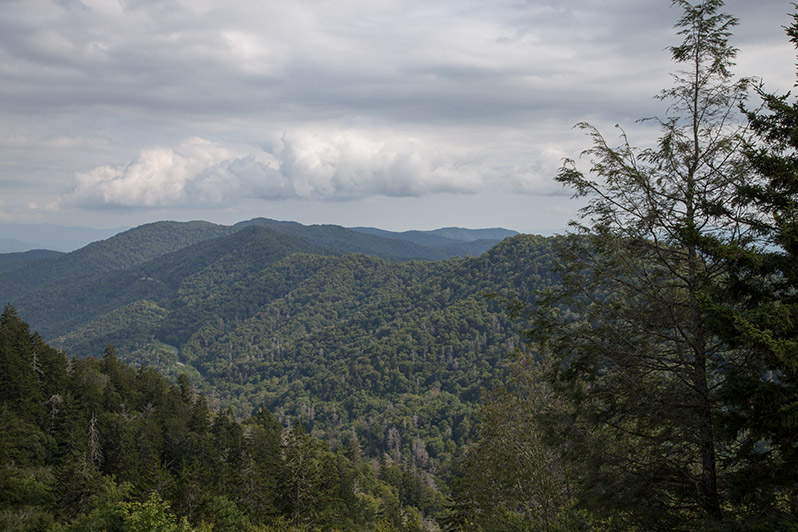
This photo would still benefit from some other adjustments. I’ll adjust the exposure +0.25, set the contrast to +20, and clarity to +30. Here is the end result.
Adjusting shadows and highlights in Photoshop is simple, but it can make a big difference with your photos.

