Free Photography Bundle ($180 value): PS actions, LR presets, photo overlays, & print templates!
Get it here.
This article is part of our series Photo Editing 101 by Ian Pullen. This series will cover all of the basics of using Photoshop for editing photos. If you’re just getting started with Photoshop or photo editing, or if you’re looking to improve your skills in this area, this series will provide an excellent foundation. If you want to make sure that you don’t miss future articles you can subscribe to our newsletter or follow us on Twitter, Google+, or Facebook. You can also find the articles that have already been published by visiting the Photo Editing 101 course page.
The Dodge and Burn tools in Photoshop are digital throwbacks to the days of the darkroom. They emulate the two techniques, but allow you to work with much greater precision. Traditionally, in the darkroom it involved waving around torn pieces of paper attached to wire as you attempted to alter the amount of light from the enlarger that reached the paper. Dodging areas so less light reached them, to make them lighter, and burning other areas by letting more light through to darken them. By darkening and lightening areas, you can help to control what the viewer’s eye focuses upon.
I personally had varied success in the darkroom, but Photoshop does make this a very easy technique to take control of. In this simple introduction, I’ll show you how you can emulate the results with your digital photos. You’ll notice in the screen shots that I’ve added a Black and White Adjustment layer to my photo, but these techniques work just the same with color photos.
How Do You Access the Dodge and Burn Tools?

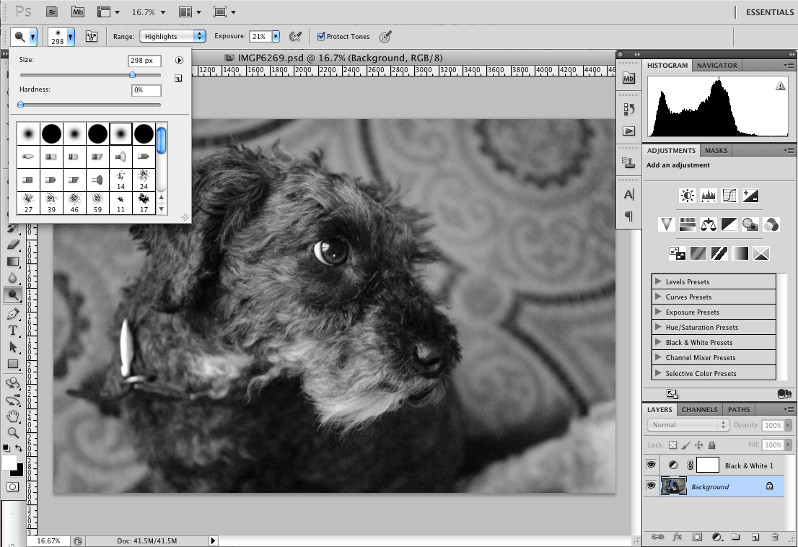
The Dodge and Burn tools are both located in a single spot in the Tools palette, which they also share with the Sponge tool. To show the little fly-out menu that you can see in the screen shot, you just need to click and hold on the currently active icon – in my case the Burn tool. You’ll see that almost all the tools now have these fly-out menus, which are represented by a small arrow head at the bottom right of the tool icons.
What Settings are Available for the Two Tools?
The Dodge and Burn tools function identically and share the same settings, though obviously they produce opposite results. If you look at the tool options bar above the workspace, you’ll see a few simple controls to pick from.
The second of the drop down menus from the left allows you to select the type of brush that you will use. You will probably recognize this interface as it’s shared by several tools that allow you to paint onto your photos or layer masks. As you want your brush strokes to be gentle and subtle when dodging and burning, you will want to choose a soft edged brush to work with. The size that you select will depend on the size of your photo and the areas that you are targeting.
The Range drop down menu is a very handy control and this gives you the ability to lighten or darken pixels based upon their current tonal value. For example, if this is set to Highlights, you could paint over a light and a dark pixel and only the light pixel would be affected.
The Exposure setting allows you to set the strength of the effect and in most cases it is best to set this quite low and build up your adjustments with lots of light brush strokes. Further along, the Protect Tones checkbox is activated by default and this is designed to maintain more detail as you work with the tools.
How Do You Dodge?

Having briefly explained the technicalities of the Dodge and Burn tools, let’s look at a practical example of how to use the Dodge tool. In my image, I want to help make the eye the focus of the photo and one way to do this is to Dodge the eye area to make it lighter and stand out more. I set the Range to Highlights as I only want to lighten the brightest areas, and the Exposure is set at 15% so that the effect will be quite subtle with each brush stroke.
I then just clicked and brushed over the eye area and the highlights of the eye and the lightest hair were made brighter. I concentrated on a small area so that the effect shouldn’t be too obvious, even though I changed the highlights to pure white.
How Do You Burn?
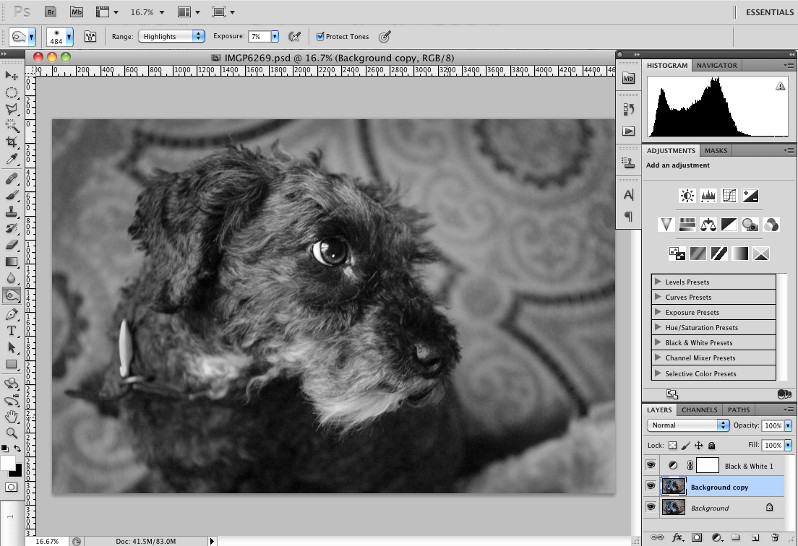
The Burn tool works just the same way, but instead darkens the areas it is painted onto. In my image I chose to burn the edges of the image to help constrain the eye. This is similar to adding a vignette, but instead the result will be less uniform. I chose quite a large brush, again with a soft edge, and set the Exposure to 7%. For most the time, the Range was set to Midtones, though I switched to Highlights to darken the bottom right corner.
I also used the Burn tool to darken the dog’s body a little and to reduce the intensity of the highlight on the collar buckle, which was competing with the eye for attention.
Conclusion
Used with care, the effect of Dodge and Burn shouldn’t really be obvious to the viewer, but should just enhance the image subtly.
See more articles in the Photo Editing 101 series.

