Free Photography Bundle ($180 value): PS actions, LR presets, photo overlays, & print templates!
Get it here.
This article is part of our series Photo Editing 101 by Ian Pullen. This series will cover all of the basics of using Photoshop for editing photos. If you’re just getting started with Photoshop or photo editing, or if you’re looking to improve your skills in this area, this series will provide an excellent foundation. If you want to make sure that you don’t miss future articles you can subscribe to our newsletter or follow us on Twitter, Google+, or Facebook. You can also find the articles that have already been published by visiting the Photo Editing 101 course page.
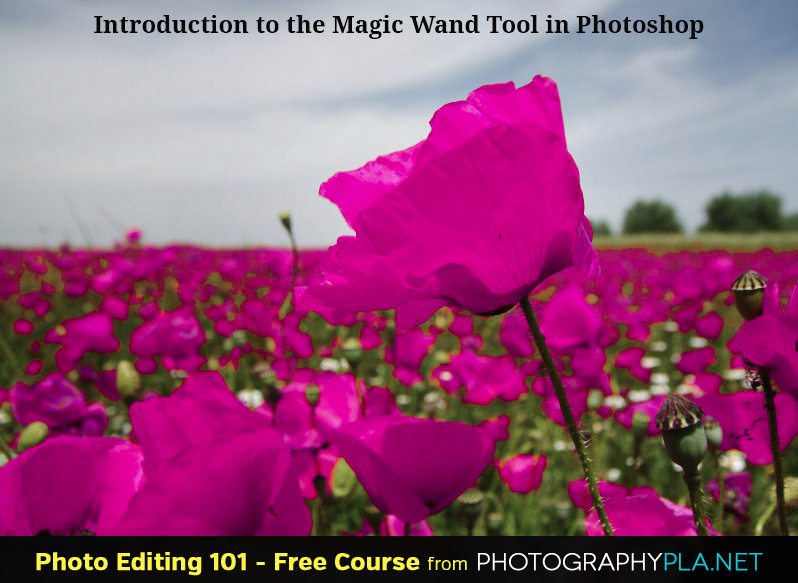
The Magic Wand tool in Photoshop may sound like it’s rather fantastically named, however, for the right images, it can seem to work like magic. It makes it very easy to select areas of a photo based purely on color so that you can make adjustments to just these areas. You just need to click on a photo and the Magic Wand tool will then take care of selecting areas of a similar hue. However, while it is a simple one click operation, there is more to using this tool than just that and I’ll quickly run through the options and features in the next few steps.
How Do You Activate the Magic Wand Tool?
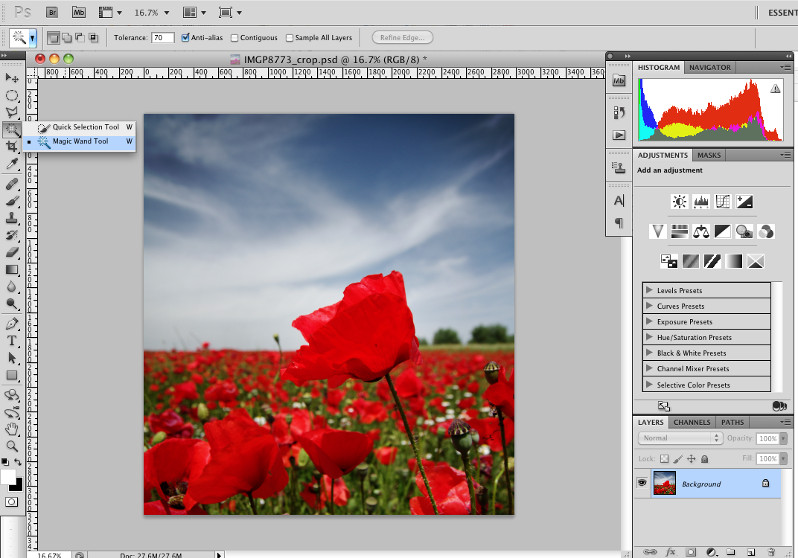
The Magic Wand tool shares a spot in the Tools palette with the Quick Selection tool and it is the fourth icon. If the Magic Wand tool isn’t visible, click and hold on the Quick Selection tool and you’ll see a little fly-out menu appears.
Magic Wand or Quick Selection Tool?
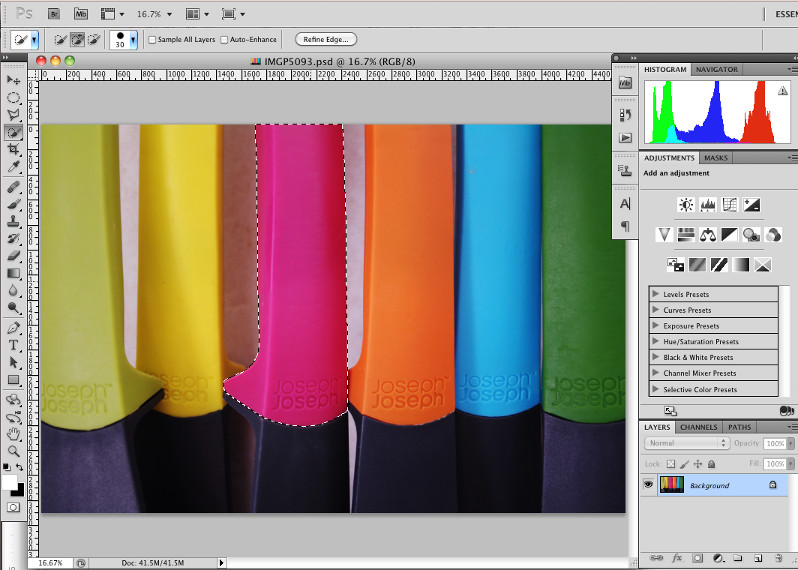
The Magic Wand tool offers you a greater amount of fine grained control than the Quick Selection tool, however, in some cases you may find that the latter tool is a better fit for the job. Where it works particularly well is when you have a single area of color that you want to isolate, such as this kitchen utensil handle.
How Do You Select an Area with the Magic Wand?
As I said earlier, selecting an area with the Magic Wand is as simple as clicking your photo, however, there are a few settings that dramatically alter the way that this tool operates.
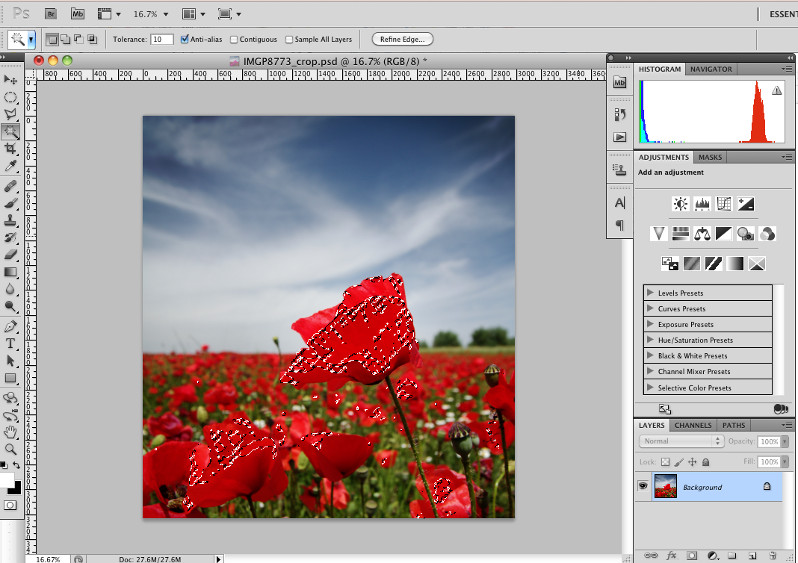
Firstly is the Tolerance setting, which can be set between 1 and 255. The higher this setting is, the more colors will be included in the selection that is made. Ideally, you will set this as low as possible, so that only the color that you click on and those colors that are very similar to it will be selected.
The screen shot above shows the Tolerance set at 10 and when I clicked on the largest poppy, it lead to this selection.
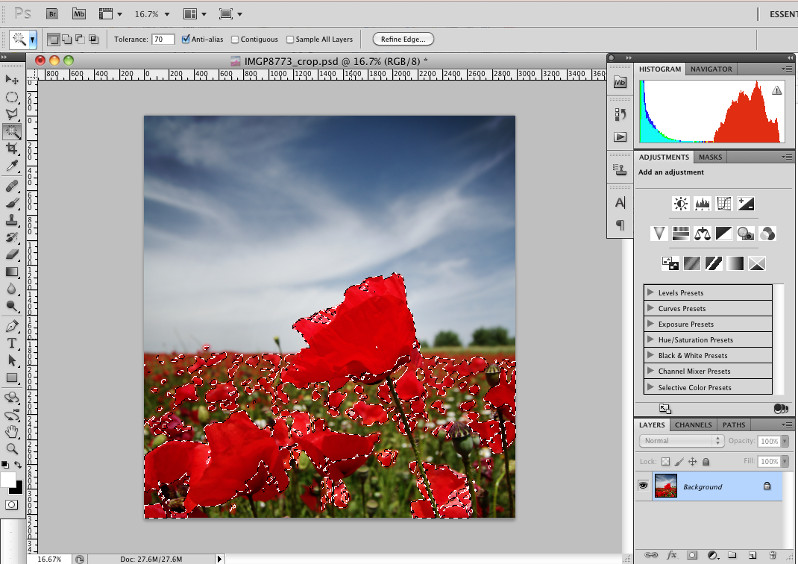
Set to 70, the Selection encompassed almost all of the poppies.
What Does the Contiguous Check Box Do?
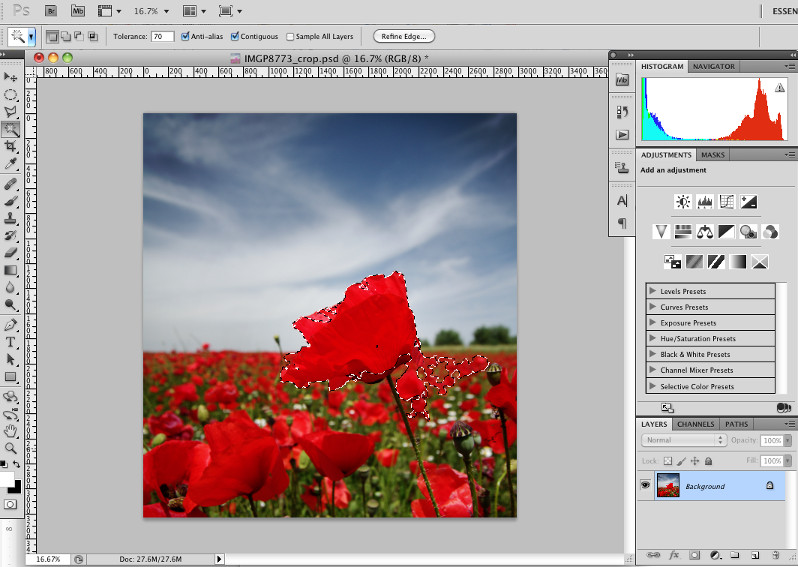
In the previous screen shot, you saw that by clicking on the main poppy, almost all the poppies were selected. This only happened because the Contiguous check box was turned off. This means that all of the pixels in the image that are similar to the clicked pixel will be included in the selection.
If the Contiguous check box is activated, only pixels that are directly connected to the clicked pixel will be selected. In the screen shot above, you can see that while the Tolerance is still set to 70, a much smaller area has been selected because the Contiguous check box has now been activated.
How You Select or Deselect Additional Colors?
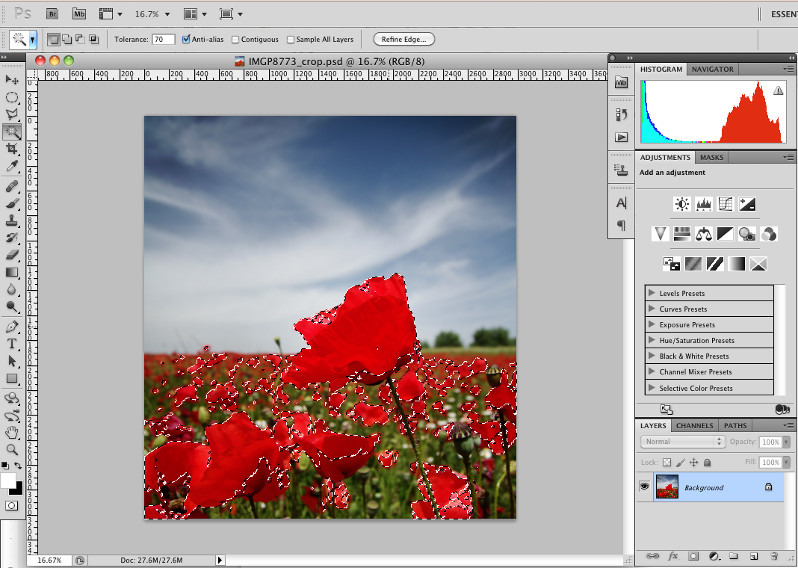
The screen shots above have shown different selection results, but none of them have successfully selected the poppies in their entirety. Fortunately, as with the other selection tools in Photoshop, there are four different Selection Modes that allow you to add and subtract from a selected area. You’ll find these towards the left of the tool options bar, represented by icons consisting of a single or pairs of rectangles.
The first mode is New Selection and when set to this, each time you click the photo, any existing selections are replaced with a new selection. The next two modes are Add to selection and Subtract from selection and we can use these these to make a selection that includes all of the poppies.
The screen shot above shows the selection after clicking once on the main poppy.
Now I have switched to the Add to selection mode and and have clicked on more areas of the poppy field to expand the selection. You can see that the selection covers pretty well all of the poppies now. If you find an area included that shouldn’t be, switch to the Subtract from selection mode and click on the area you want to remove and you’ll see that your selection shrinks. When adjusting your selection in this way, remember that you can change the Tolerance setting and also turn off the Contiguous setting if you want to remove just a single area that shares a color with another area in the photo.
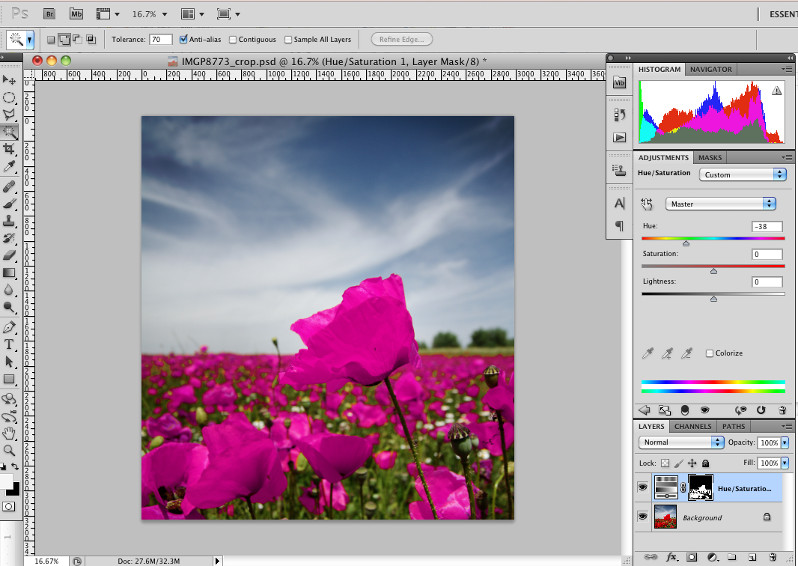
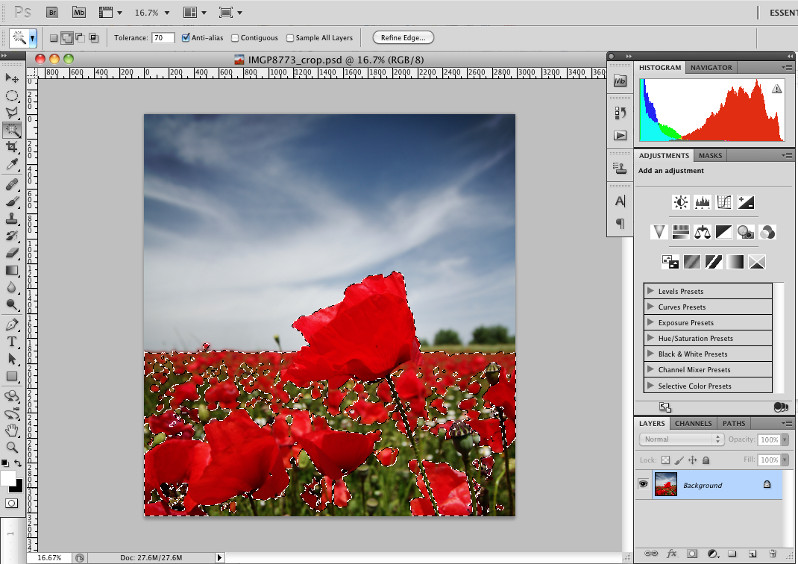
In this final screen shot, I’ve added a Hue/Saturation adjustment layer and you can see that only the selected area has been affected by the changes I made to the Hue slider.
Conclusion
The Magic Wand is a very useful tool for making selections that would be near impossible to achieve manually. By making full use of the various options, you can create very accurate selections with very little effort.
See more articles in the Photo Editing 101 series.

