Free Photography Bundle ($180 value): PS actions, LR presets, photo overlays, & print templates!
Get it here.
This article is part of our series Photo Editing 101 by Ian Pullen. This series will cover all of the basics of using Photoshop for editing photos. If you’re just getting started with Photoshop or photo editing, or if you’re looking to improve your skills in this area, this series will provide an excellent foundation. If you want to make sure that you don’t miss future articles you can subscribe to our newsletter or follow us on Twitter, Google+, or Facebook. You can also find the articles that have already been published by visiting the Photo Editing 101 course page.
The Marquee selection tool in Photoshop is one of the most basic of all the selection tools, however, it’s a good introduction to making selections as it shares many features with the other more advanced selection tools. It’s also rather more flexible than you may first think and with feathered edges, it can be used to add subtle vignettes to photos.
I’ll run through some of the tool options available with the Marquee tool here and show how you can add a simple vignette to a photo at the end.
How You Activate the Marquee Tool?
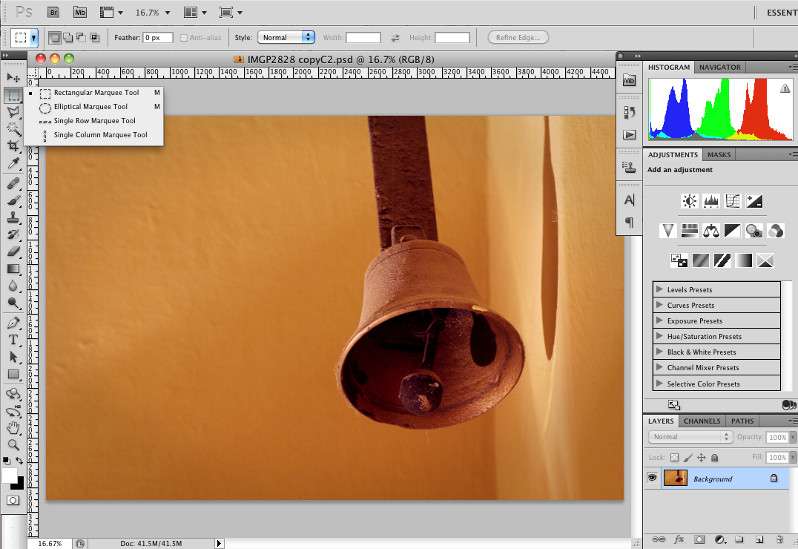
The Marquee tool is the second icon in the tools palette and by default is set to the Rectangular Marquee. However, you should see that there are more options available as represented by the little arrow head at the bottom right of the icon. If you click and hold the icon, you will see a fly-out menu appears that shows you can also select an Elliptical Marquee, a Single Row Marquee or a Single Column Marquee.
How Do You Use the Marquee Tool?

With the Rectangular and Elliptical marquees, you click and drag over your image and you will see a selection outline of ‘marching ants’ is drawn over the area that you select. If you hold the Shift key down as you drag, the selection will be constrained to a square or perfect circle, depending on which Marquee tool is active. Holding the Alt or Option key as you drag will cause the selection to be drawn from the center outwards. By default, selections are drawn from a corner.
The Single Row and Single Column marquees work a little differently, as you only need to click on your image on the point that you want the selection to pass through. This results in a one pixel selection being made across your image from edge to edge. This can be useful if you ever want to draw a thin straight line as you can easily fill the selection.
You can cancel a selection by going to Select > Deselect or pressing Control+D or Command+D depending on your operating system.
What Selection Modes are Available?
When you select one of the Marquee tools, you will see that the tool options bar displays a number of features that you can set. The first that we’ll look at are the selection modes which are the four icons made up of a single or pairs or rectangles.
The default is New Selection which will always replace any existing selection with the new one. However, one of the strengths of the Marquee tool is the ability to create more complex selections by combining selections. The other three options are:
- Add to selection – allows you to make multiple selections which can be combined or separate.
- Subtract from selection – deletes the area of any existing selection that intersects with a new selection.
- Intersect with selection – produces a new selection that encompasses just the area that is intersected by two selections.
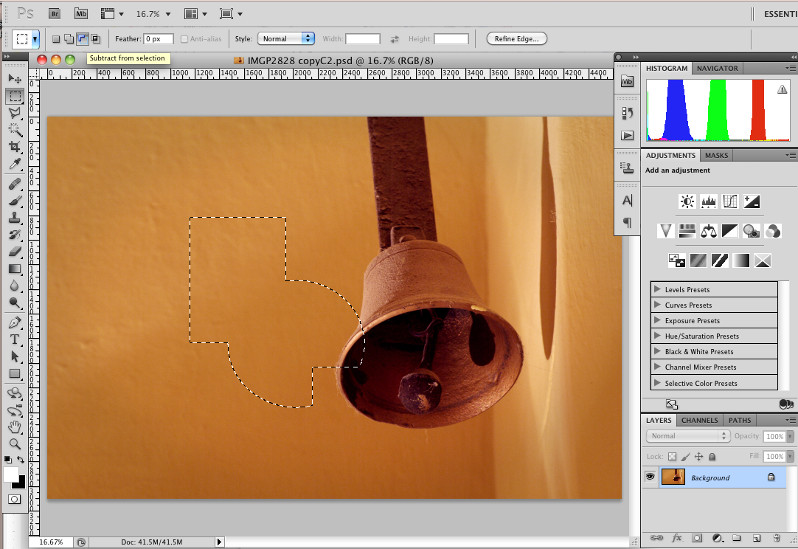
If any of those don’t make sense, give them a try and you’ll soon see how they produce different results. In the screen shot, I made a rectangular selection, then switched to the Elliptical Marquee tool and set the mode to Add to selection and then returned to the Rectangular Marquee and with the mode set to Subtract from selection, removed part of the ellipse.
One last note, if you ever want to reposition a selection, just switch back to the New selection mode and then you can click and drag your selections to a new position.
How Do You Feather a Selection?
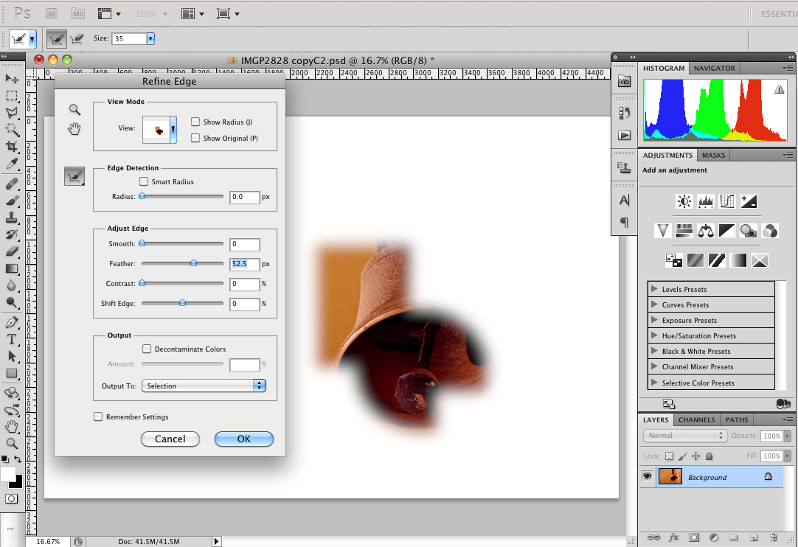
You have several options for feathering your selections. Once you’ve made a selection, you can go to Select > Modify > Feather and set it there. Before drawing a selection, you could set a Feather amount in the Feather input box. However, the most flexible option is to click the Refine Edge button towards the right of the tool options bar. This allows you make changes and see the effect before committing to them. As you’ll see in the screen shot, there are also other options available that you can use to adjust how your selection’s edge works.
How Do You Constrain the Size/Proportions of a Selection?
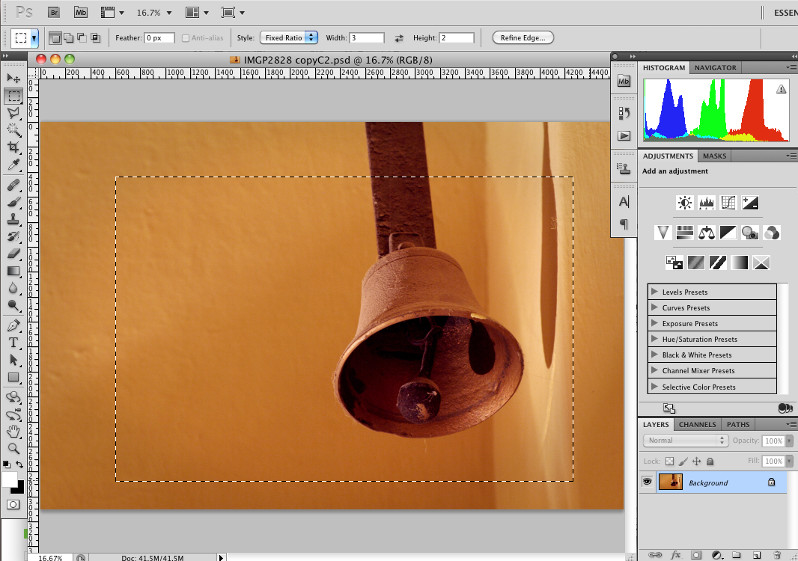
If you need to have a selection of a fixed size or proportions, you can change the Style drop down menu to Fixed Ratio or Fixed Size. In the screen shot, you should see I used Fixed Ratio and set the width to three and the height to two, before making my selection. With Fixed Size, you would specify a size in pixels and you only need to click on the image to automatically have a selection of that size applied.
How Do You Apply a Vignette Using the Marquee Tools?
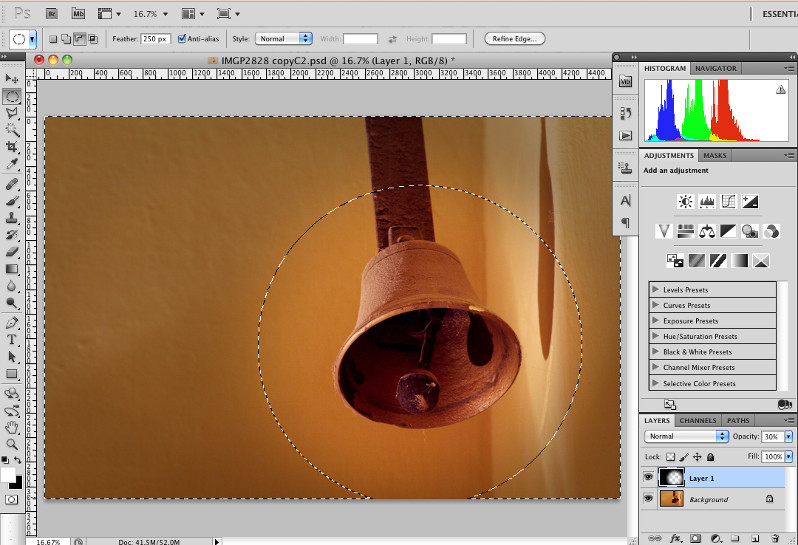
In the screen shot, you can see that I’ve added a dark vignette centered on the door bell. To achieve this, I fist drew a rectangular selection that encompassed the entire image. I then switched to the Elliptical Marquee tool, set the mode to Subtract from selection and Feather to the max setting of 250px, before drawing an ellipse around the bell. Next I added a new layer by going to Layer > New > Layer, followed by Edit > Fill and set the Use drop down to Black. Finally I set the Layer Opacity to 30%, though that’s darker than I’d normally choose so that the effect is more obvious.
Conclusion
While the Marquee tools may seem quite basic, you can achieve a surprising amount with them and many of the options are also available with more advanced selection tools in Photoshop.
See more articles in the Photo Editing 101 series.

