Free Photography Bundle ($180 value): PS actions, LR presets, photo overlays, & print templates!
Get it here.
This article is part of our series Photo Editing 101 by Ian Pullen. This series will cover all of the basics of using Photoshop for editing photos. If you’re just getting started with Photoshop or photo editing, or if you’re looking to improve your skills in this area, this series will provide an excellent foundation. If you want to make sure that you don’t miss future articles you can subscribe to our newsletter or follow us on Twitter, Google+, or Facebook. You can also find the articles that have already been published by visiting the Photo Editing 101 course page.
The Photo Filter Adjustment Layers in Photoshop can be a quick and easy way to change the mood of a photo or correct for a color cast. They’re based on traditional filters that used to be used in the days of film photography, but with Photoshop you have a far greater range of filter types available to you.
You can choose to use some of the standard filters at the default density or roll your own. This is an easy tool to get used to and I’m going to quickly run through the various features available to you that you can use them to adjust your own photos and show a few examples of how the settings can produce different effects.
How Do You Add a Photo Filter Adjustment Layer?
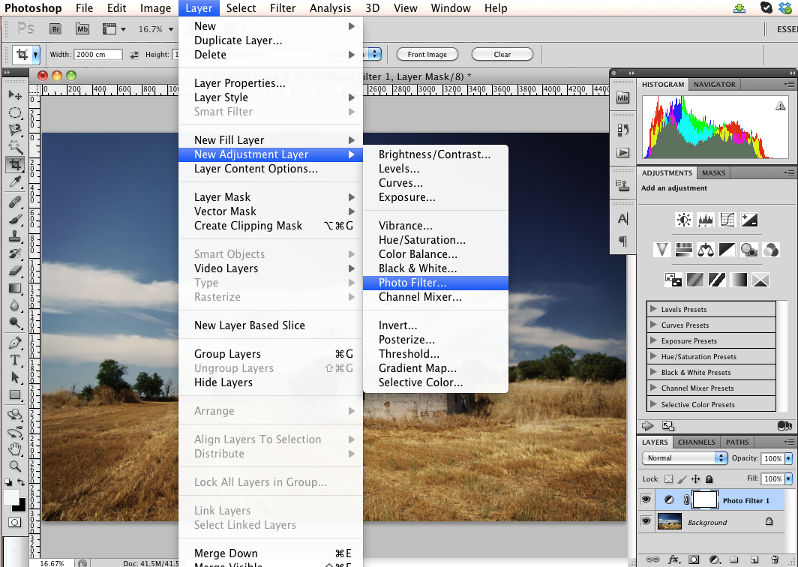
If the Adjustments palette is already open, you can just click on the small camera icon towards the right of the second row. Alternatively, go to Layer > New Adjustment Layer > Photo Filter.
How Do You Change the Filter Applied?
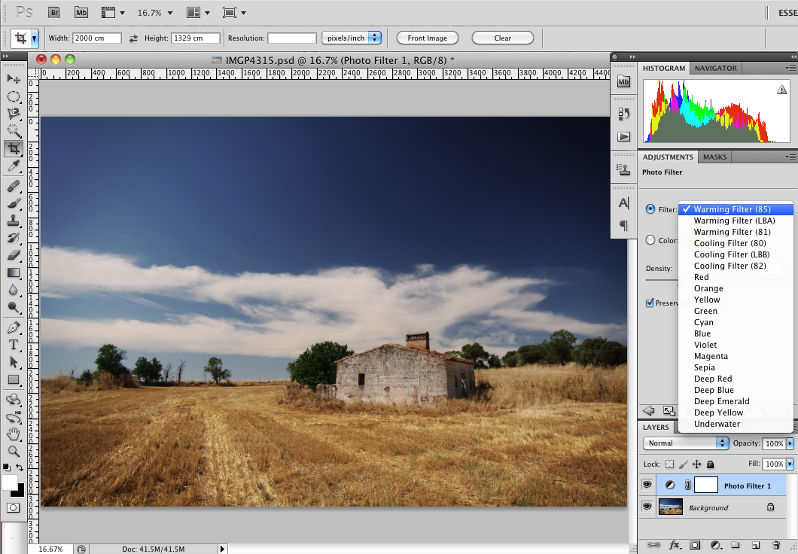
Changing the filter is as easy as clicking on the drop down menu next to the Filter radio button and selecting from the list. If the drop down is grayed out and inactive, just click the Filter radio button.
Interestingly, unlike many of the other Adjustment Layers, you can’t save your own filter settings so that you can reapply them again to other photos.
How Do You Set Your Own Filter Color?
While there is a good range of different filters in the drop down list, if you want to get creative, you can specify your own color for the filter.
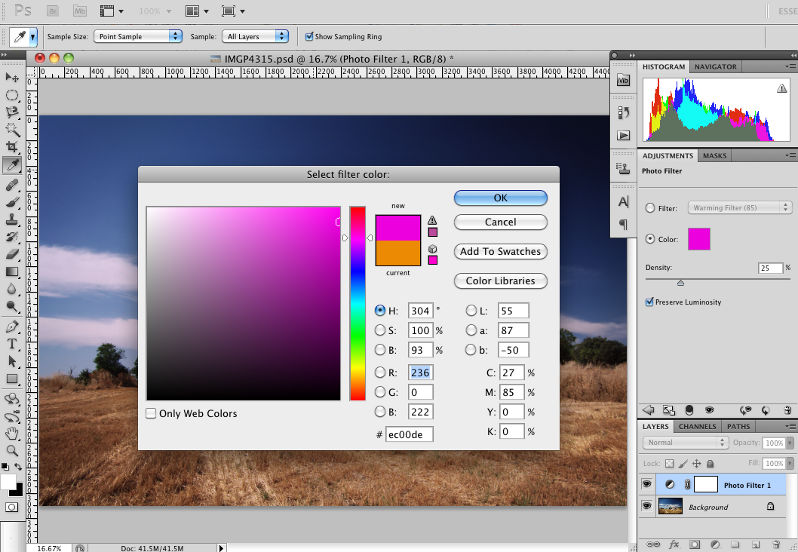
To do this, just click on the box of color below the drop down menu and a new dialog will open labelled Select filter color. This presents the familiar Photoshop color picker and as soon as you select a new color, the the Color radio button becomes active and the drop down menu is grayed out. You can see the effects of your selected color on your photo in real time.
How Do You Adjust the Strength of a Photo Filter Adjustment Layer?
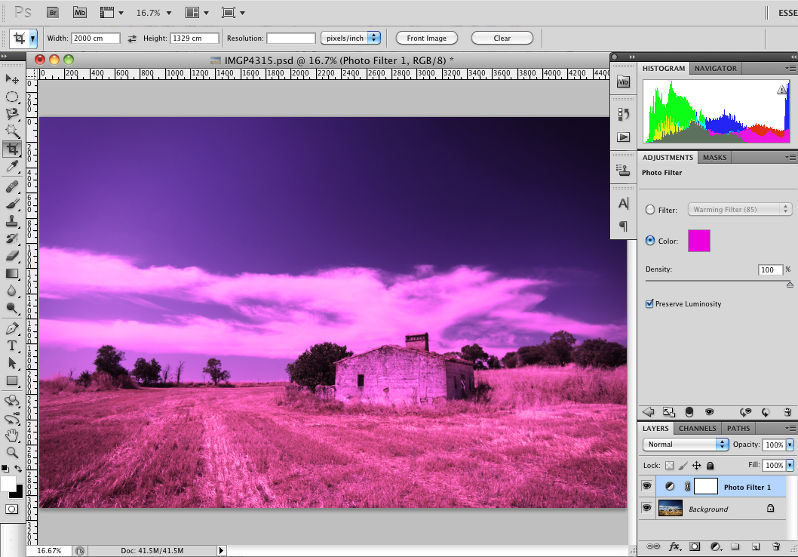
You can easily control the strength of the filters using the Density slider. This defaults to a setting of 25%. Dragging this slider to the right will increase amount of the new color added to the photo, while dragging to the left will reduce the effect, producing more subtle results.
As you can see in the screen shot, dragging too far to the right will produce unnatural effects that will be best suited for more creative results.
What Does the Preserve Luminosity Check Box Do?

The last of the controls is the Preserve Luminosity check box and when active, this maintains the overall brightness of your photo. You can see in this screen shot how the image looks darker and flatter in comparison to the previous screen shot and the only difference between them is that the second one has Preserve Luminosity turned off.
Why Would You Use Photo Filter Adjustment Layers?
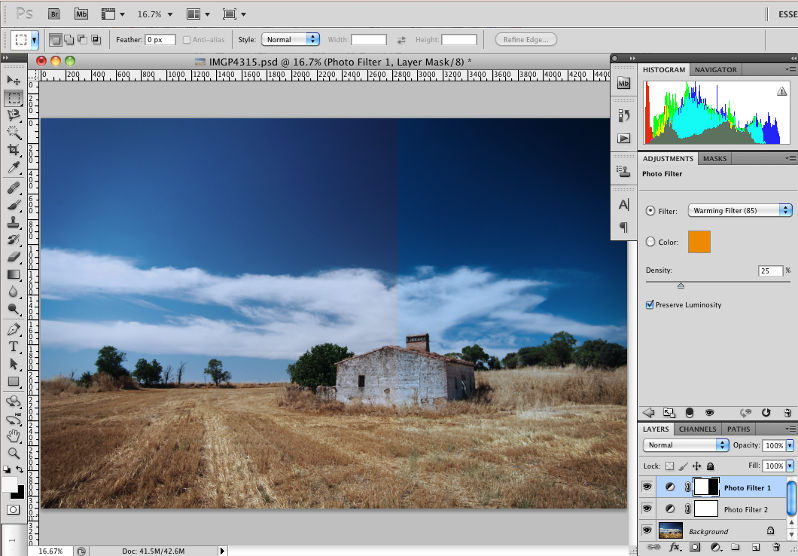
As I touched on earlier, Photo Filter Adjustment Layers can be useful for correcting images and adding creative effects. In the screen shot above, I’ve added a cooling filter to the image to simulate the slightly blue color cast that might occur from using a tungsten white balance in daylight. I’ve then added a warming filter to offset the effect. I’ve only applied the warming filter to the left hand side and you should see how the clouds on that side are nearer to white than those on the right, which have a cyan color cast.
You can correct for most color casts by adding a filter of a color that is the complementary color of the color cast. If you’re not familiar with complementary colors, just do an image search for ‘color wheel’ on Google or Bing and you’ll see how complementary colors are arranged opposite to each other on the wheel.
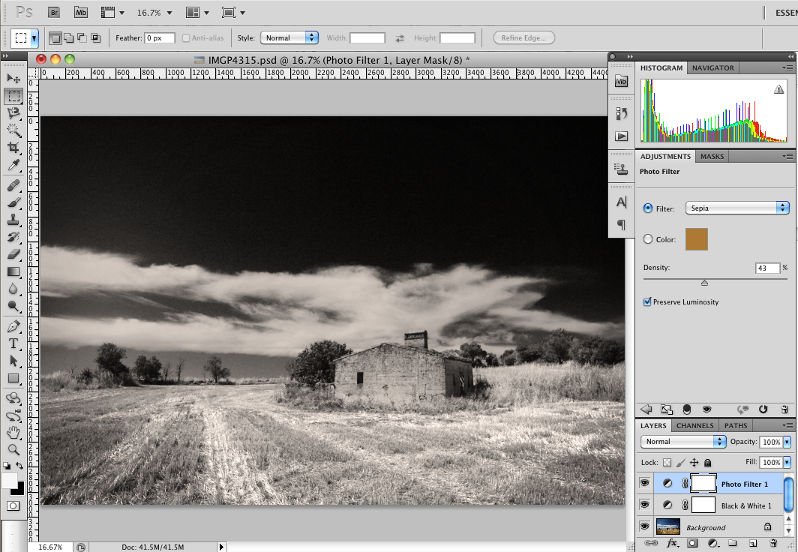
Photo Filter Adjustment Layers are also a great way for tinting black and white photos. In this screen shot, I’ve added a Black and White Adjustment Layer set to the Infrared preset and then added a a Photo Filter layer, using the Sepia preset. You could also specify your own color for this tint if you want a different feel.
Conclusion
Just as with the traditional film equivalents, Photo Filter layers in Photoshop can be used for correcting your images and for more creative uses. Adding a colored tint using a Photo Filter can completely change the mood of an image and done subtly, the effect may not even be noticed by many viewers.
See more articles in the Photo Editing 101 series.

