Free Photography Bundle ($180 value): PS actions, LR presets, photo overlays, & print templates!
Get it here.
This article is the first in our series Photo Editing 101 by Ian Pullen. This series will cover all of the basics of using Photoshop for editing photos. If you’re just getting started with Photoshop or photo editing, or if you’re looking to improve your skills in this area, this series will provide an excellent foundation. If you want to make sure that you don’t miss future articles you can subscribe to our newsletter or follow us on Twitter, Google+, or Facebook.
For new users of Adobe Photoshop, gaining an understanding of how layers work is arguably the most important thing to learn first.
The Layers palette offers a number of features and tools that makes it very powerful. Furthermore it also plays host to the various Adjustment Layers that make it easy to edit your photos in different ways and combine the effects in exciting ways.
Where Do You Find the Layers Palette?
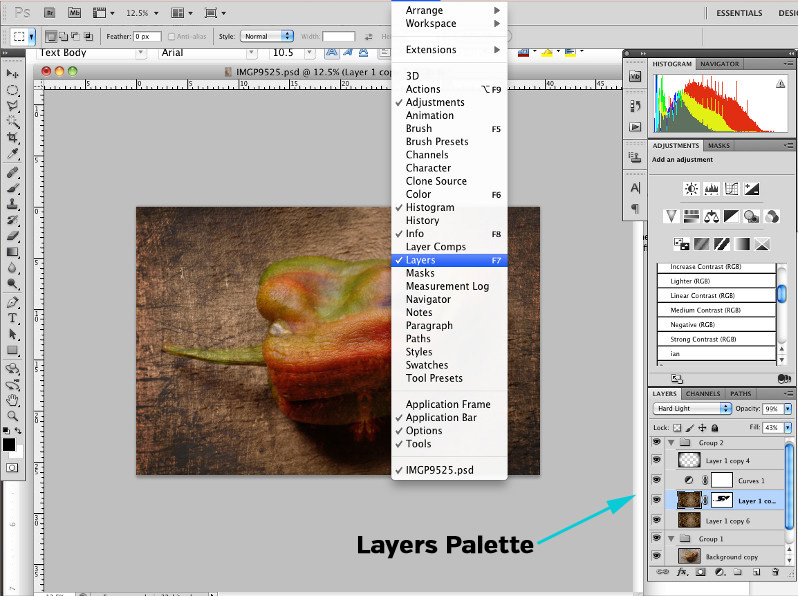
If you can’t see the Layers palette, just go to Window > Layers to open it.
What Are Layers?
The easiest analogy for layers is to think of each layer as being like a sheet of acetate. A sheet could contain a solid image that covers the complete sheet and hides all other sheets below it. However, a sheet could be semi-transparent or contain an image that doesn’t cover the whole sheet, both of which would allow layers below to show through and combine to form a composite image.
In the screenshot above, you can see a heavily stylized image that is a composite of several different layers that form together to create the final complete image.
There are several important features at play here to form the final image at the top of the page, including an Adjustment Layer. As we look at the palette and the features included, I’ll also explain some of the features that were used to help create the final image. I won’t touch on everything available here, as the various features are very powerful and offer users an extensive range of options that would require a lot of detail to cover everything. It’s also worth noting that some features, such as Layer Styles, may not be so relevant to photographers.
Anatomy of the Layers Palette
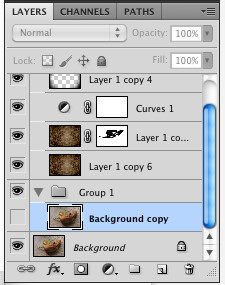
The main body of the Layers palette is simply a list of the different layers that form an image, with layers higher up the list being higher up the stack of layers in the image. If the top layer was completely opaque, no other layers would be visible at all.
To the left of each layer is a box containing a little eye icon and you can click this to show or hide a layer.
At the top and bottom of the palette are several tools and we’ll have a quick look at them and give you a general introduction.
The Bottom Bar

Starting from left to right, the little buttons in the bottom bar do the following:
- Link Layers allows you link layers together so that if you move or resize one, any linked layers are also resized or moved. You need to hold down the Shift key in order to select more than one layer and this button will be inactive until multiple layers are selected.
- The FX button offers a menu of different layer styles and while these can produce creative results, most photographers probably won’t venture into this territory.
- The mask button allows you to apply a layer mask to the active layer, which is a flexible way to hide part of a layer without permanently deleting it. We’ll cover masks in more detail later in this series.
- The fill/adjustment layer button allows you to add special types of layers to an image. Adjustment layers will have most relevance to photographers and these allow you edit your photo without actually changing your base image.
- The layer groups button adds folders to the palette that you can place layers within. If you’re working with lots of layers, this can make it much easier to manage your work.
- The new layer button will add a new blank layer to your document when clicked. If you click on a layer in the palette and drag it onto this button, a duplicate of the layer will be added to the document. In the screen shot, you can see that I’ve added a new Layer Group and placed a copy of the background layer and a new blank layer into the group.
- Finally, the last button deletes the currently active layer. Alternatively, you can drag a layer onto this button to delete it.
The Top Bar
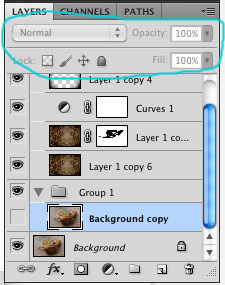
The tools in the top bar of the Layers palette generally affect how the pixels of the active layer will interact with the layers below it.
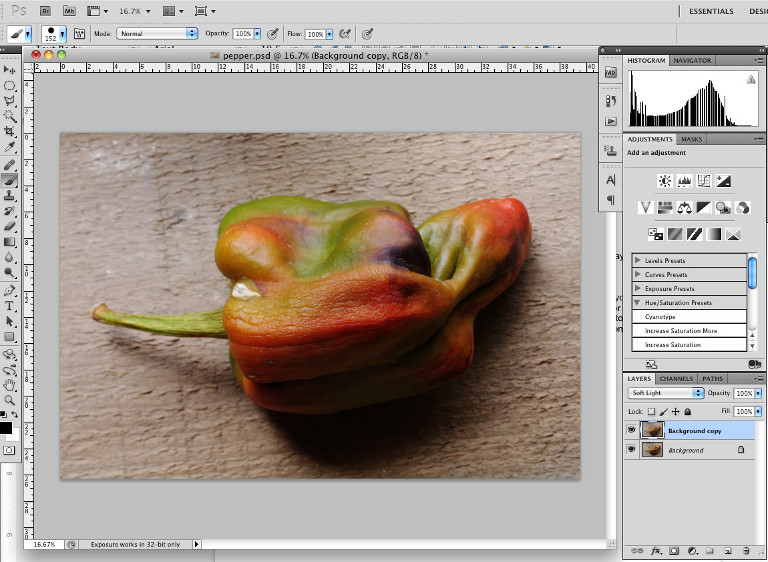
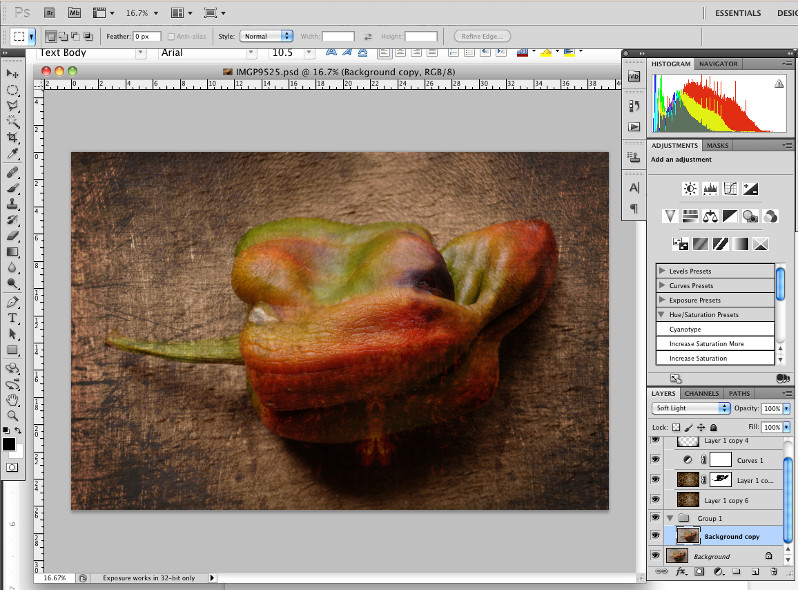
- There’s quite a bit of science behind how Blending Modes operate, but thankfully you don’t need to understand that to make effective use of them. The quickest way to get a feel for these is to open an image, duplicate the background layer and then change the mode of the top layer to see the effect that it has. In the screen shot above, I’ve used Soft Light to increase the contrast of the photo.
- Opacity/Fill appear to do the same thing in most cases, but they do differ in one key way. What they do the same is to reduce the opacity of a layer so that layers below can show through. You can either type a new value into the box or click it and drag the slider. The one way they differ is if you have applied a layer style to a layer. In this case the Opacity control will affect the whole layer, including Layer Styles, but the Fill control will not affect any Layer Styles.
- Lock has several different options. Locking transparent pixels will mean that you can only edit opaque and semi-opaque pixels, leaving a transparent background unaffected. Locking the image pixels will stop you editing any pixels, whether transparent or otherwise. The lock position option stops you moving a layer to a new position and the lock all button locks everything to stop you from editing a layer in any way.
Conclusion
Because of the power and breadth of features on offer through the Layers palette, this has been a rather cursory look at it. However this is an important foundation for any photographer looking to use Photoshop and a sound understanding of the Layers palette will be essential to making the most of your photos in post production.

