Free Photography Bundle ($180 value): PS actions, LR presets, photo overlays, & print templates!
Get it here.
This article is part of our series Photo Editing 101 by Ian Pullen. This series will cover all of the basics of using Photoshop for editing photos. If you’re just getting started with Photoshop or photo editing, or if you’re looking to improve your skills in this area, this series will provide an excellent foundation. If you want to make sure that you don’t miss future articles you can subscribe to our newsletter or follow us on Twitter, Google+, or Facebook. You can also find the articles that have already been published by visiting the Photo Editing 101 course page.
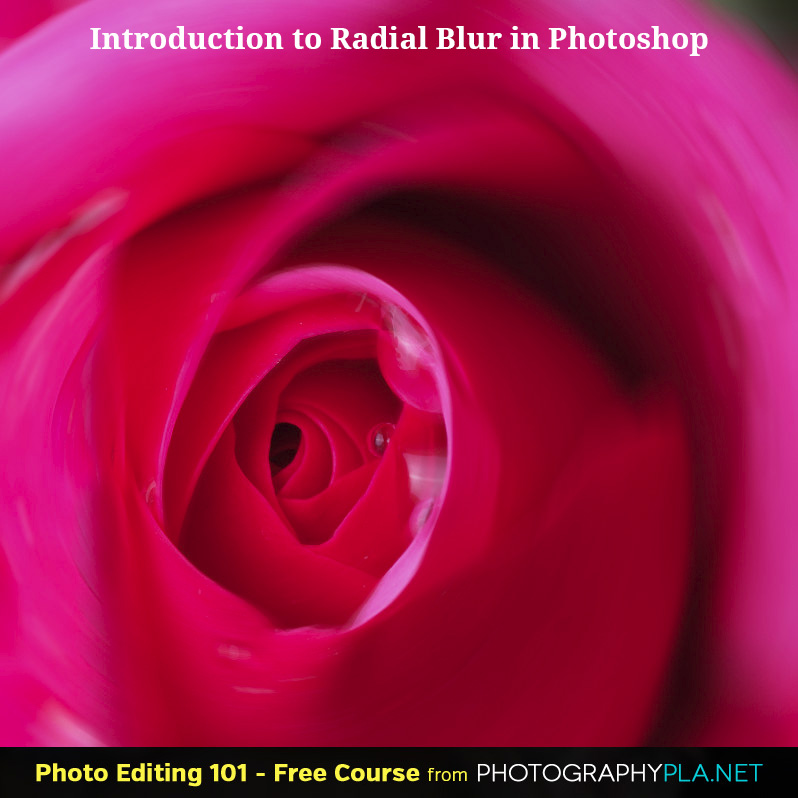
Photoshop’s Radial Blur filter is arguably two filters in one. Unsurprisingly, it will apply a spin type blur that looks as if the image is rotating around a central point. However, it also allows you to apply a zoom effect that is similar to zooming a lens during an exposure.
Both types of blur lend themselves well to creative effects and they can be used to lead the eye to the main subject. In the next few steps, I’ll introduce you to the basic controls and show how you can use these filters with your own photos.
Should You Use Smart Objects with Radial Blur?
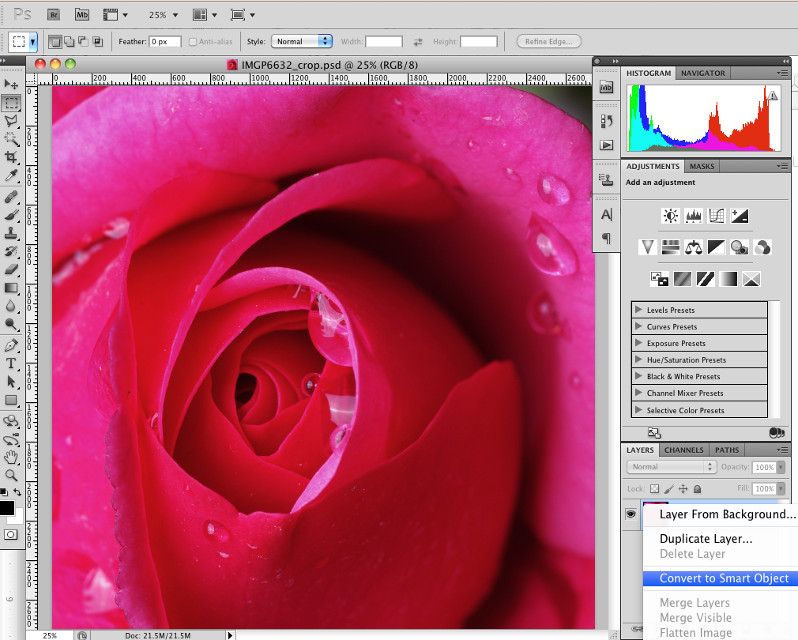
By default, Radial Blur is a destructive tool, meaning that once you apply it to a layer, that layer is changed and the only way to undo it is to go back in History – not an option once you’ve closed your file. If you convert your photo to a Smart Object, any filters that you apply continue to be editable and you can even delete them completely at any time. In the Layers palette, right-click on the Background layer and select Convert to Smart Object.
How Do You Add a Radial Blur Filter?
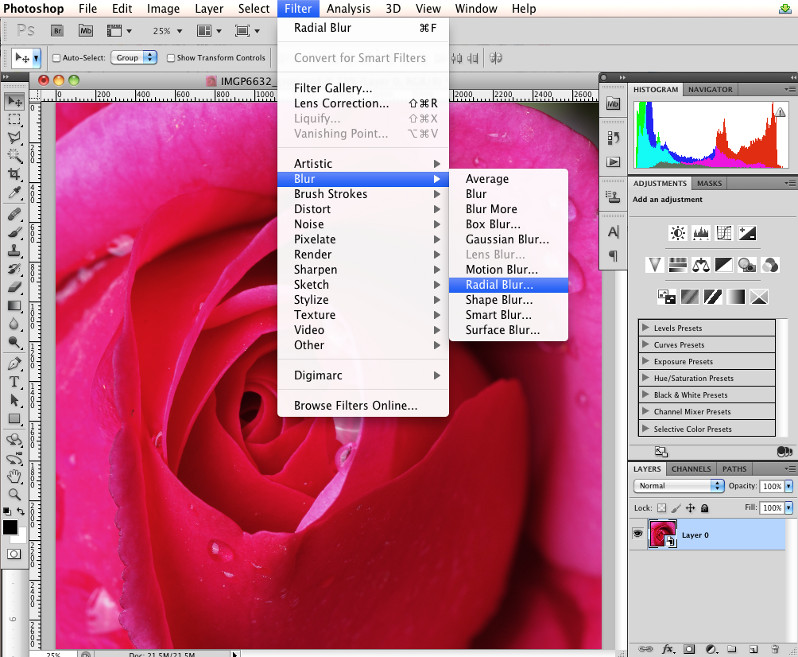
To add a Radial Blur filter, just go to Filter > Blur > Radial Blur and you’ll see the dialog open. If you’re using a Smart Object, you can click OK at this point and you’ll see a new Radial Blur entry added to the Layers palette. Double-click the new entry and it will reopen the Radial Blur dialog.
What Does the Amount Slider Do?
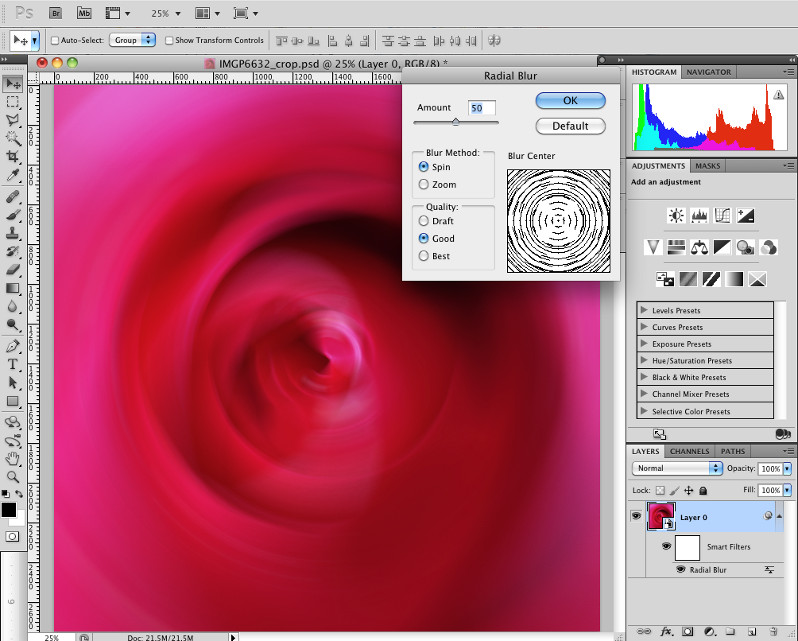
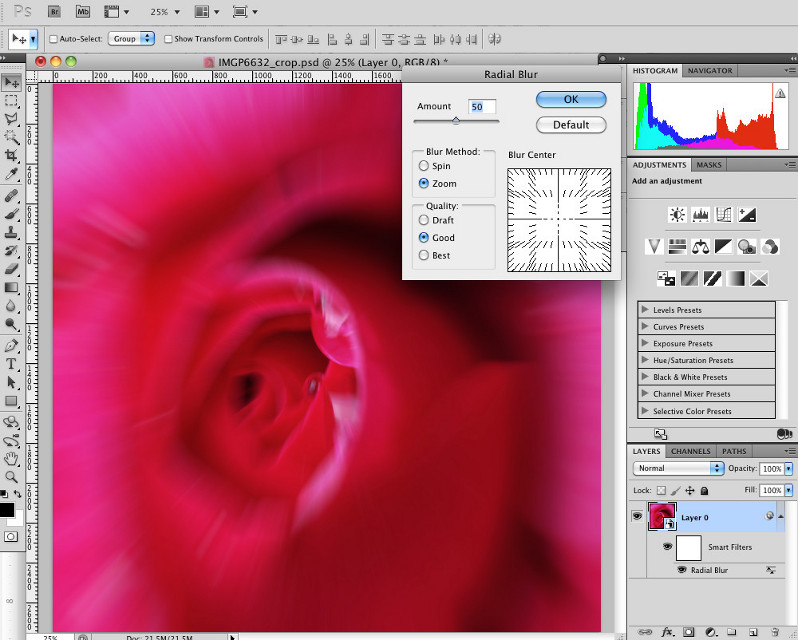
The Amount slider is a simple control for setting the strength of the blur that you’re applying. The higher the number, the greater the amount of blur that is applied and you can see a graphical representation of your changes in the Blur Center graphic. By default, it is set to 10, but in the screen shot, you can see the effect of it when set to 50.
What Do the Blur Method Controls Do?
As I mentioned earlier, there are actually two different types of blur that can be applied with the Radial Blur filter and you use the Blur Method radio buttons to select the type that you’re applying. The Spin blur is the one that makes the image appear to be rotating around a point, while the Zoom method blurs the image towards the center point. When you switch between them, you’ll see that the Blur Center graphic changes appearance. The screen shot shows the image with the method changed to Zoom and the amount still set to 50. The difference is quite obvious when compared to the previous screen shot.
What Does the Quality Setting Do?
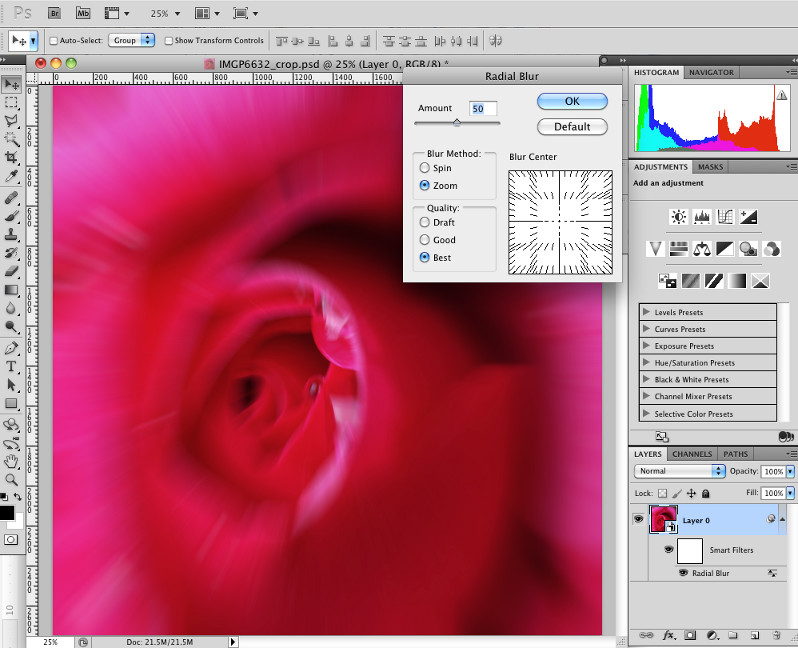
There are three quality settings and these affect the way that the blur is calculated. If you’re using a less powerful computer, then setting this to Draft should make the filter apply a bit quicker and this is a good way to experiment with different settings to see what works best. When you’re happy with the result, you can then switch the Quality setting for the final effect. Obviously Best will give you superior results, but if you’re using the image online or at smaller sizes, Good will often be sufficient – can you see any difference between this screen shot and the previous one? However, unless you really are seeing a time problem when applying the filter, you may as well select Best for final pieces of work.
What Does Blur Center Do?
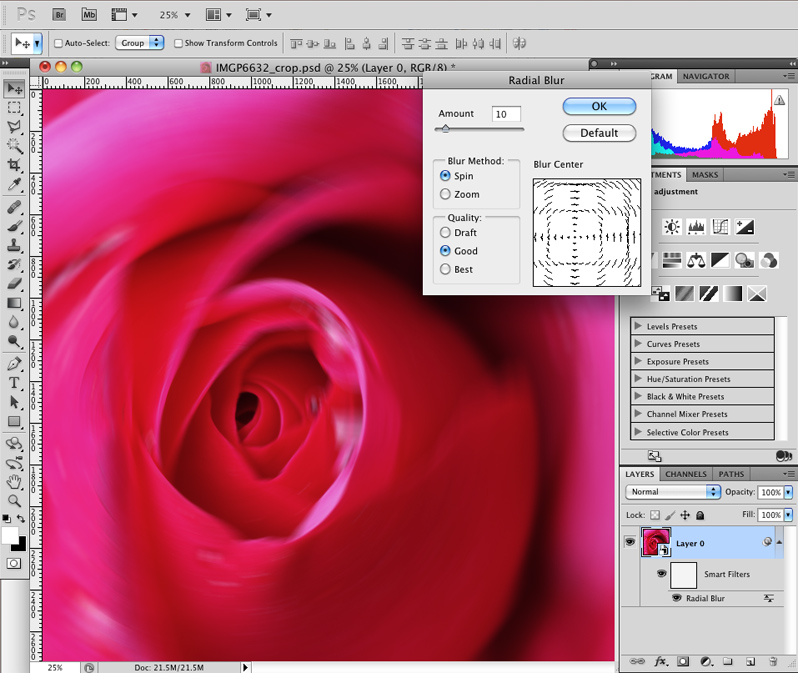
To an extent, the Blur Center graphic is the nearest thing that the Radial Blur filter has to a preview, showing you a representation of direction and strength. It’s main role though is to adjust the center point that the filter focuses on. Just click and drag on the graphic and you’ll see the center point can be easily repositioned. You may find you need to make a few attempts to get the position exactly as you want. In the screen shot, you can see that I moved the center over the heart of the rose meaning this was more in focus than previously.
Conclusion
The Radial Blur is a nice creative tool to use to produce soft and slightly abstract results with your photos. You may also want to try experimenting with masks at the center point to increase the area of sharp focus. The first image on this page had a feathered mask added to the filter and you can see that the innermost water drop has remained in focus, unlike in the last screen shot on this page.
See more articles in the Photo Editing 101 series.

