Free Photography Bundle ($180 value): PS actions, LR presets, photo overlays, & print templates!
Get it here.
This article is part of our series Photo Editing 101 by Ian Pullen. This series will cover all of the basics of using Photoshop for editing photos. If you’re just getting started with Photoshop or photo editing, or if you’re looking to improve your skills in this area, this series will provide an excellent foundation. If you want to make sure that you don’t miss future articles you can subscribe to our newsletter or follow us on Twitter, Google+, or Facebook. You can also find the articles that have already been published by visiting the Photo Editing 101 course page.
Selective Color Adjustment layers in Photoshop allow you to make subtle corrective adjustment to your photos, as well as giving you the power to make more creative edits that can radically change the appearance of a photo.
Selective Color Adjustment layers are a bit like the Hue control from Hue/Saturation Adjustment layers, but they do differ in some important ways.
Firstly, while Selective Color layers allow you to make adjustments to the same range of hues, they also allow you add color to white, gray and black areas within your photos. Secondly, while Hue/Saturation only allows you to switch hues and then adjust the saturation and lightness, Selective Color allows you to add and subtract color values, giving a finer grained control over the resulting hue. Finally, while Hue/Saturation allows you to specify the number of hues that you operate on, either expanding or reducing the range of hues that are included within the six different color ranges, Selective Color doesn’t offer this degree of control.
Let’s tale a look at the controls available with Selective Color Adjustment layers and how we can use them to adjust images in different ways.
How Do You Add a Selective Color Adjustment Layer?
There are a couple of ways to add a layer to your photo. If the Adjustments palette is open, then just click on the icon that looks like a rectangle split into four triangles. Alternatively, go to Layer > New Adjustment Layer > Selective Color. You’ll now see a new layer added to the Layers palette – just go to Window > Layers if you can’t see the palette.
What Do the Presets Do?
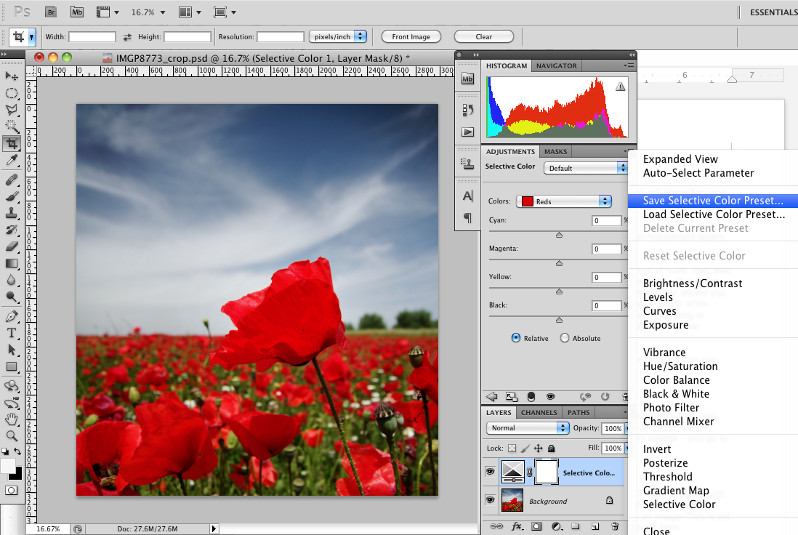
As with many Adjustment Layers, the first thing on offer is a drop down menu that allows you to apply a preset adjustment to an image. This is set to Default at first and if you’ve never saved any settings, there will be no presets to choose from. You can easily save your own presets by clicking the small icon at the top right of the Adjustments palette and clicking Save Selective Color Preset from the context menu that opens. This is a great time saver if you find yourself making similar edits to lots of photos.
How Do You Make a Corrective Adjustment to a Photo?
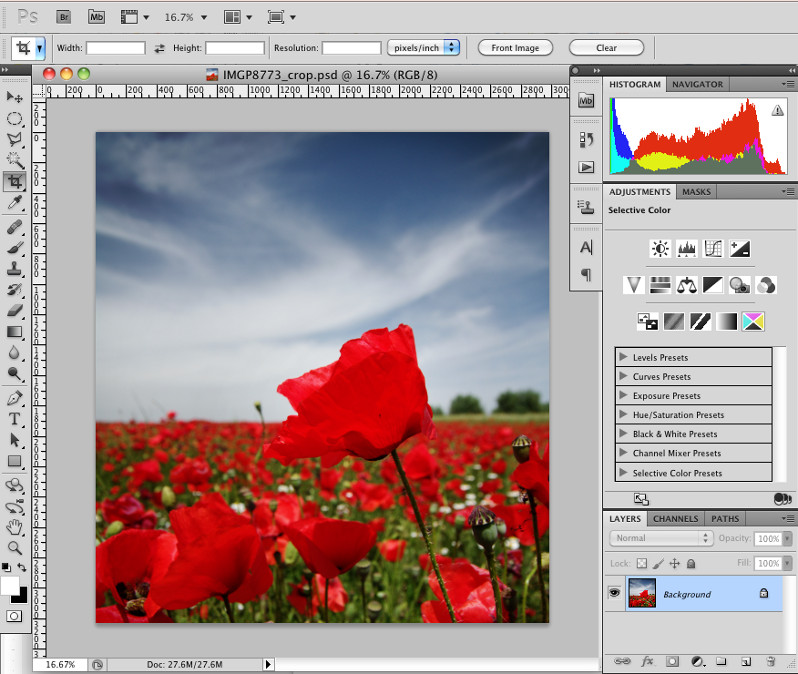
As I’ve said, you can use Selective Color Adjustment layers to make corrective adjustments to your photos to change the mood of a photo. I’m going to reduce the intensity and richness of the sky while leaving the poppies in the foreground untouched.
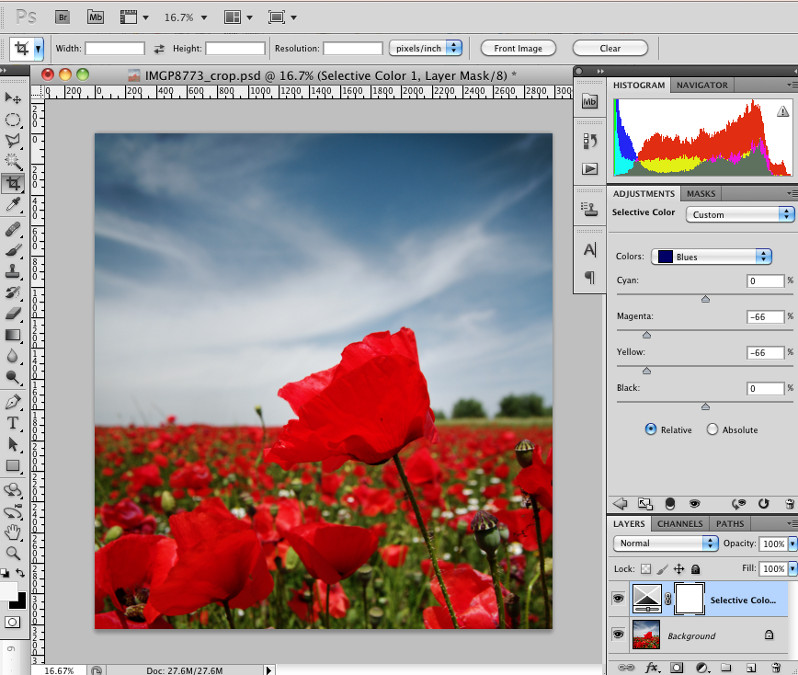
As I’m targeting the sky, I will select the Blue and Cyan channels from the Colors drop down menu for my edits.
In the screen shot above, you can see that I’m working on the Blue range. You’ll have also worked out by now that the adjustment sliders operate on the CMYK values that are used in most printing processes. This tool works the same regardless of whether your photo is in RGB or CMYK mode, however. To make the blue sky less deep, I reduced the Magenta slider, dragging it towards the left. Sliding to the right would increase the amount of Magenta mixed with blue pixels. That started to add a slight green tint to the sky and I offset that by also reducing the amount of yellow.
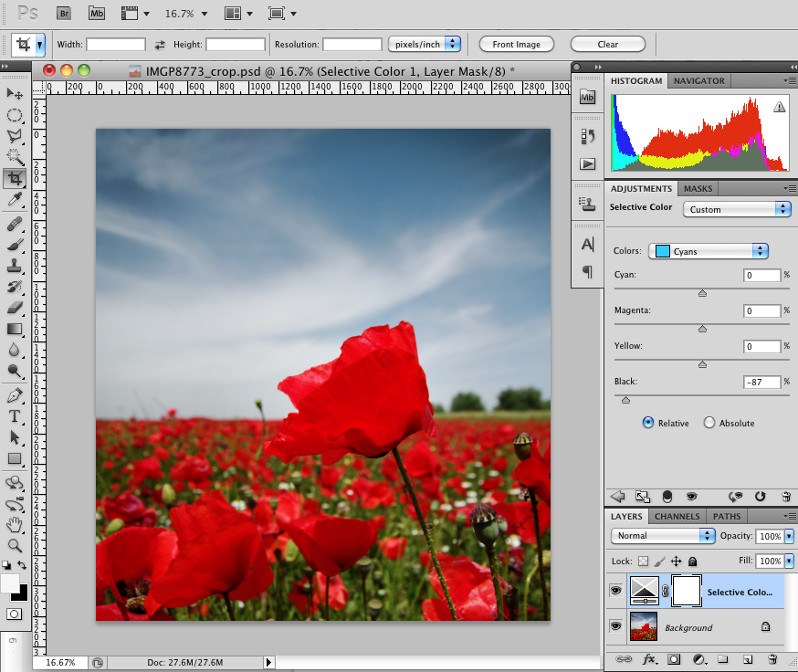
I then switched to Cyan in the drop down menu and this time just reduced the black slider to reduce the strength of the sky a bit more.
How Do You Get a Bit More Creative with Selective Color Adjustments?
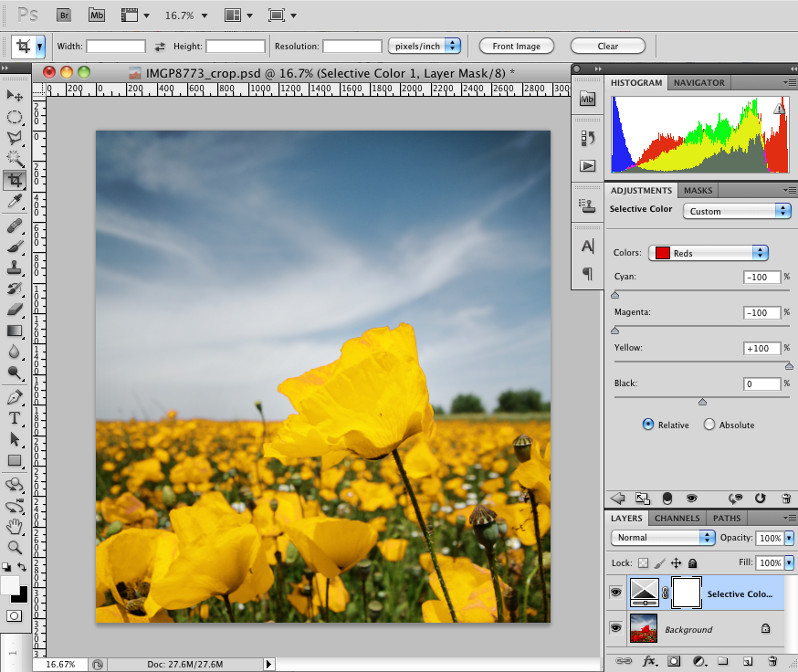
The previous adjustments changed the appearance of the photo a little, but the colors remained true to the real world. However, you can also have a bit more fun with these adjustments.
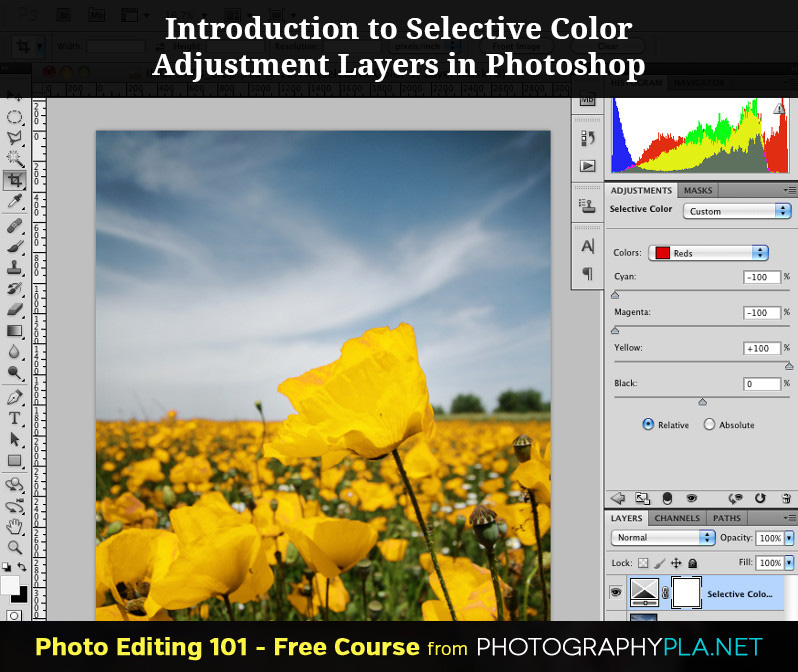
This time I switched the Colors drop down to Reds and then dragged the Cyan and Magenta sliders all the way to -100% while increasing the Yellow to +100%. Et voila, a field full of yellow poppies.
What Do the Relative and Absolute Settings Do?
Finally, I should mention the Relative and Absolute radio buttons. These change the way that your adjustments are calculated, either relative to the amount of a color present or on an absolute range of values. It’s perhaps easiest to see the effect in practice.
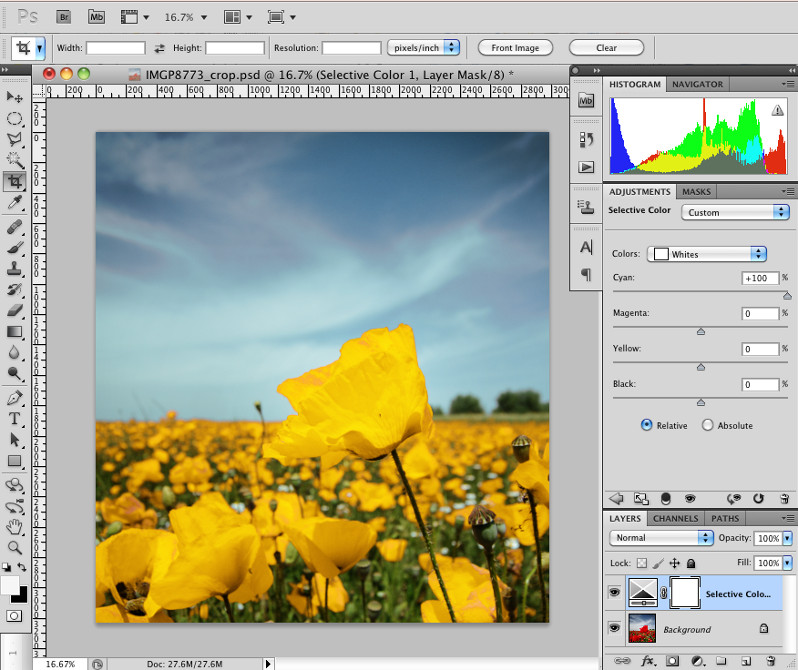
In this screen shot, I’ve selected White and have increased the Cyan value to +100%. You can see that the whitish areas of the sky now have a cyan hue. As the white areas included some cyan to start with, this new color has been calculated relative to the initial cyan values. Had the white areas been pure white, they would have remained white even with the Cyan set to +100%.
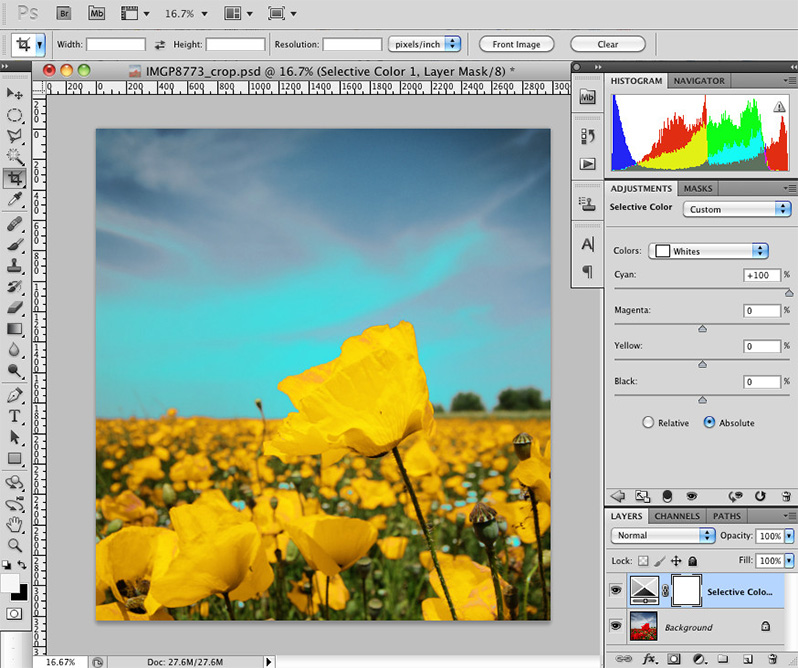
This screen shot shows the setting on Absolute. The whitish areas have now had full cyan added and this would have happened even if they had been pure white.
Conclusion
Selective Color Adjustment Layers can allow you to make naturalistic and dramatic creative adjustments to your photos. It’s worth noting however, that your mileage with this feature may vary from image to image, as the mix of colors across the complete photo changes. My example photo was well suited for this technique as the foreground and background had very different color values.
See more articles in the Photo Editing 101 series.

