Free Photography Bundle ($180 value): PS actions, LR presets, photo overlays, & print templates!
Get it here.
This article is a part of our series Photo Editing in Lightroom 101. Throughout the series we’ll cover the details of Lightroom’s library and develop modules and how you can use Lightroom to improve your own photos. As new articles are published they will be added to this page. If you don’t want to miss future articles in the series, please subscribe to our RSS feed or our email newsletter.
Most photographers love Lighroom for its ability to help with managing and organizing photos, as well as the tools in the develop module for working with tones, exposure, curves, and other basic adjustments. When it comes to touching up photos, Lightroom often takes a back seat to Photoshop. Although Photoshop does offer plenty of power and potential for editing and manipulating photos, you may find that Lightroom can actually handle most of the things that you need in your every day work as a photographer.
In this article we’ll take a look at the Spot Removal tool in Lightroom and how you can use it to touch up your photos, with no need to use Photoshop. The spot removal tool is especially helpful for working with portraits and fixing skin blemishes, but it can also be used for other purposes as well. The spot removal tool can be used in combination with adjustment brushes (for smoothing skin) to touch up portraits, and we’ll cover the adjustment brush tool in an upcoming article.
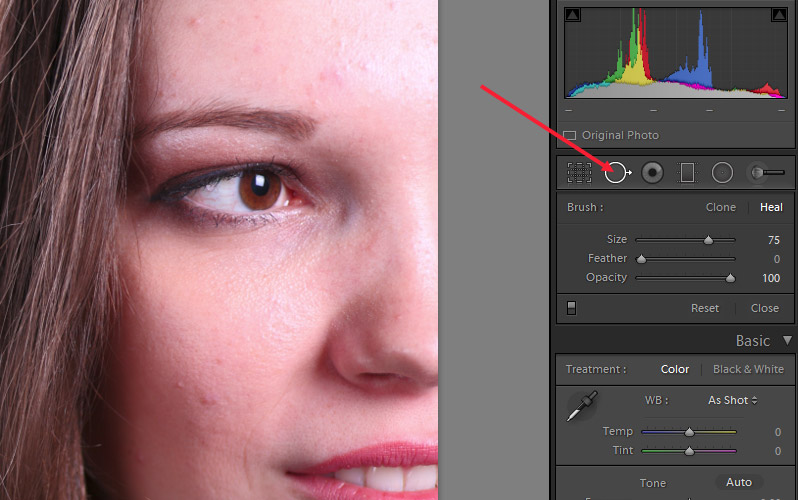
First, to get started with the spot removal tool, click on the tools icon near the top right of the develop module, or simply use the keyboard shortcut “q”.
The spot removal tool can work in two different ways: clone and heal.
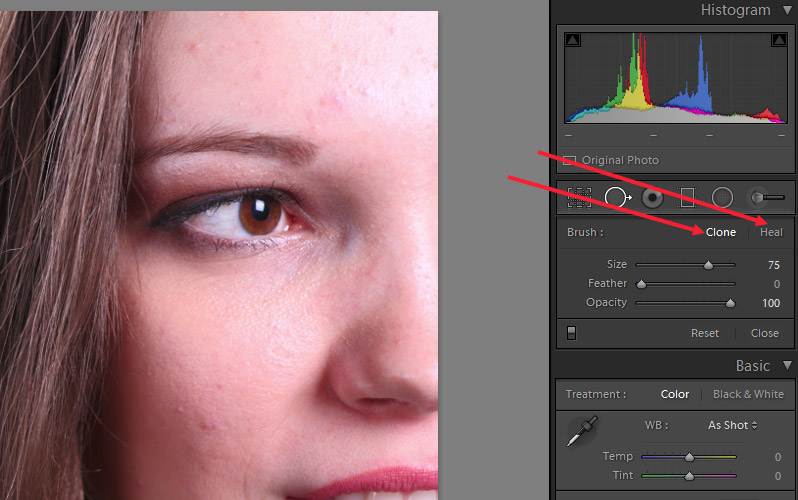
When clone is activated you will be selecting a spot in the photo that you want to fix, and then you’ll pick another spot on the photo to clone. The spot is then cloned exactly. The heal option is a lot smarter, and it is generally more appropriate for touching up skin. When the heal option Lightroom will automatically blend the tones and brightness of the spot to create a more seamless look. Let’s take a look at an example.
First, let’s start by looking at how the clone functionality works. Regardless of whether clone or heal is selected you will see 3 sliders: size, feather, and opacity.
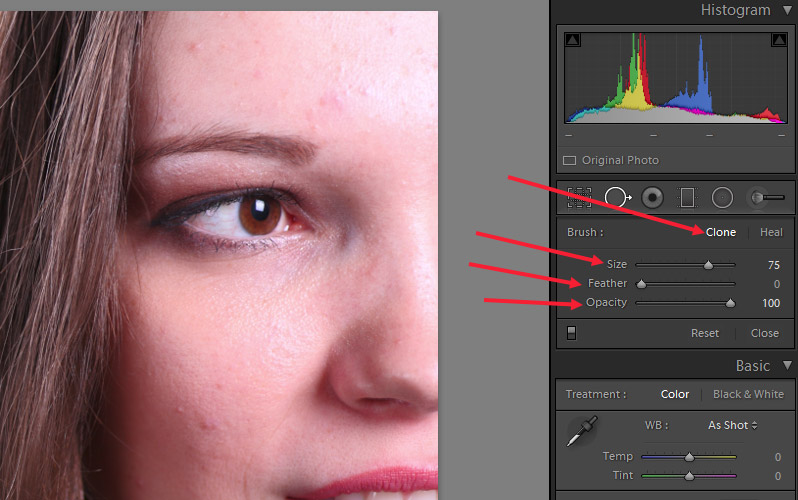
The size slider controls the size of the spot that you will be working with. Use the slider to increase the size and you’ll see that the size of the spot will increase accordingly.
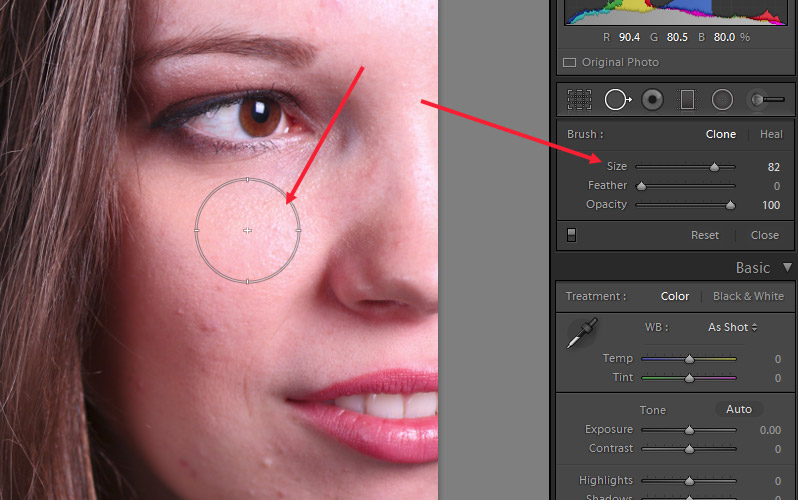
The feather slider impacts how hard or soft the edges of the spot will be. Leaving this slider at 0 will result in a hard edge, and increasing that number will make the edge softer. Opacity impacts how strong the effect can be seen. If you reduce the slider from 100 it will reduce the opacity of the effect and part of the old spot will show through. In general, for touching up skin I leave the feather at 0 and the opacity at 100.
Ok, now let’s get started by using the clone tool. First, pick the spot in the photo that you want to correct, align the circle over the spot and click the mouse.
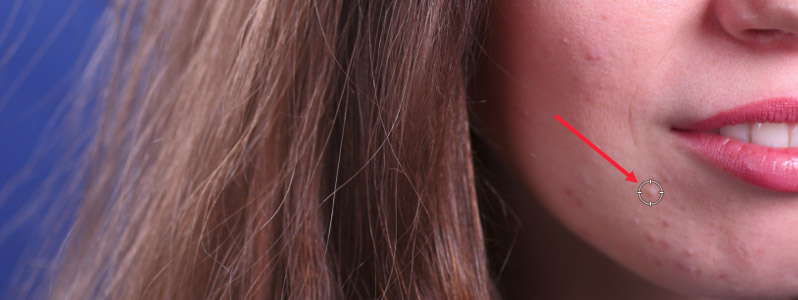
When you click the mouse it will create a solid white circle where you clicked, and it will also add a 2nd circle that is attached to it.
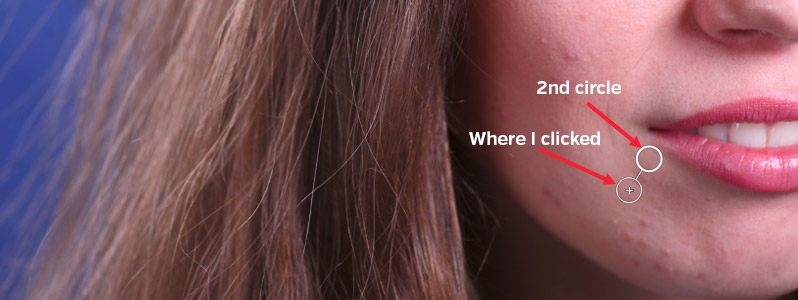
You’ll use the 2nd circle to select the area that you want to clone. Hover your mouse over the 2nd circle and you should see a hand appear. Then click and drag the circle to an area that you want to clone, so in this case a nice smooth area of skin.
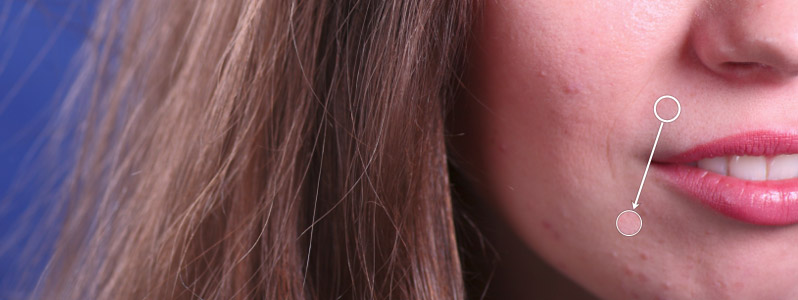
As you can see in the screenshot above, this approach doesn’t work very well. The skin tones are not equal because of shadows, so the area that I am cloning is much lighter and it causes the spot to look much worse than it originally did because of the difference in skin tone. All it is doing is taking the area in the 2nd circle and exactly cloning it in the area of the first circle. When you are touching up skin the clone option usually will not work very well for this reason.
So let’s try the healing option and see how it works. Click on healing to activate it.
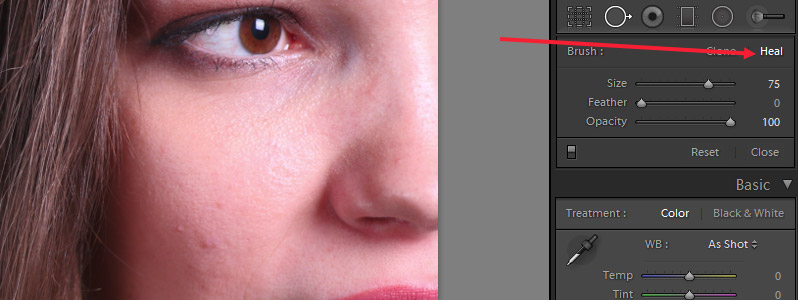
I’ll leave the sliders for amount, feather, and opacity at the same settings. To use the healing tool you will do the same thing. Select a spot that you want to fix, get the circle over the spot, click the mouse, move the 2nd circle to a smooth area of skin, and click the mouse.
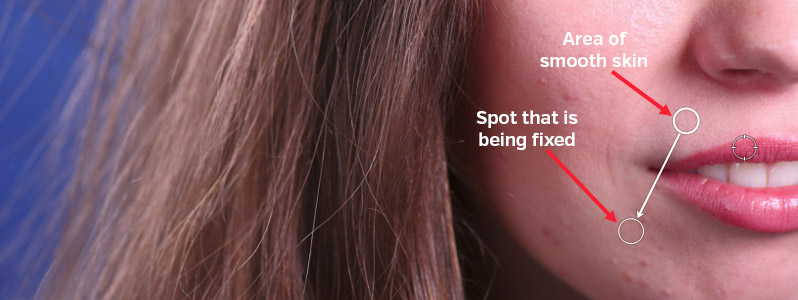
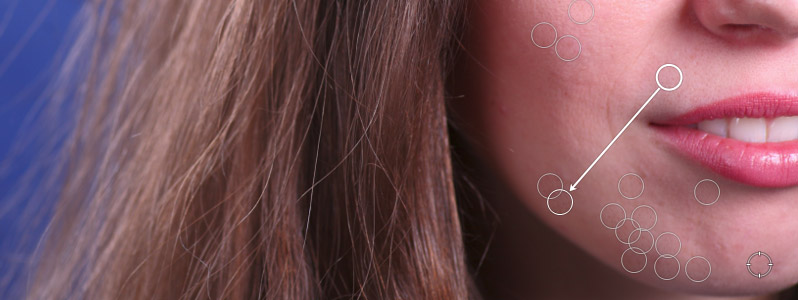
This time in the screenshot above you can see the Lightroom has automatically blended the tones so that it looks natural. This is the power of the healing option of the spot removal tool. And I can keep going by clicking more spots to heal and selecting areas of smooth skin.
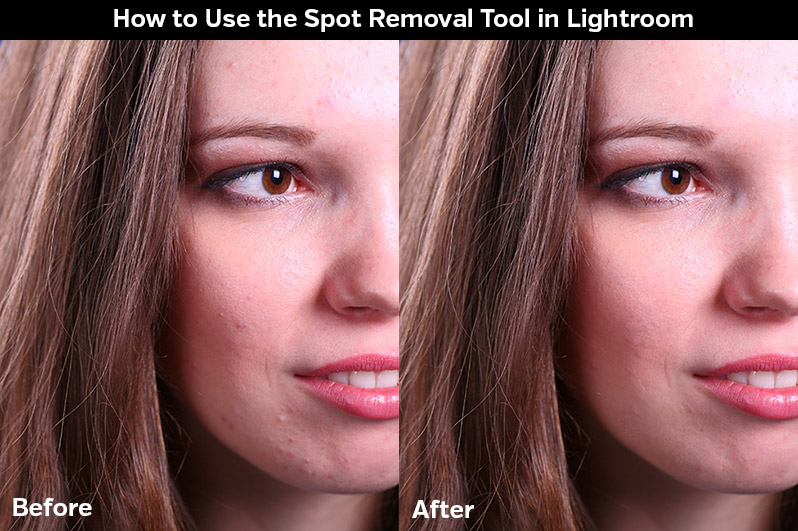
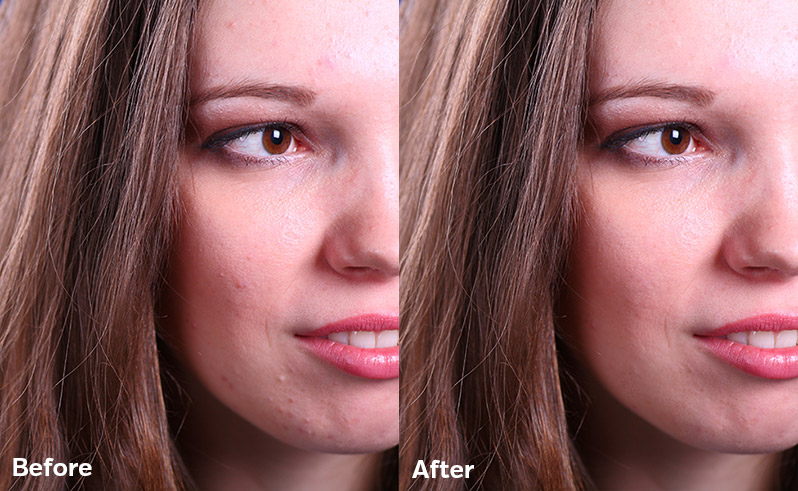
Below you’ll see a before and after photo that shows the result. If I wanted to get the best results I would also continue by using the adjustment brush for smoothing skin, but that is a topic for a future article. For now we’ll look at what we were able to accomplish with the spot removal tool.
And that covers the basics of the spot removal tool. We’ll be covering a few other tools in upcoming articles.
If you don’t want to miss the other articles in this Photo Editing in Lightroom 101 series, please subscribe to our RSS feed or our email newsletter. As new articles are published they will be added to the series page, which will serve as an index for the entire series.

