Free Photography Bundle ($180 value): PS actions, LR presets, photo overlays, & print templates!
Get it here.

In this tutorial, I’m going to show you how you can use layers of textures to give your photos a lo-fi retro appearance using Adobe Photoshop.
Whether you love it or hate it, Instagram and many other similar apps and services have shown that creative photo filters are very popular. While you can use such apps for one click results, taking advantage of layers and blending modes can allow you to get creative and brew up your own unique effects.
For this article, I’ll be using some PhotographyPla.net textures, the Bokeh set and one of the Noise Overlays sets.
Do remember that with this technique, there is no right and wrong way to do things and expreimenting with different settings can often yield unexpected and exciting results.
Open Your Photo
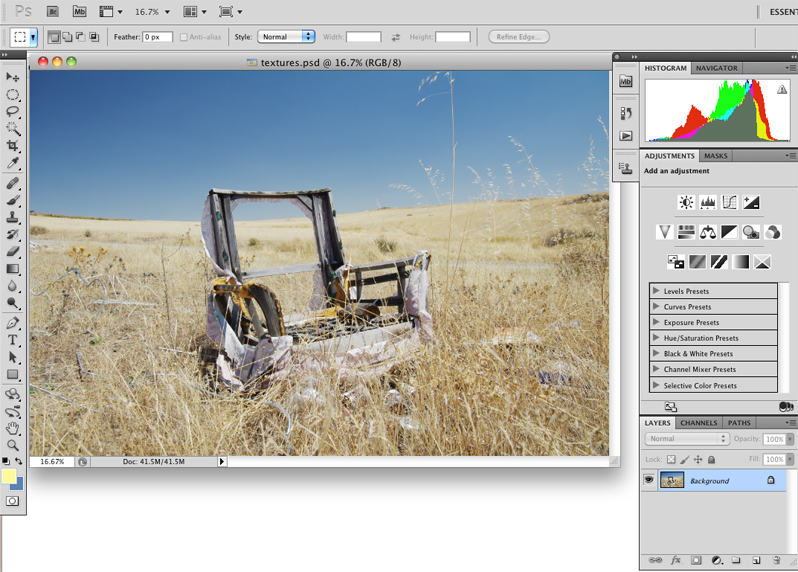
The photo that you choose to work with may have some bearing on the type of textures that you choose to work with, but I’ve just picked a shot from my hard drive. This old chair was found by a country track in western Spain a few years ago and was surrounded by empty beer bottles. I can only assume that the local shepherd enjoyed a cold a one while working hard watching his sheep.
Place a Texture Layer
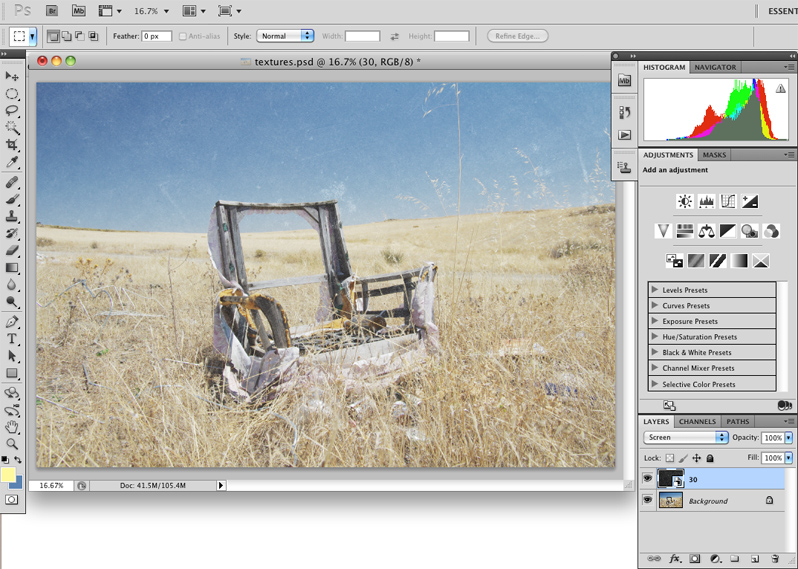
There are several ways to add an image as a new layer of another image, but one straightforward way is to go to File > Place and then navigate to the file, before clicking the Place button. You’ll probably need to resize the new layer by clicking and dragging the corner drag handles. When the new layer covers the whole of the picture, press the Return key or double click on the new layer.
Obviously, the photo underneath is now obscured, but if you now move to the Layers palette and change the dropdown Blending Mode menu from Normal to Screen, you’ll see that the photo reappears with a noisy texture applied to it. If you like, you can tweak the effect by reducing the Opacity slider and/or trying another Blending Mode, such as Linear Dodge or Color Dodge.
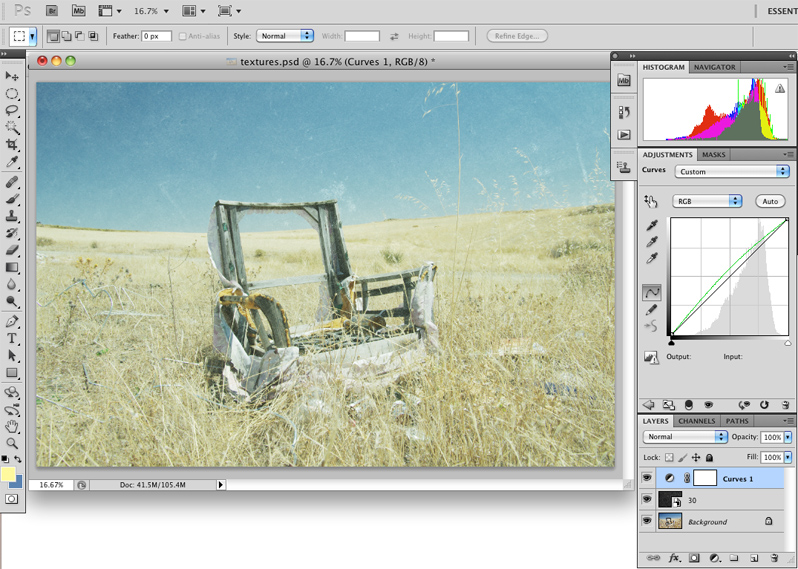
Add a Color Cast
Old photos very regularly had color casts and so let’s add one too. You can pull this off in different ways, so if you already have a favored method, go for it. If not, go to Layer > New Adjustment Layer > Curves to open the Curves palette. Change the RGB dropdown menu to Green or one of the other two colors, if you prefer, and then click on the middle of the diagonal line and drag it up a little. You’ll see the color of your photo takes on a bit of a color cast as you adjust the line position.
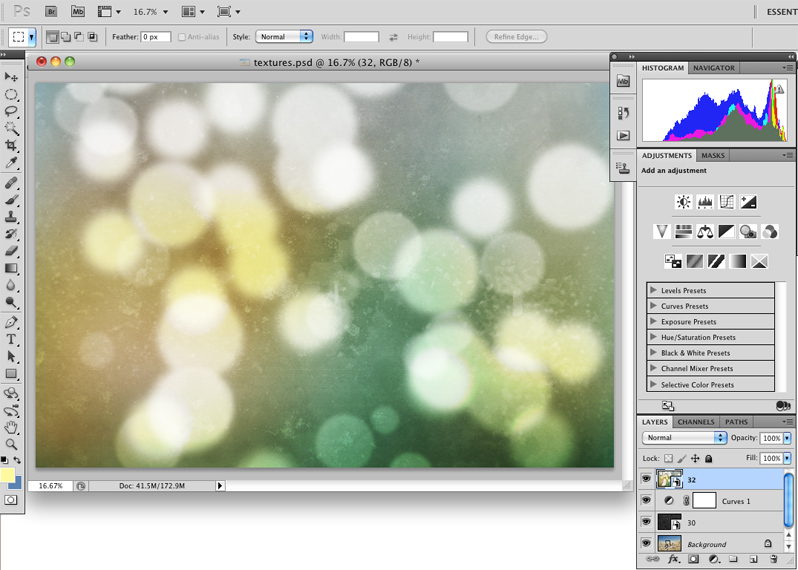
Add Another Texture
You could leave it at this point, but why not try adding another texture to build up an even stronger effect. This time I added a texture from the Bokeh set, in the same way as before. I selected one that contained colors similar to those in the base photo.
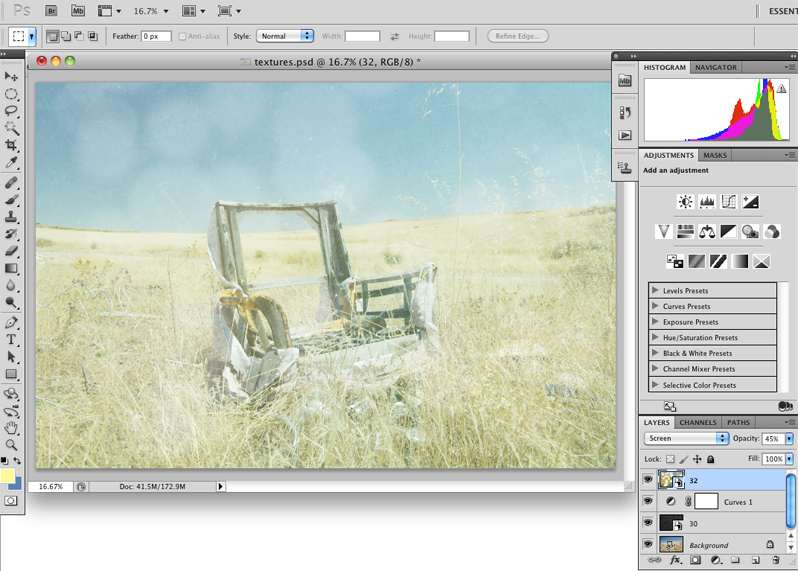
Change the Blending Mode to Screen
In the accompanying image, you can see that I changed the Blending Mode to Screen again, but this time I reduced the Opacity to 45%. The effect is quite nice, but as I said earlier, experimentation is the name of the game, so lets experiment.
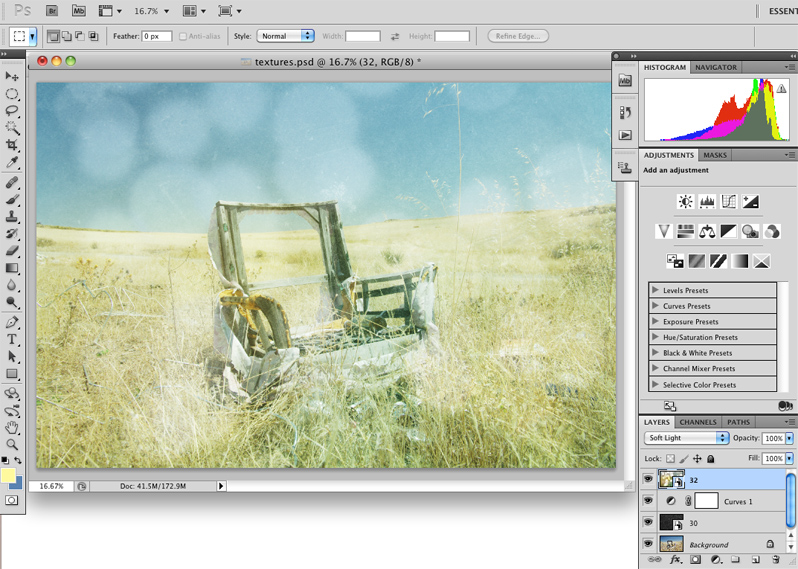
Try the Blending Mode Set to Soft Light
Here, I reset the Opacity to 100% and changed the Blending Mode to Soft Light. The end result isn’t radically different, but you can see that the image has a little more contrast than when set to Screen. Do try some of the other blending modes too, as you may find some others that produce interesting results.
Also, don’t always settle for the first texture that you try out. The first picture on this page used a bokeh texture with colors that were quite different from the base photo which produced a rather more colorful end picture. You could also look at overlayinga frame effect to the image to finish off the retro photo effect.

