Free Photography Bundle ($180 value): PS actions, LR presets, photo overlays, & print templates!
Get it here.
The Shadows/Highlights adjustments tool in Photoshop can be an effective way to correct photos that are too dark or too light. It is generally more effective in bringing out detail in shadow areas, but it can also help to recover some detail in highlight areas that look as if they have been blown out.
One weakness of Shadows/Highlights is that they are not available as an adjustment layer, meaning that you have to make destructive edits. However, by duplicating layers and using masks, it’s possible to get much of the flexibility of adjustment layers when using this feature, as I’ll show you in the next few steps.
To try this technique out, you’ll need a photo with some dark shadow areas – I’m using a photo of Rosie, our Iberian Slug Hound, reclining after a hard day barking at the neighbors.
Open Your Photo and Duplicate the Background Layer
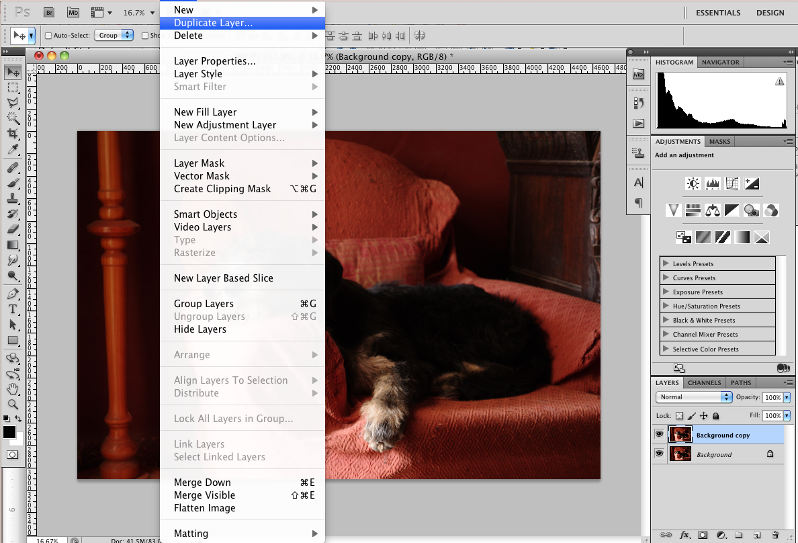
To open your photo, go to File > Open and navigate to your photo before clicking the Open button. You now need to duplicate the Background layer so that you don’t make irreversible changes to the underlying photo. You can either right-click on the Background layer in the Layers palette and select Duplicate Layer, followed by the OK button or go to Layer > Duplicate Layer and again press OK.
Open the Shadows/Highlights Adjustment Tool
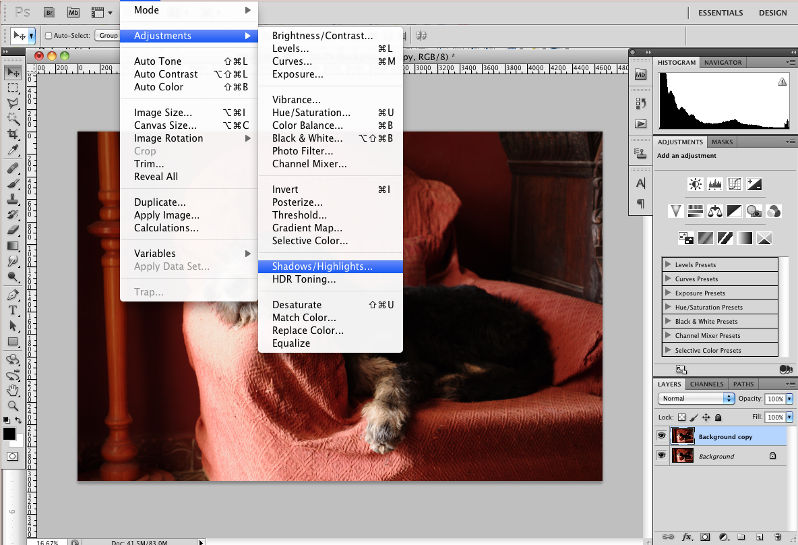
Now, ensure that the new duplicated layer is active by clicking on it in the Layers palette and then go to Image > Adjustments > Shadows/Highlights to open the panel.
More or Less Options?
When the Shadows/Highlights panel opens, you may be presented with just two slider controls. This makes the tool very easy to use, but you will get greater control and potentially better results if you click the Show More Options checkbox at the bottom of the panel. If you’ve used this tool before with More Options visible, it should automatically open showing all the controls.
How Do You Adjust the Shadows Using Shadows/Highlights Adjustments
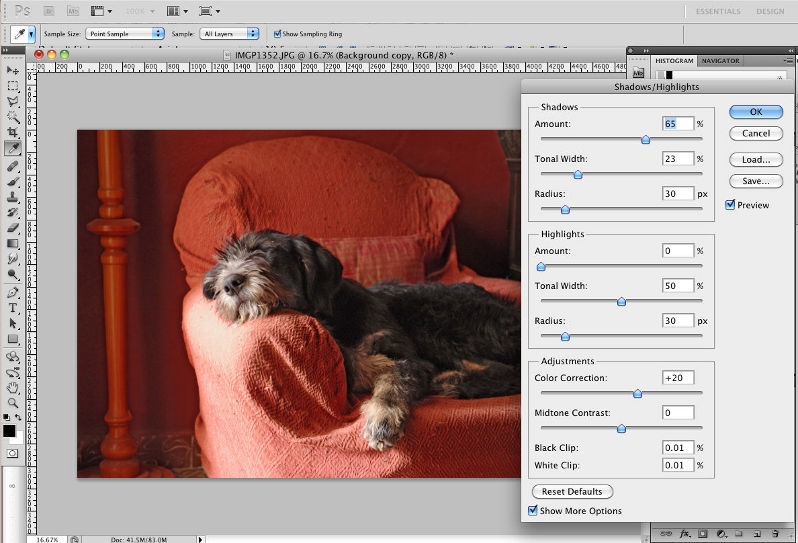
In the Shadows area, you’ll see that there are three sliders that you can adjust. In most cases, I concentrate upon just the Amount and Tonal Width settings, leaving the Radius to the default.
If you slide the Amount slider to the right, you should see that the shadow areas lighten visibly. If you reduce the amount of the Tonal Width slider, you will see that less shadow areas are affected, meaning that the overall photo doesn’t change so noticeably, with just the darker shadow areas being lightened.
I’ve made quite a strong correction in this example to make the effect obvious, but this comes at a price. Do be aware that as you lighten dark areas, you will often see the noise become more noticeable and the contrast may fall off more than you’d like.
How Do You Adjust the Highlights Using Shadows/Highlights Adjustments

Perhaps unsurprisingly, the controls for the Highlights work much the same, though with the Amount slider darkening, rather than lightening. You can see that on the arm of the chair, there is a very light area and by increasing the Highlights Amount slider, I’ve increased the detail in that area a little.
How to Use the Adjustments
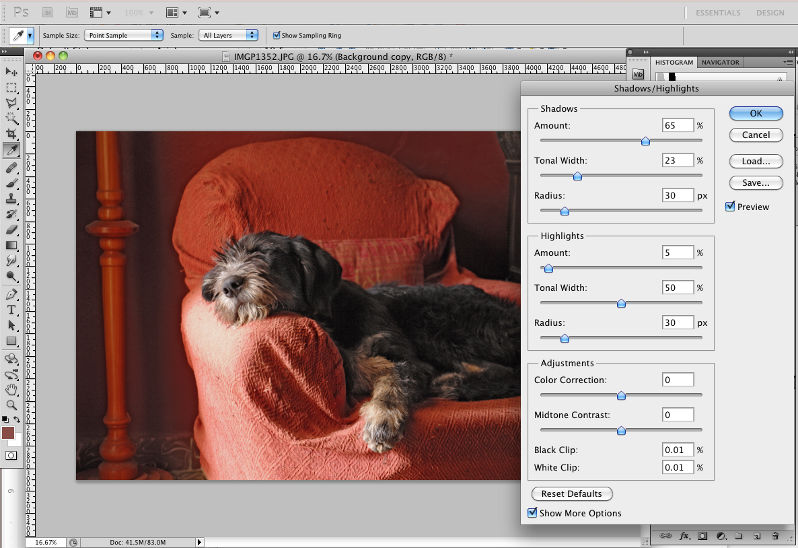
Before moving on to the final step, you may also want to consider the settings in the Adjustments section. In my case, I felt the red colors had become too saturated, so I dragged the Color Correction slider to zero. You may also want to try adjusting the Midtone Contrast to see how that affects your photo. I leave the Black Clip and White Clip unchanged as these can produce dramatic and unnatural results, though can be useful for fine tuning images for print.
Once you’re happy with your adjustments, click the OK button
How to Make it Non-Destructive
If you convert the duplicated background layer to a smart object before applying the shadows and highlights adjustments it will be done in a non-destructive way.
How to Apply Shadows/Highlights Adjustments to Specific Areas
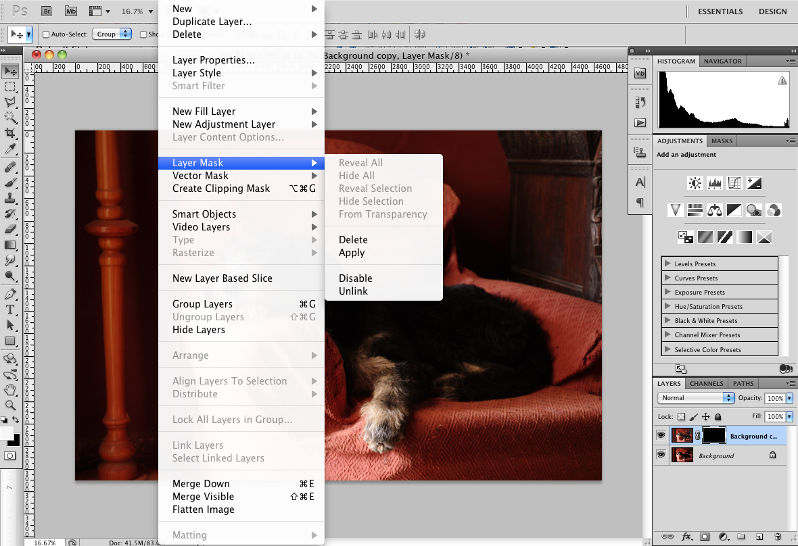
You should see that you’ve improved the dark areas, and possibly light areas too, but you will likely have also affected the overall tone of your photo. You may see that the image also exhibits some typical aspects of HDR images, such as halos or shadowy outlines. We can overcome this by adding a mask to the layer and then painting over the areas that we want to apply the adjustments to.
Go to Layer > Layer Mask > Hide All and you will see a black rectangle icon is added to your Layers palette next to the duplicated layer.
Now select the Brush tool from the Tools palette and select a largish, soft brush and reduce the opacity to 50% or a little less. Now ensure that the foreground color is set to white (pressing the X key will switch the foreground and background colors) and now start to paint over the areas of the photo that you want to apply you adjustments to. As you paint, you will see that shadow detail is revealed.
Conclusion
While you could use the Shadows/Highlights tool to adjust a complete photo, using this technique of a duplicated layer with a mask allows you to carefully target the areas of your photos that need to be adjusted. However, remember to keep an eye on noise levels in shadow areas as you work to ensure you get balanced results.

