Free Photography Bundle ($180 value): PS actions, LR presets, photo overlays, & print templates!
Get it here.
Last week we released a free haze Photoshop action, and today we’ll cover the process of how you can create this type of effect in Photoshop. Of course, you can use the action to get this effect quickly, but if you’d like to learn the specific steps that were used to get this effect, read on.
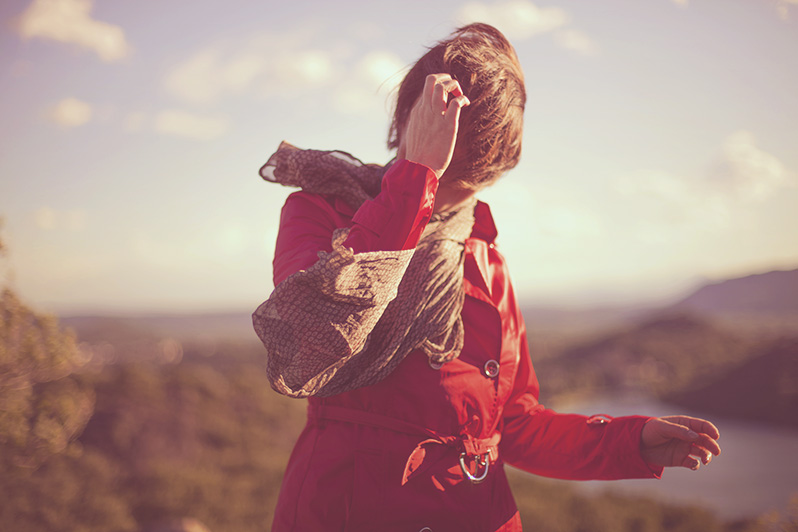
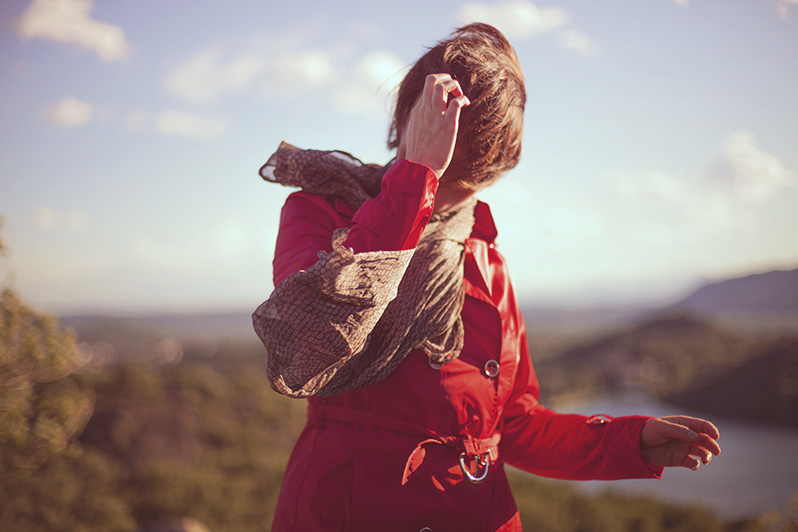
Here is a look at a before version of the sample photo I’ll be using for this tutorial (The photo is courtesy of SplitShire. You can get it here if you’d like.):

And here is a preview of the effect that we will be creating:
Haze effects tend to work very well for some outdoor photos, especially outdoor portraits. Ok, so now let’s get into the steps needed to create the effect in Photoshop.
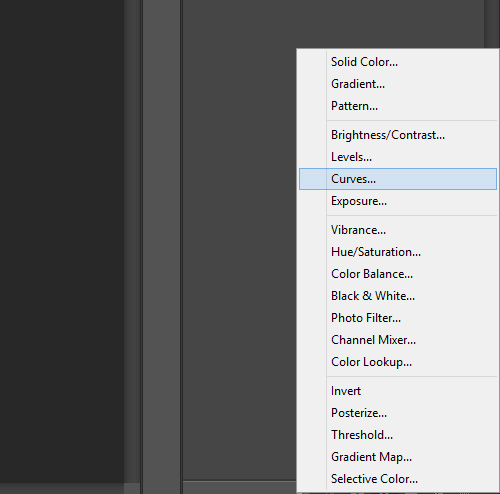
Step 1: Add a Curves Adjustment Layer
To add the curves adjustment layer click on the icon (shown below) at the bottom of the layers palette.
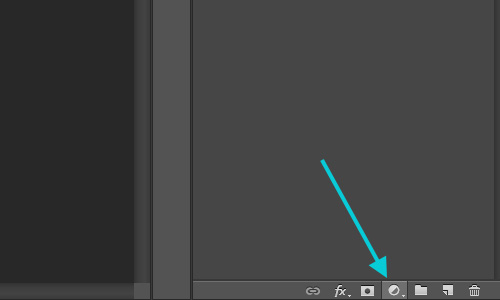
From the options that open up, select “Curves”.
Edit the RGB curve to look something like this:
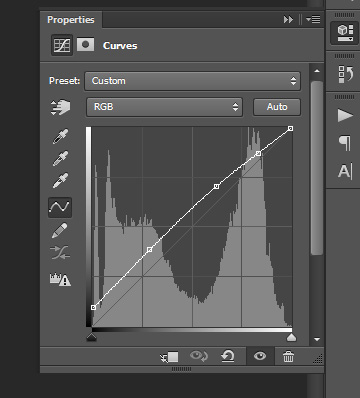
What we’re doing here is lightening the photo, especially the darker areas. After the curves adjustment the sample photo looks like this:
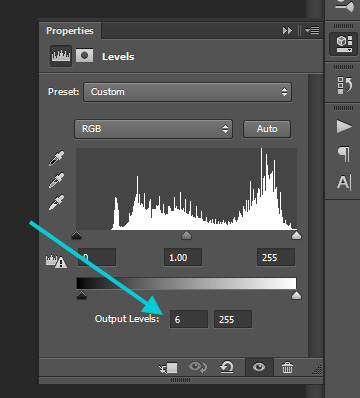
Step 2: Add a Levels Adjustment Layer
Repeat the process of adding an adjustment layer, but this time select “Levels”. The setting we want to change here is the first number after “output”, and we’ll change that to 6 (or something similar). This will also lighten the photo a little more.
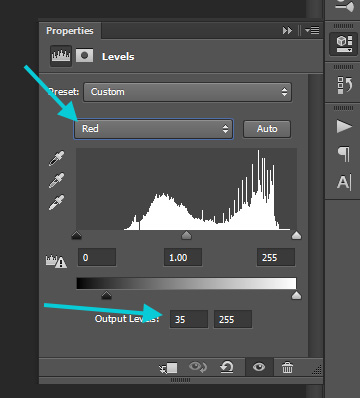
Next, use the drop down to select the “Red” levels. Here we’ll change the output setting to 35. This gives the photo a bit of a red tint.
Next, use the dropdown again to select “Green” and change the same output level to 20. And then select “Blue” and change the same setting to 30.
After the Levels changes the sample photo looks like this:
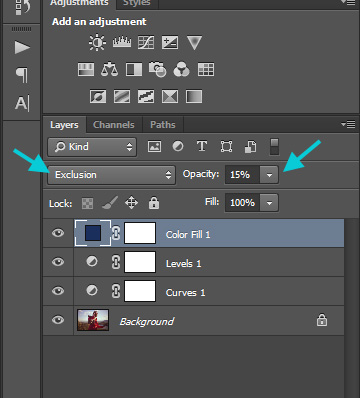
Step 3: Add a Solid Color Adjustment Layer
Click the icon at the bottom of the layers palette to add another adjustment layer, and this time select “Solid Color”. Set the color to #152b5d, which a dark blue. Change the layer’s blend mode to “Exclusion” and the opacity to 15%.
Step 4: Add Another Solid Color Adjustment Layer
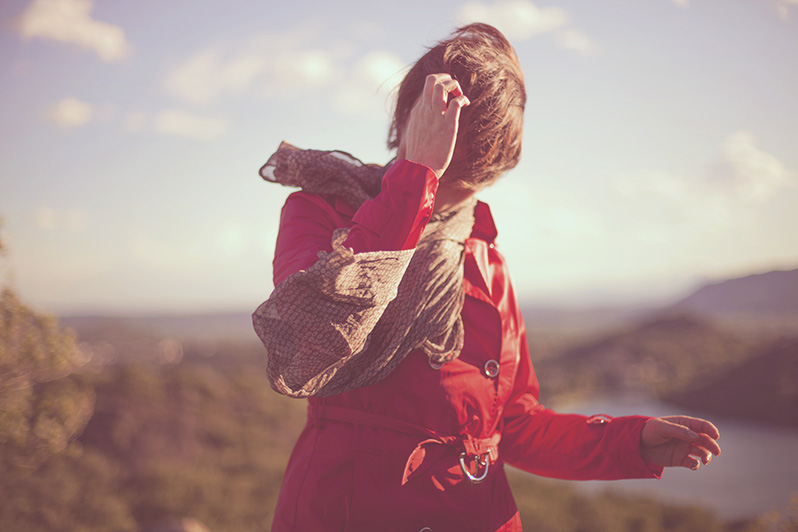
Give this layer a color of #96713d, which is a shade of brown. Set this layer’s blend mode to “Soft Light” with an opacity of 20. After the two solid color adjustment layers that photo now looks like this:
Step 5: Add a Gradient Map Adjustment Layer
This is the last step. Add another adjustment layer and this time select “Gradient Map”. Select the gradient that goes from purple to orange.
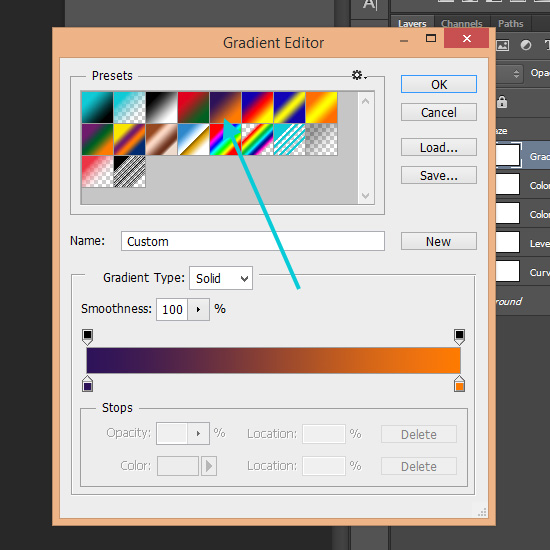
Then set this layer’s blend mode to “Soft Light” and the opacity to 20.
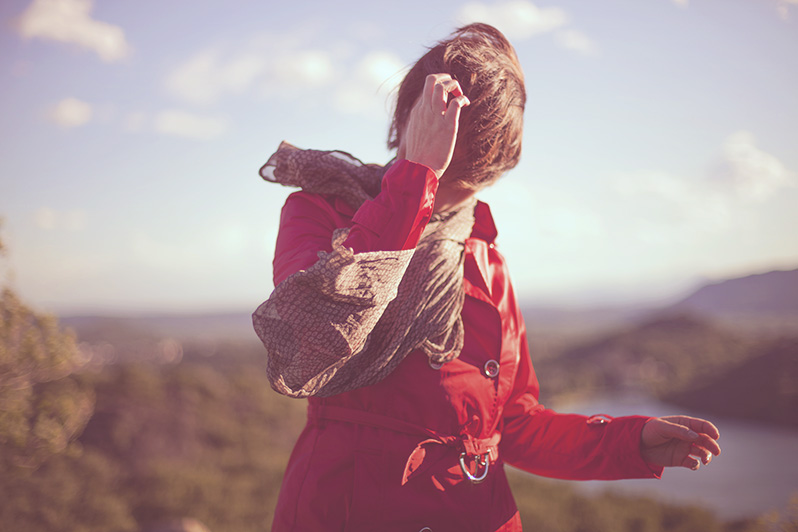
That’s it! Here is the end result:
This type of haze effect is fairly versatile and can work well with a variety of different photos. And, of course, if you’d like to get the action for creating this effect you can get it here. The download includes a version for Photoshop and a version for Photoshop Elements.

