Free Photography Bundle ($180 value): PS actions, LR presets, photo overlays, & print templates!
Get it here.
Blue hour is that magical, but brief, time that occurs right before sunrise and again right after sunset when the sun is at just the right elevation to cast a beautiful hues of blue and purple across the sky. Blue hour is not to be confused with golden hour, it’s more commonly talked about sibling, despite being equally stunning to photograph. Because it’s a little bit darker during blue hour, shooting during it may seem a little daunting at first. But, I hope that doesn’t deter you from giving it try–it can actually be pretty easy to capture brilliant blue hour shots with just a little planning and forethought.
What To Shoot
There are a lot of things that photograph well during blue hour, so a lot of what you should be shooting will depend on personal preference. Just keep in mind when choosing your location, you may have to use slower speeds to compensate for the lessened natural light. If there are moving objects in your photos, you’ll need to prepare yourself to see a little motion blur–we’ll talk more in depth about this in minute.
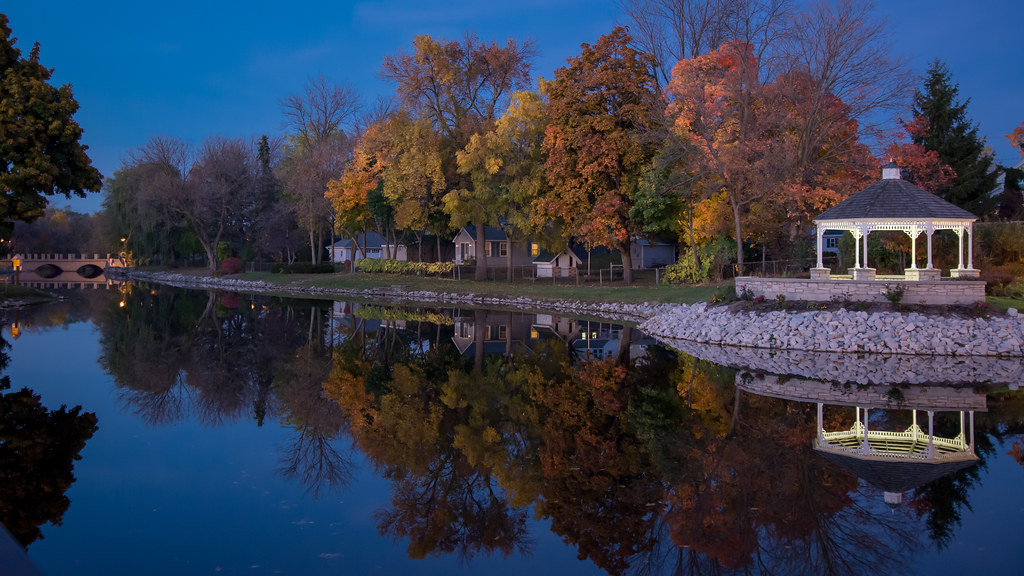
If you are near a coastline or body of water, blue hour can make for stunning landscapes, as you’ll see in some of the photos in this article. In the photo just above, you can find a little blue hour inspiration in the spirit of street photography. Another good example is cityscapes, like this one below, which can be a very rewarding way to practice blue hour photography. Many things can be photographed during blue hour, so choose a location that speaks to you and try to capture what it is that draws you to that location.
Be There Early
Like most good times, the moment we have to experience blue hour is pretty fleeting. It leaves just as quickly as it comes, which means it’s crucial to be on location and ready to shoot as soon as blue hour starts. It’s best to look up exactly when blue hour will occur on the day you want to shoot at the location you want to photograph. There are many ways to do this. I prefer to use an app called PhotoPills, but there are also plenty of websites that can be used as well.
Once you have pinpointed when blue hour starts and ends, allow yourself enough to travel to the location, set up your gear, and get your exposure settings dialed in as best as possible.
Equipment
You won’t need a lot of special equipment to shoot during blue hour, but there is at least one thing that’s mandatory: a tripod. Or, at the very least, something sturdy and safe to rest your camera on. Your shutter speeds will be to long to take handheld shots, so having a tripod to stabilize your camera is a must. In some instances, you may be able to use a wide aperture–such as f1.8– that would make having a tripod unnecessary, but this isn’t always possible.
Another useful tool to have is a remote shutter release so you don’t have to worry about shaking your camera when you press the shutter with your finger. Doing so can result in blurry photos. However, if you don’t have a shutter release, you can set the self timer on your camera to delay the start of the exposure. Usually a few seconds will be an adequate amount of time for your camera to steady itself after you press the shutter release button, but 10 seconds would be a more conservative time.
A fill light can be particularly useful as well, to help you brighten shadows and draw the viewers eye to a certain part of the photo. A flash works great, but you can also look for an available light source such as a street light.
Exposure Settings
Since this will vary between each and every shoot, it’s impossible for me to give you the exact settings you will need to set your camera to in order to get properly exposed blue hour photos. Since many blue hour photos tend to fall into the landscape side of things, more often than not you’ll want to use more of a narrow aperture, such as f11 or f16. This will allow you to get a nice, deep depth of field to make sure everything is in focus.
If you’ll be using a wide aperture, you’re most likely going to have a longer shutter speed, as we mentioned earlier. A good starting point for exposure speed using an aperture of f11 would be about 1 to 2 seconds, but it’s not out of the question to have a shutter speed of 5 seconds or longer. Again, this all depends on what and where your shooting.
While motion blur may not sound appealing at first, there are a lot of ways you can incorporate it into your blue hour photography that will actually enhance the composition. The taillights of cars travelling down a busy highway is one of these instances. Another way would be getting a soft milky effect when shooting moving water. Rather than be dismayed by long shutter speeds combined with movement, just get a little creative and figure out a way to make it a good thing. After all, we learn best by experimentation!

