Free Photography Bundle ($180 value): PS actions, LR presets, photo overlays, & print templates!
Get it here.

Understanding white balance is critical to good photos. This photo is a white balance cheater with daylight coming through the skylight, tungsten lights and fluorescent lights over the bar. In this case balance for the dominant light source and let the others go their own way.
Back in the old days of photography, we’re talking way back when the built-in light meter was an actual physical needle on one side of the viewfinder, every photographer carried around a little packet of filters. You needed those filters because you might leave for a shoot with daylight balanced film in your camera and find it necessary to move indoors before you were at the end of the roll.
You’d use the filters to correct the color temperature of the indoor lighting until you could switch to indoor film. There was a filter to correct for tungsten lights, another for fluorescents and a few oddballs for specialty lighting. The goal of those filters was to make the color white come out looking white, instead of green, orange or light blue, hence the term “white balance”. When white comes out right, you can bet the rest of the colors will also be accurate. It says amazing things about human vision because we perceive white paper as white whether we’re outside in daylight or inside reading by candlelight. For your camera it’s a little more complicated.
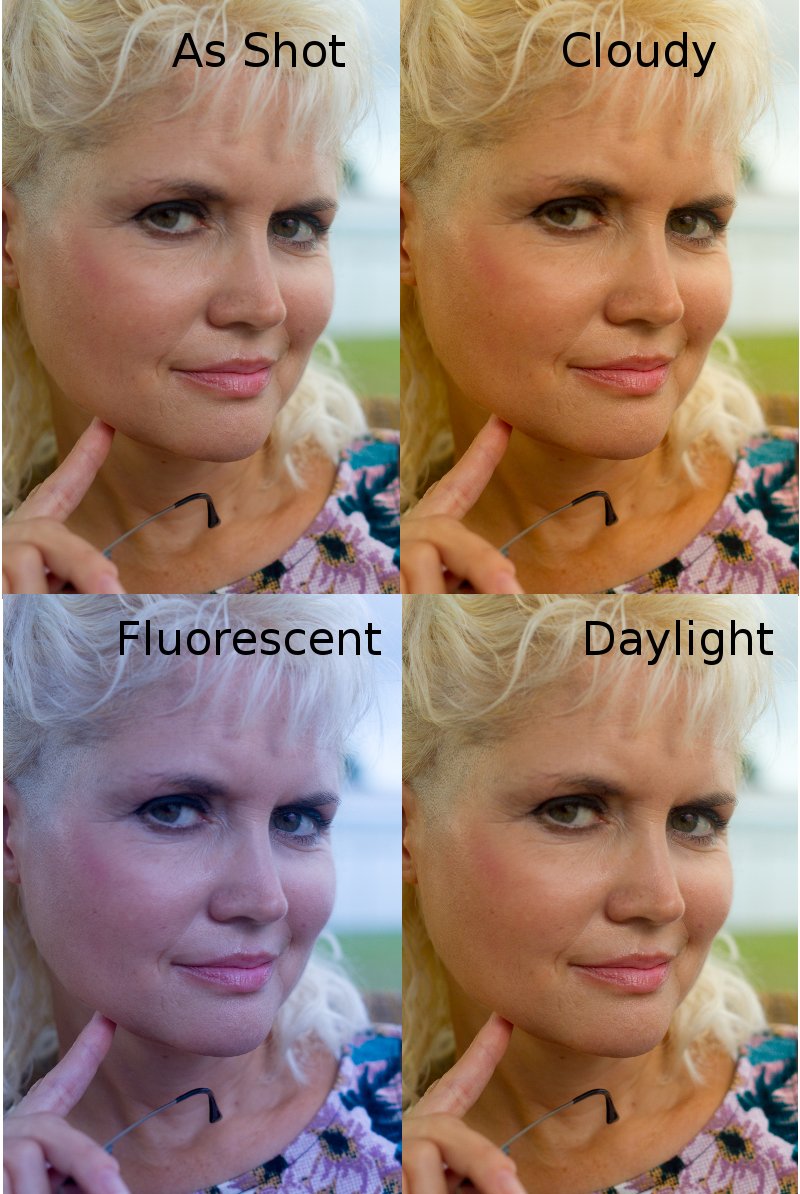
How the same photo changes with the white balance presets in Lightroom.
Today white balance is basically a color temperature data point in the information your camera records when you take a photograph. I won’t get too much into the details of color temperature and black body radiation because it’s complicated, I mean like Neil deGrasse Tyson complicated, and it doesn’t help you take better pictures. It can also be confusing because photography uses the terms “warmer” and “cooler” when talking about color temperature exactly the opposite of how a physicist would describe them.
When The Camera Decides
When your camera is in one of the automatic modes, the camera reads the color temperature and makes the calculation of the appropriate white balance setting. Cameras have gotten so good at reading color temperature that most cameras have the white balance manual controls buried in a menu setting somewhere. Anytime you export a photo as a JPEG, the camera has made the white balance corrections based on its own readings.
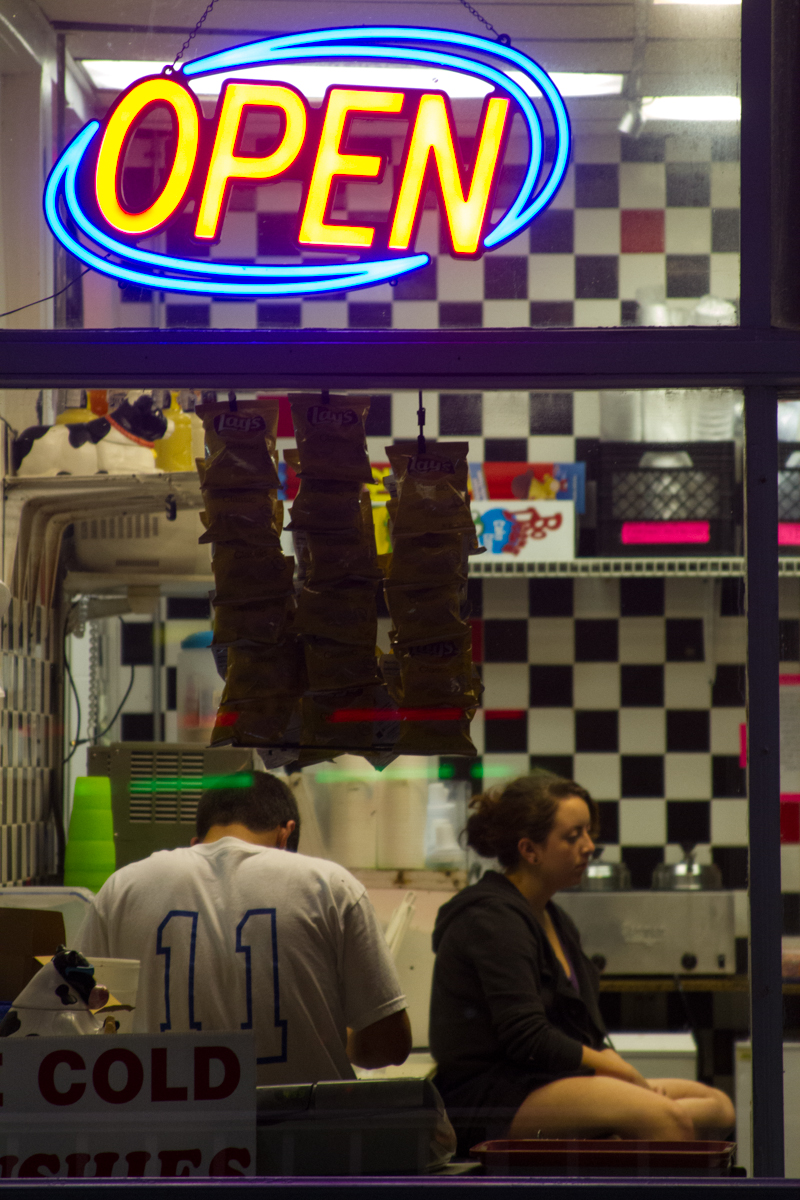
In this shot the dominant light source are the fluorescent lights lighting the subjects inside.
When You Decide
Exporting pictures as RAW files means the white balance adjustments have not been applied to final photo. The color temperature data is merely recorded, along with the raw output from the image sensor, and the whole kit and caboodle is shipped off to your image processing program like Lightroom or AfterShot Pro where it’s all sorted out.
There are many advantages to working with RAW image files and being able to change the white balance in post processing is one of them. In your image editing program you can decide what color temperature looks better by either selecting a white balance preset with names like Cloudy, Fluorescent, Daylight and Tungsten or just moving the color temperature slider until you like the colors.
When White Balance Gets Complicated
Where white balance gets tricky is in mixed lighting situations. Maybe you have daylight filtered through a skylight and tungsten light inside the house. It’ll be up to you to decide in post whether you want the tungsten light to go orange and balance for the skylight or balance for the interior light and let the skylight take on a slight bluish cast. My strategy is to balance for the dominant light source that provides the most natural colors for the subject and let the other light sources go their own way.
Have Some Fun
If you want to experiment with odd looks use a circular polarizing filter and then fiddle with the white balance in post processing. You can get some really unique looks because a polarizer is one of those things that confuses your camera’s computer and how the sensor records the shot. Combine all that with some of the black & white or infrared preset filters in Lightroom and you can get some interesting looks.
Getting white to actually appear white in a photo is a lot easier than it used to be and, if you shoot in RAW, you can make white balance decisions at your computer later. Don’t be afraid to experiment with gels and filters to get some really strange colors.

