Free Photography Bundle ($180 value): PS actions, LR presets, photo overlays, & print templates!
Get it here.
In this “how to” tutorial I’m going to walk through how to use vignettes and targeted exposure adjustments to help control where the viewer’s eye concentrates.
Vignetting in photos is a bit of an odd thing with some photographers willing to spend $1,000s on quality optics that offer an even exposure across the frame, while at the same time, the popularity of various photo filter apps have made bold and strong vignettes an aesthetic choice for others.
Sometimes a heavily contrived vignette can work really well with a specific image, but right now we’re going to see how subtle adjustments to a photo can make a big difference that won’t be immediately obvious to the viewer. I’m working with the Lightroom 5 Beta, but this is easily achieved using Photoshop too. I’ve also called upon the assistance of Alfie as my model – a one eyed, three and a half legged Yorkie recently rescued from a dog pound.
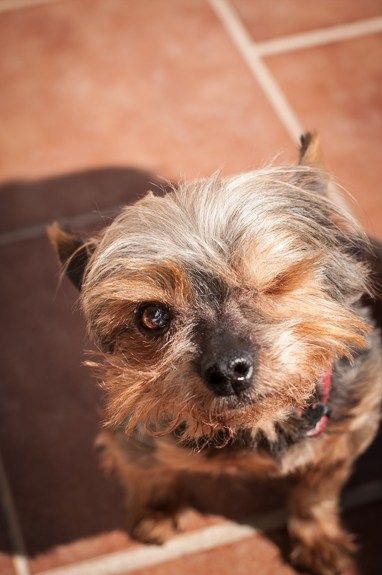
The Base Photo
This photo was captured mid morning in strong directional sunlight, as witnessed by the shadow area that fills two thirds of the left of the frame, thanks to a large dog that stood to the side of Alfie. The shadow obviously isn’t an attractive addition to the shot, but in the final version of the photo, I feel that it adds to the contrast that helps to drive the eye to the face.
I could pretend that this was straight out of the camera, but at this stage I’ve already tightened the crop a little and made some other global adjustments to the photo. I’ve also used the Adjustment Brush to lighten the eye a little as it’s set on the shaded side of the face.
If you want to give this technique a go, ideally you’ll want an image that contains a single point of interest. It obviously works well for portraits, but it can also be an effective way to help draw the eye to the point of interest in a landscape.
Add a Vignette

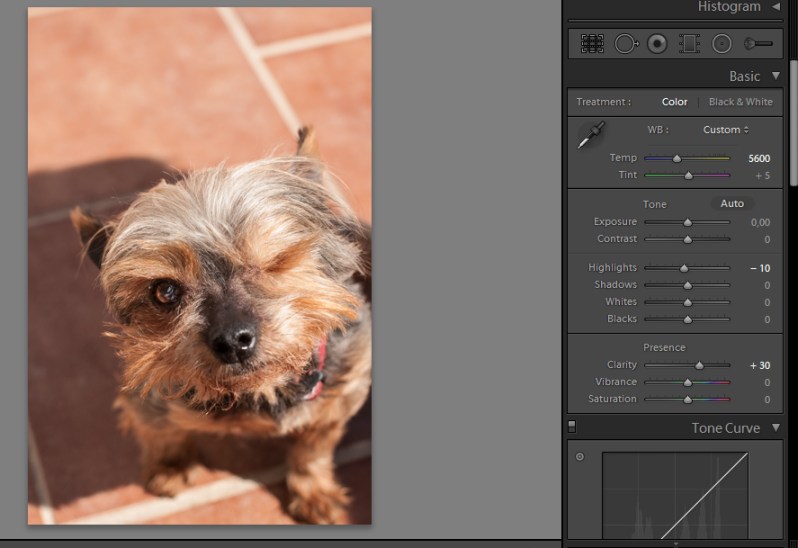
With the addition of the Radial Filter in Lightroom 5, you’ve got more options for creating vignettes and can now choose to center them as you see fit, but for my image, I chose to use the Post-Crop Vignetting tool from the Effects panel.
For this image, I adjusted the Amount slider to -28. Personally, that feels like quite a strong vignette to be adding. However, I’ve softened the effect by increasing the Feather a little to 60 and also setting the Highlights to 22. The higher the Highlights setting, the less the vignette affects lighter areas and this can make a vignette less solid and less obvious.
Additionally, I tweaked the Roundness slightly so that the vignette would encroach top and bottom a little more. To my eye this feels reasonably well balanced because of the block of shadow. Also, the mottled surface of the floor tiles makes the effect less extreme.
The settings of vignettes will vary from photo to photo, but ultimately you don’t want it to be immediately obvious to your viewer.
To better understand what the sliders do, slide the Feather all the way to the left so that the vignette has a hard edge and then adjust the others in turn.
Highlight the Focal Point

The Radial Filter is a quick and easy way to focus adjustments on a specific area of a photo, though for more irregularly shaped subjects, you could use the Adjustment Brush.
Click on the Radial Filter to select and then click and drag from the center of your subject to draw a circular selection. By default, the filter works on the area outside of the circle, so click the Invert Mask check box and also ensure that the Feather slider is set to 100 to keep the edge as soft as possible. You can now make the adjustments you think necessary to help this region stand out a little. In my case I increased the Exposure by 0.20, Contrast by 4 and Clarity by 10, while leaving the Sharpness and Noise sliders to the settings dialed in by default.
As with the vignette, the effect should be very subtle and not immediately obvious to the viewer, but when you place the original image beside the adjusted version, the difference will be quite clear.
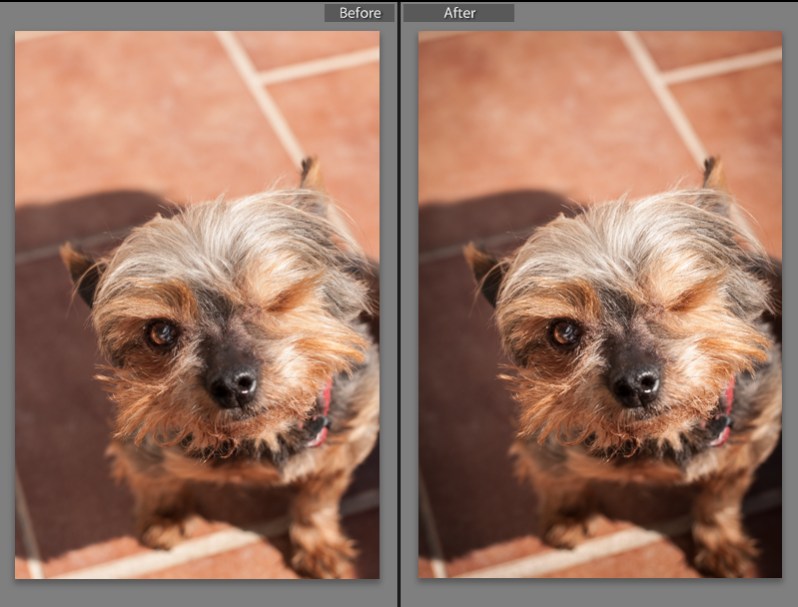
It’s very easy to over-develop a photo with contrived effects and while, sometimes, bold adjustments can make an image, very often a “less is more” approach is the most effective and pleasing solution.

