Free Photography Bundle ($180 value): PS actions, LR presets, photo overlays, & print templates!
Get it here.
Apertures are somewhat of a multi-purpose tool. Not only does it allow you to help control how much light is let into the camera as you take a photograph, but it can also be used an as artistic tool to use when composing your image. Before we get to that though, let’s take a moment to make sure we’re all up to speed about what exactly an aperture is.
Aperture
ap·er·ture: a space through which light passes in an optical or photographic instrument, especially the variable opening by which light enters a camera.
That space through which light passes is most typically found in our lenses. We control how large or small that space is by adjusting our f-stop value. The larger the f-stop–for example, f 22–the smaller the aperture opening, which translates to less light being able to pass through the filter. Smaller f-stop numbers, like f 1.8, will have a larger aperture opening and will let much more light through in a shorter amount of time. This is why lenses with small apertures (or f-stops) are sometimes referred to as a “fast lens”.
Take a closer look at this video clip, which demonstrates the aperture blades opening up as the lens is brought through it’s different f-stops:
Aperture As Part Of The Exposure Process
When determining which exposure settings to use, the aperture is partially determined by the shutter speed and vice versa. You can use fast shutter speeds with larger apertures and still be able to freeze motion, or you can use a narrower aperture to help you capture long exposures in bright light.
In other words, you can use one to the advantage of the other–think aperture priority and shutter priority modes. If you know you need a fast shutter speed to freeze some fast action, you can set your camera to shutter priority mode, dial in a fast shutter speed and your camera will automatically adjust the aperture to the correct exposure setting for each individual photo you take. Aperture priority works the same way, in that you can set the aperture setting you’d like to stick with, and your camera will readjust the shutter speed as needed, to ensure you’re getting correct exposures.
Aperture As Part Of The Creative Process
Now, let’s take a look at a couple of the most common ways you can use aperture to achieve different effects in your photographs.
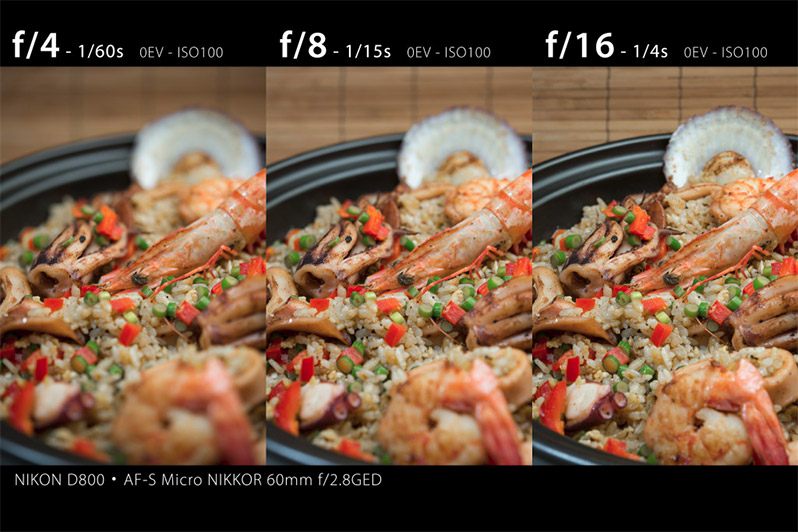
Compare the difference between the depth of field at each of the various apertures. Photo by Gabriela Nakayoshi
First, we’ll talk about depth of field. As you may already know, the aperture size directly relates to how much depth of field you can expect to get. Smaller apertures, such as f 22, will yield you a deep depth of field–meaning background elements are likely to be in focus in addition to the foreground elements.
Alternatively, larger apertures, like f 3.5, will have a much more shallow depth of field. This causes the background elements to fall out of focus more quickly and create the blurry look that’s referred to as bokeh. Because aperture controls the depth of field in a photograph, you can see the importance of being able to harness it’s power.
Bokeh
In portrait photography, it’s common to want the subject to be in focus, while the rest of the photo falls off into background bokeh. This helps the subject stand out in the photo and also directs the viewers eye where the photographer intended it to look—pretty important stuff. But, there’s a fine line between too much and not enough, so try experimenting with multiple aperture settings to see which one accomplishes the look you’re going for.
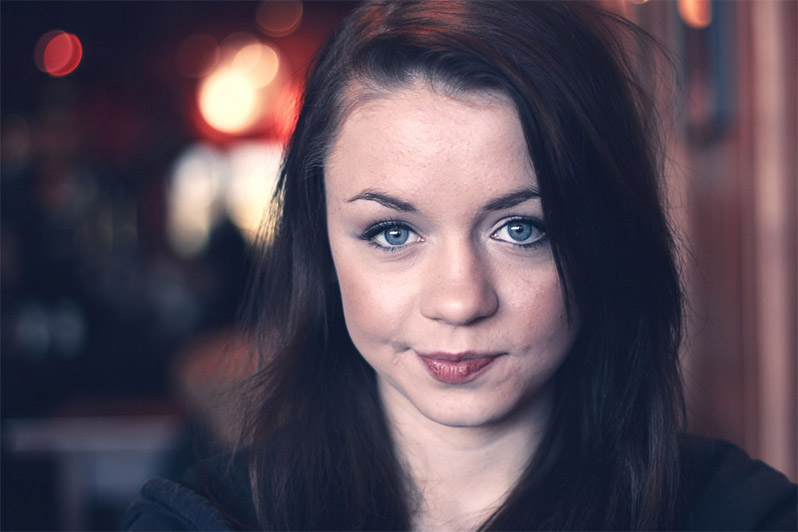
Photo by Andrea Rose
Long Exposures
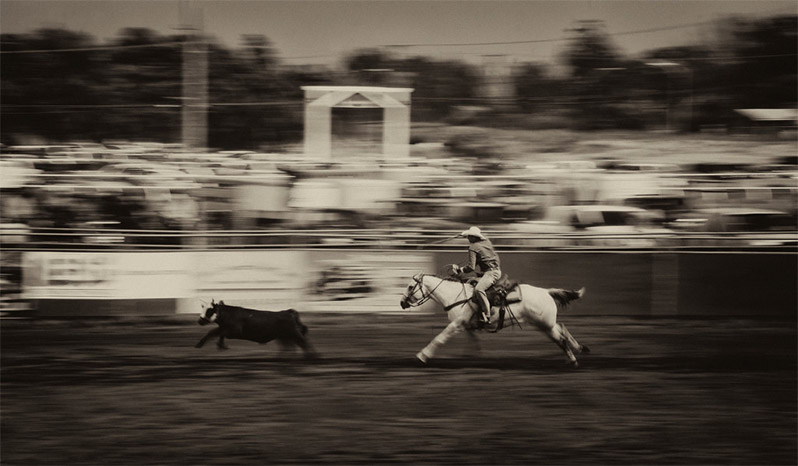
For the next example, let’s have a look at the photograph below. I took this photo on a fairly sunny day, but I knew I wanted to use a longer exposure to capture some motion blur. In order for me to use a long shutter speed, I had to limit the amount of light that would pass through the lens, otherwise I would risk overexposing the photo. To do this, I simply adjusted my aperture to a larger f-stop, and decreased my shutter speed.
By using the aperture setting to get the shutter speed I required, I was able to effectively employ some motion blur techniques to get the exact photo I wanted.
Practice Makes Perfect
Priority modes are a great way to help new photographers break away from fully automatic mode, but the sacrifice you make is giving up some of your creative control to a computer. This isn’t always necessarily a bad thing, but hopefully this article will inspire you to try your hand at fully manual mode to help you achieve complete creative control of your photographs.

