Free Photography Bundle ($180 value): PS actions, LR presets, photo overlays, & print templates!
Get it here.
This article is a part of our series Photo Editing in Lightroom 101. Throughout the series we’ll cover the details of Lightroom’s library and develop modules and how you can use Lightroom to improve your own photos. As new articles are published they will be added to this page. If you don’t want to miss future articles in the series, please subscribe to our RSS feed or our email newsletter.
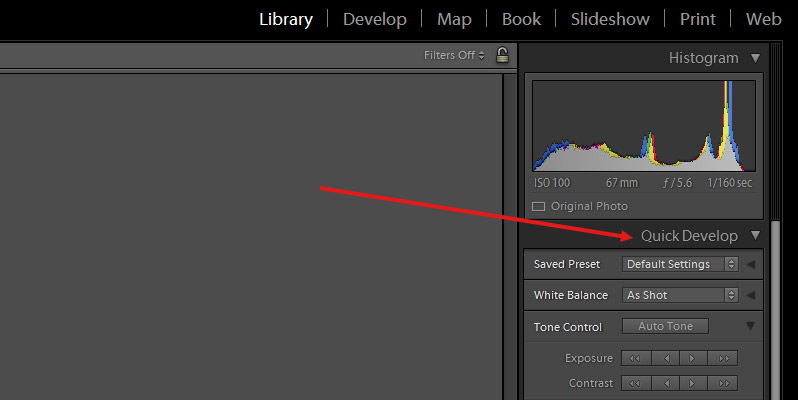
In previous articles we’ve covered the most important functionality of Lightroom’s library module, and in future articles we’ll move on to the develop module where you will be editing your photos. But the library module includes a quick develop section where you have some limited tools that can be used to edit your photos right from the library module. Now, only a fraction of the develop module’s functionality is included in the quick develop, but if you only need to make one or two small and specific changes you may be able to do it without going to the develop module.
You can access quick develop below the histogram to the right side of the library module.
Here you can apply any of the develop presets that you have installed (we’ll cover the process of installing presets in a future article), or the default presets that come with Lightroom. Simply use the dropdown menu to find the preset that you want.
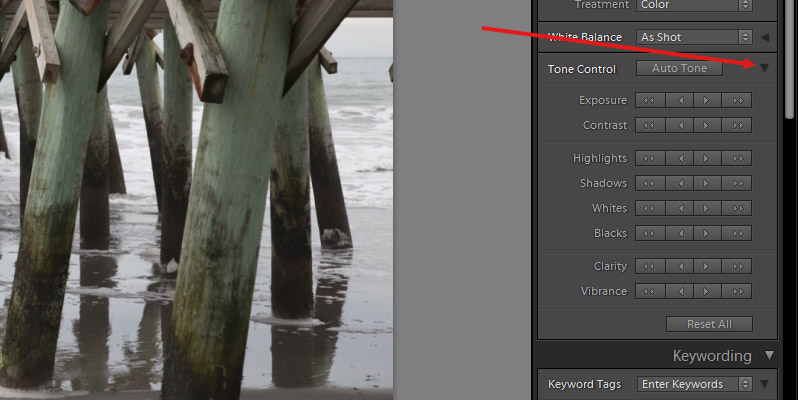
You also have other options like the crop ratio, black & white conversion, white balance, tone control, exposure, clarity, and vibrance. And if you hold down the alt key the clarity and vibrance options will change to sharpening and saturation.
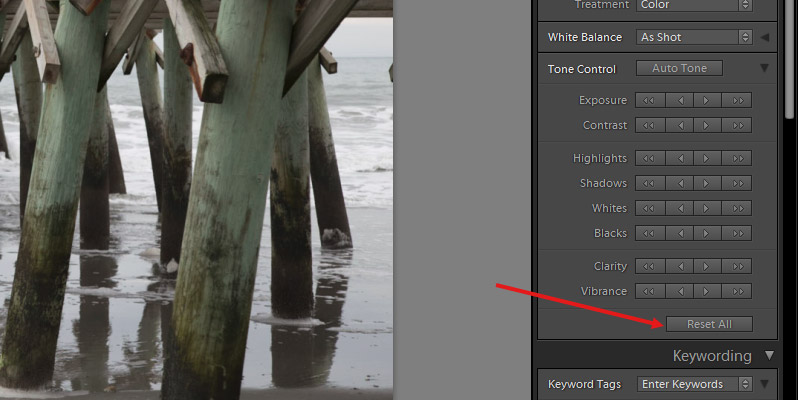
If the arrows are pointing to the side there are more options available. Click on the arrow and it will face down and open the additional options. For example, in the screenshot below I click the arrow next to tone control.
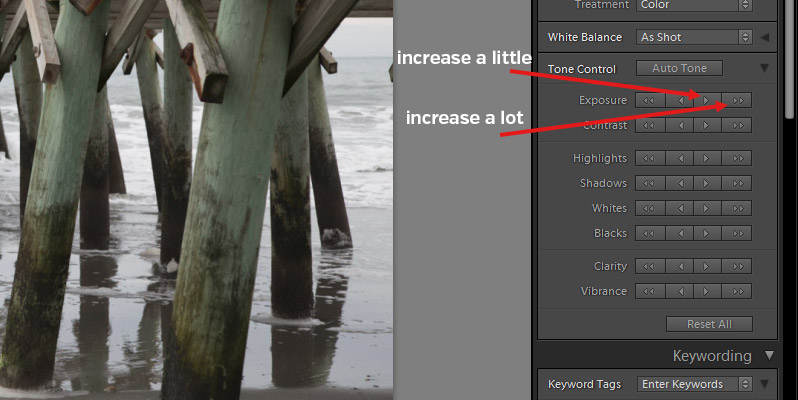
When you’re making changes in quick develop you will use one of the arrows to adjust a particular setting. There is a lighter and a stronger button for increasing and decreasing the setting. For example, if you want to increase exposure a little, you will click on the single right-facing arrow for exposure. If you want to increase exposure a lot you will click on the double right arrow.
And you can also reset all of the changes at any time by clicking the “reset all” button. This button will reset any changes you have made in quick develop or in the develop module.
In the develop module you have much more precise control. In quick develop you can make changes, but you can’t really see the value of those changes. Still, if you just need to make a simple change, quick develop may come in handy.
In the next article we’ll move on to the develop module.
If you don’t want to miss the other articles in this Photo Editing in Lightroom 101 series, please subscribe to our RSS feed or our email newsletter. As new articles are published they will be added to the series page, which will serve as an index for the entire series.

