Free Photography Bundle ($180 value): PS actions, LR presets, photo overlays, & print templates!
Get it here.
This article is a part of our series Photo Editing in Lightroom 101. Throughout the series we’ll cover the details of Lightroom’s library and develop modules and how you can use Lightroom to improve your own photos. As new articles are published they will be added to this page. If you don’t want to miss future articles in the series, please subscribe to our RSS feed or our email newsletter.
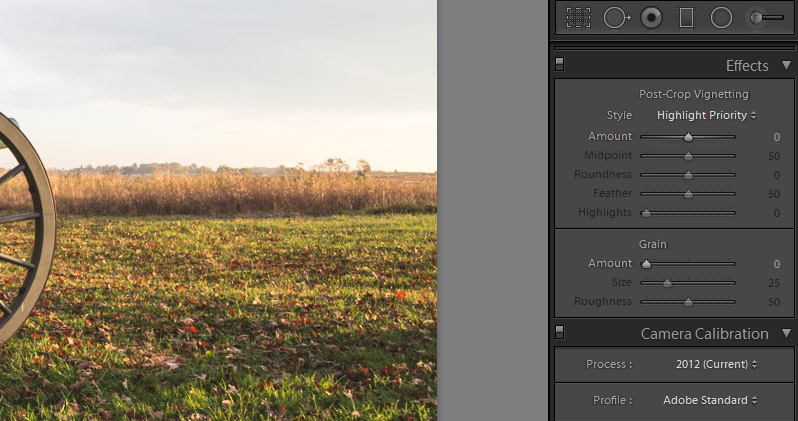
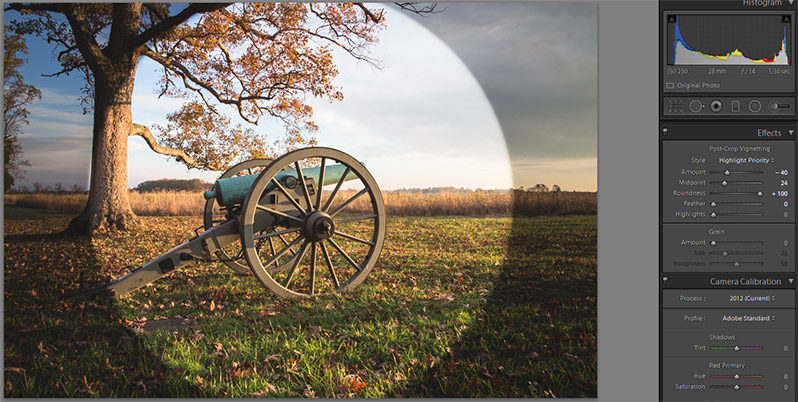
In Lightroom’s develop module under in “effects” section you’ll find the settings to work with vignettes and grain.
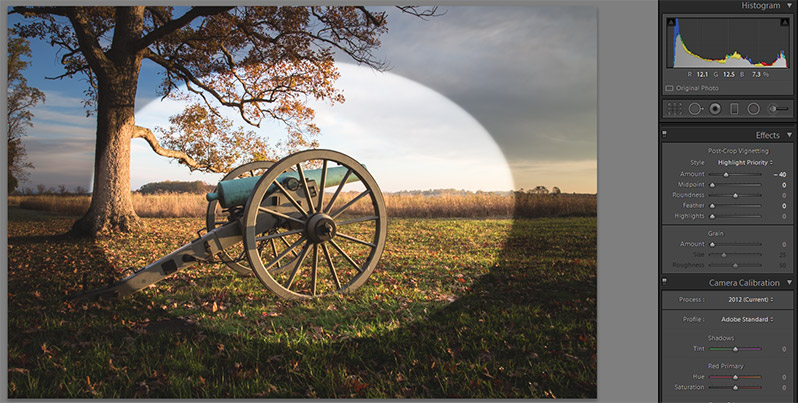
Let’s start with vignettes. There are 5 different sliders for working with vignettes. The “amount” slider controls the amount of vignette that you want to add. Moving it to the left will add a dark vignette, and moving it to the right will add a light vignette. The image below shows a photo with the amount slider moved all the way to the left for a dark vignette of maximum amount.

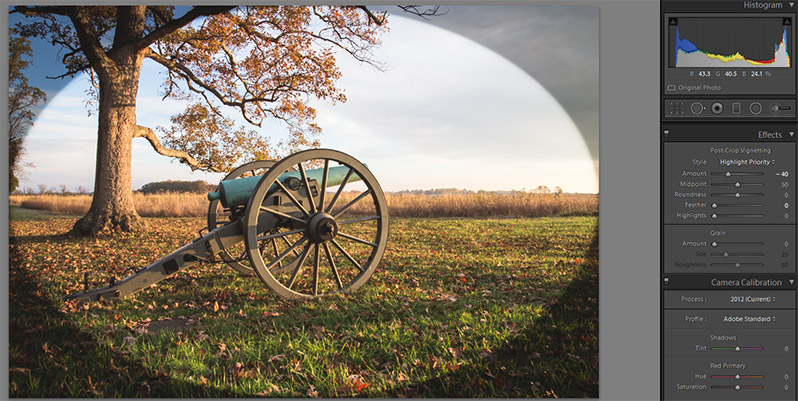
You’ll rarely want a vignette that strong, but the image shows the impact of the amount slider. For the sample photo I’ll set the amount to -40 to give it a dark vignette that is not as overpowering.
Now let’s skip a few sliders for a moment and go down to the “feather” slider. This slider controls hard or soft the edge of the vignette will be. Move the feather slider all the way to the left and you’ll have a hard edge vignette, and move it to the right and it will have an edge that transitions very gradually. The screenshot below shows the feather slider set to “0” to show the hard edge.
While this is likely not the type of vignette that you want, I’m going to leave the feather set to “0” for a few minutes because it will be helpful for demonstrating how the midpoint and roundness sliders work. If you move the midpoint slider all the way to the left (a value of “0”) you’ll get a small area of the photo not impacted by the vignette, as shown below.
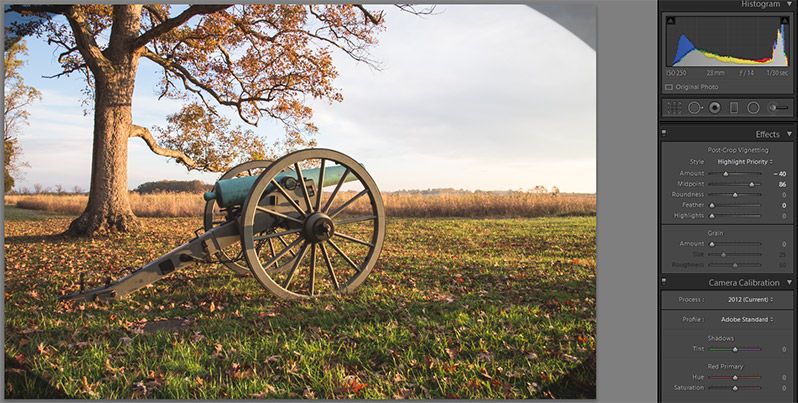
And if you move the midpoint slider to the right you’ll get a vignette that impacts only the corners of the photo, as shown below.
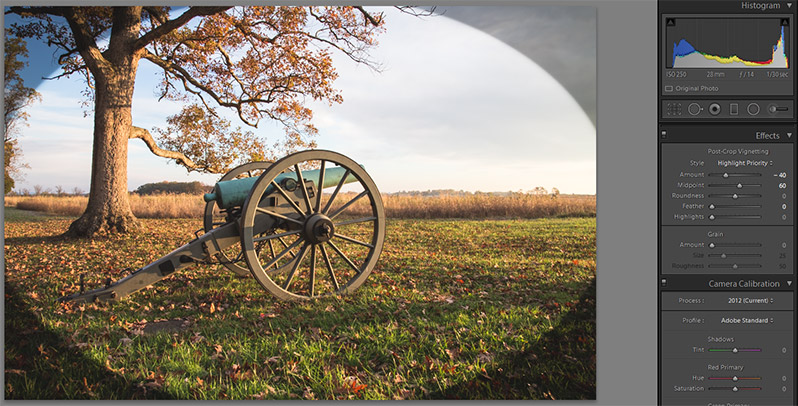
The roundness slider impacts the shape of the vignette. At the default setting of 50 the vignette will have an oval shape.
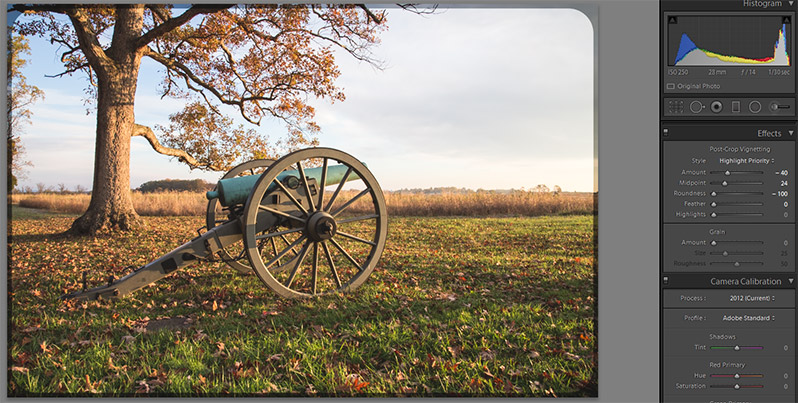
If you move the roundness slider to the left it will give you a rectangular vignette with rounded edges.
And if you move it to the right you’ll get more of a circular shape.
Now that we’ve gone over those 4 sliders I’ll go back and set the vignette for the sample photo to use the following settings: amount of -40, midpoint of 55, roundness of 20, and feather of 50.

The last slider, “highlights”, will allow you to add some highlights back into the darkened areas of the vignette.
Adding Grain
Below the settings for vignettes, you’ll find the settings for adding grain to a photo. You may want to use grain to give a photo a vintage feel, or in some cases you may want to make a photo gritty or add some texture. There are 3 sliders for working with grain: amount, size, and roughness. They are all pretty self explanatory, but let’s take a look at how they work.
The amount slider is set to “0” by default. If you want to add some grain, simply increase the value for the amount. In the photo below I have moved the amount all the way to 100, and you can see that a very noticeable amount of grain has been added.
The size slider is set to 25 by default. Decreasing that value will decrease the size of the grain, and increasing that value will increase the size of the grain. In the photo below I have moved the size slider to a maximum of 100, and you can see that the grain is noticeably larger than in the previous image when it was at the default setting of 25.

The roughness slider will, of course, control how rough the grain is. The default setting is 50. Reducing that value will reduce the roughness of the grain, and increasing that value will increase the roughness of the grain. In the photo below I have moved the roughness all the way to the maximum setting of 100.

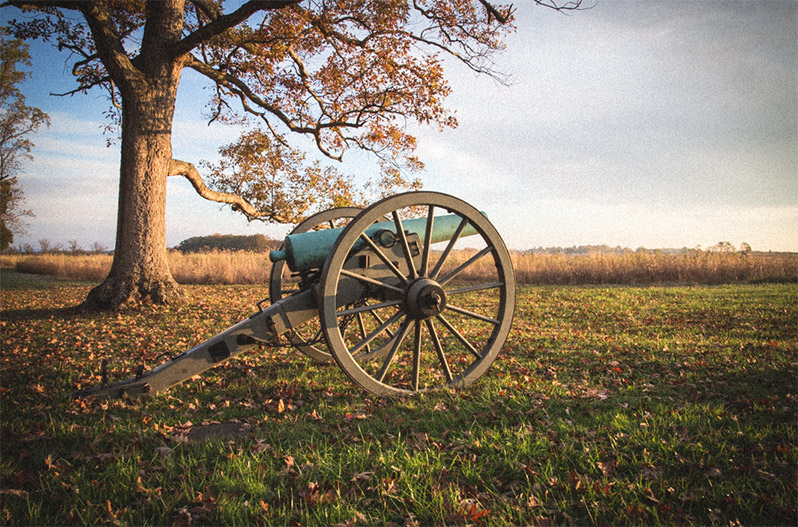
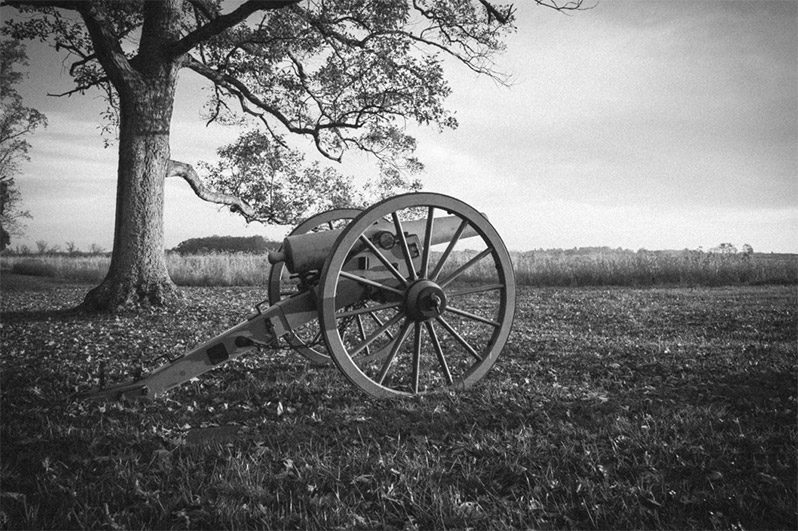
Now that we’ve looked at how the grain sliders work, I’ll go back and set the sliders for this sample photo. I’m going to convert the photo to black and white for a vintage feel. I’ll set the amount to 70, the size to 40, and the roughness to 45.
If you don’t want to miss the other articles in this Photo Editing in Lightroom 101 series, please subscribe to our RSS feed or our email newsletter. As new articles are published they will be added to the series page, which will serve as an index for the entire series.

