Free Photography Bundle ($180 value): PS actions, LR presets, photo overlays, & print templates!
Get it here.

This article is a part of our series Photo Editing in Lightroom 101. Throughout the series we’ll cover the details of Lightroom’s library and develop modules and how you can use Lightroom to improve your own photos. As new articles are published they will be added to this page. If you don’t want to miss future articles in the series, please subscribe to our RSS feed or our email newsletter.
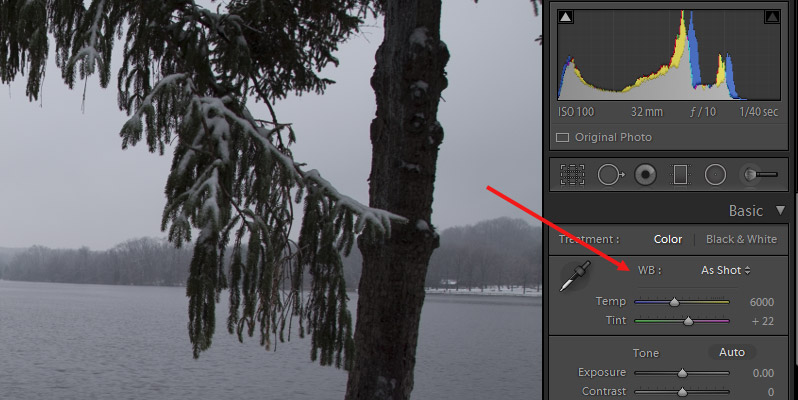
If your photos have an unnatural tint to them it may be due to the white balance or temperature. In Lightroom you can easily make adjustments to white balance, and there are a few different ways to go about it.
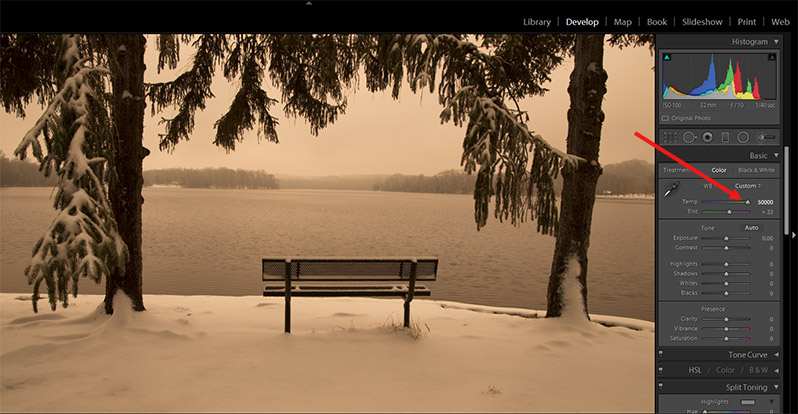
The white balance settings can be found in the “basic” area of the develop module, to the right side of the screen.
The first, and probably the easiest, way that you can adjust the white balance is by using the options in the dropdown. Click on the arrows next to “as shot” and it will give you several different options to select. If you’re working with a RAW file you’ll have more options here. The screenshot below shows the options for a RAW file.
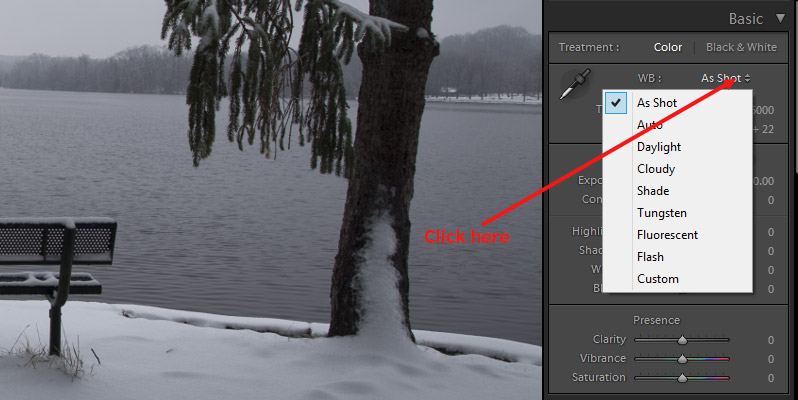
If you select “auto” Lightroom will make its best guess as to the ideal white balance setting. Sometimes this works well, and other times you will need to manually adjust it from there. The other options are daylight, cloudy, shade, tungsten, fluorescent, flash, and custom.
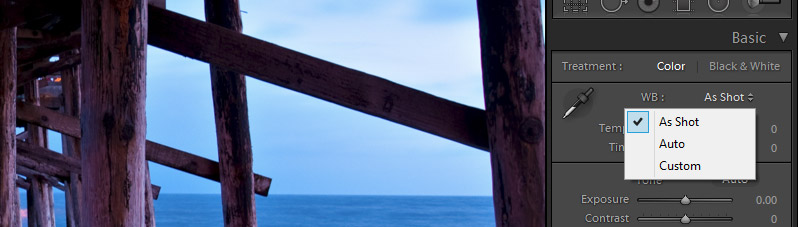
If you’re working with a JPG file your options here will be more limited. You’ll only be able to choose as shot, auto, or custom (as shown in the screenshot below).
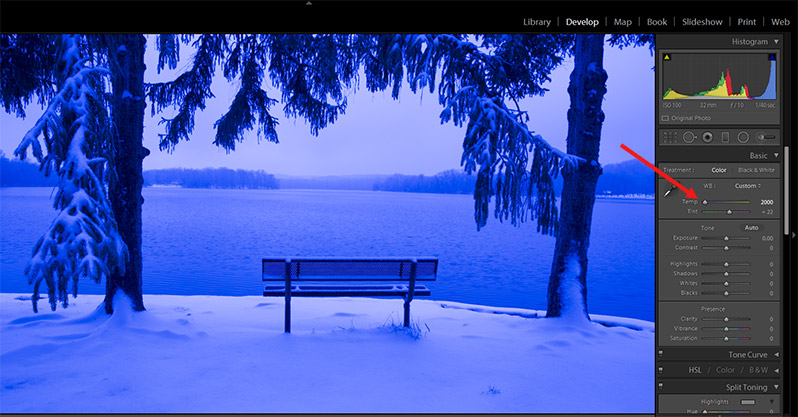
Sometimes the settings in the dropdown will be all that you need to make the right white balance adjustment, but in many cases you may want to tweak it a little bit from there. A second way to adjust the white balance is to use the temperature slider. When you’re using the dropdown to select an option like “daylight” the slider will also be adjusted, you just don’t have to manually make those adjustments. But by doing it manually you have more control and more options.
If you were to take the slider all the way to the left the photo would be very cool with a blue tint.
And if you were to take the slider all the way to the right the photo would be very warm.
If you start by selecting the options from the dropdown you can find the one that looks best, and then just adjust the temperature a small amount from there, if needed, by manually adjusting the slider.
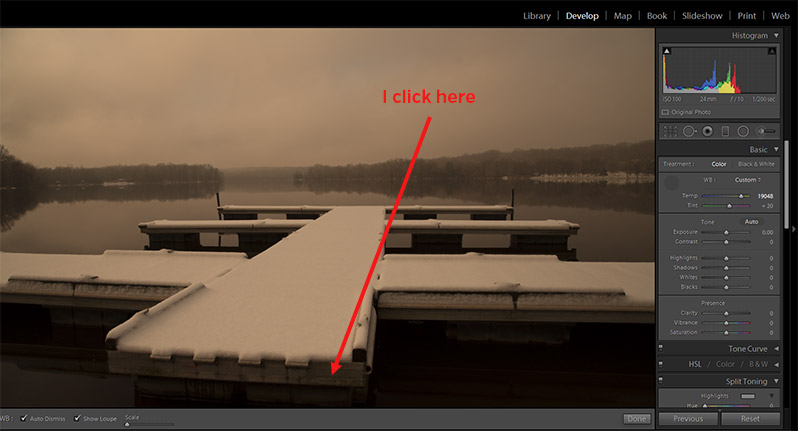
In addition to the dropdown and adjusting the temperature slider, a third way to adjust the white balance is to use the White Balance Selector. This tool allows you to click on a neutral color within your photo and it will adjust the white balance accordingly. You can access the selector by clicking on the icon (shown in the screenshot below), or by using the keyboard shortcut “w”.

For this example I have intentionally set the temperature of this photo to be way too warm. I’ll then use the selector to click on a gray area of the dock in the photo, and Lightroom will adjust the white balance.
And after clicking on the neutral gray area it adjusts the temperature and looks like this.

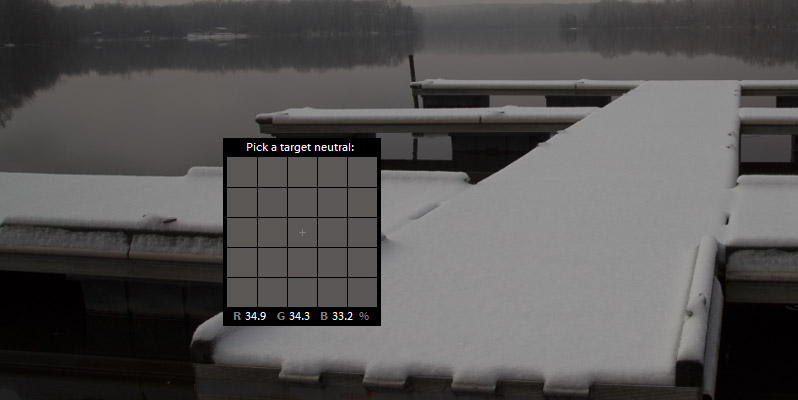
When you are using the selector you will see a grid like the one in the screenshot below. At the bottom it lists the R, G, and B values. A neutral color have values that are equal, or very close to each other. If the values are not equal there is some color in the pixel.
When you use the selector it will also adjust the tint, in addition to the temperature. The tint slider is located directly below the temperature slider and it allows you to adjust the magenta or green tint.
If you don’t want to miss the other articles in this Photo Editing in Lightroom 101 series, please subscribe to our RSS feed or our email newsletter. As new articles are published they will be added to the series page, which will serve as an index for the entire series.

