Free Photography Bundle ($180 value): PS actions, LR presets, photo overlays, & print templates!
Get it here.
Some portraits can benefit from minor touch ups, including whitening teeth. While this can be done in Photoshop, it can also be done quite easily in Lightroom. If you use Lightroom for the majority of your work you will probably prefer not to have to open Photoshop for something like whitening teeth.
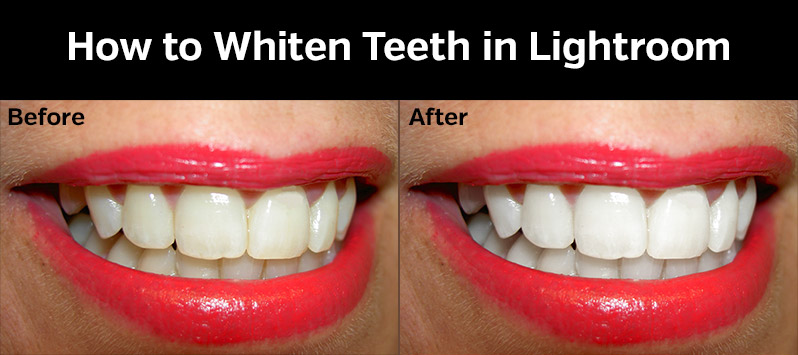
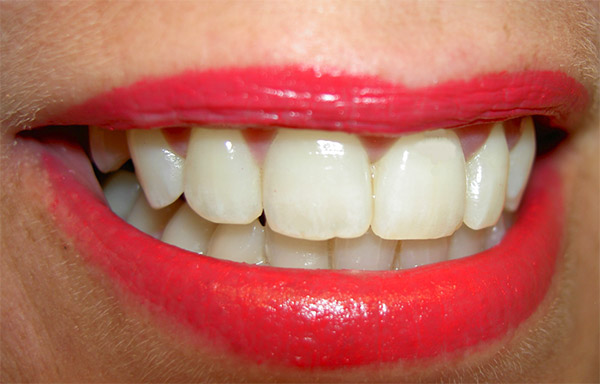
In this tutorial we’ll walk through the simple process of using Lightroom’s adjustment brush to whiten teeth. Here is a look at the “before” version of the sample photo that I’ll be using for this tutorial.
And here is how it will look after we have whitened the teeth.
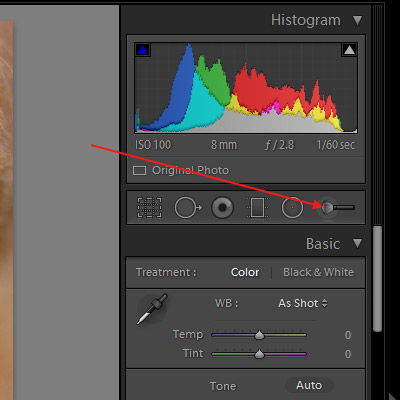
Ok, to get started you’ll want to select the adjust brush. You can do this by clicking on the icon shown below, or simply use the keyboard shortcut “k”.
For this tutorial I’ll be working with one of the adjustment brushes from our Master Workflow Lightroom Presets, but Lightroom also has a built in adjustment brush preset for whitening teeth that you can use if you’d like, or you can adjust the settings manually. The settings I am using through the Master Workflow brush for whitening teeth are: exposure +0.40, highlights +5, clarity +5, and saturation -50.
The adjustment brush also has settings for size, feather, and flow. The size setting will depend on the size of the area that you want to edit. I prefer to work with the feather at 0 and flow at 100 for whitening teeth. Move your mouse over the teeth and you’ll see a circle. Adjust the size setting and the size of the circle will change. For smaller details you will want a smaller brush, and for larger areas a larger brush size will make the process faster.
Now, simply use your mouse to brush over the teeth. You can use the keyboard shortcut “O” to see a red overlay that shows where you have brushed.
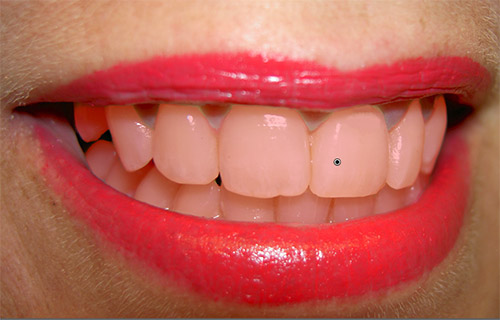
This is really helpful to make sure that you are getting everything that you want to whiten. And if you need to erase and area where you didn’t mean to brush simply hold the alt key (PC) or option key (Mac) and brush over the area that you want to erase.
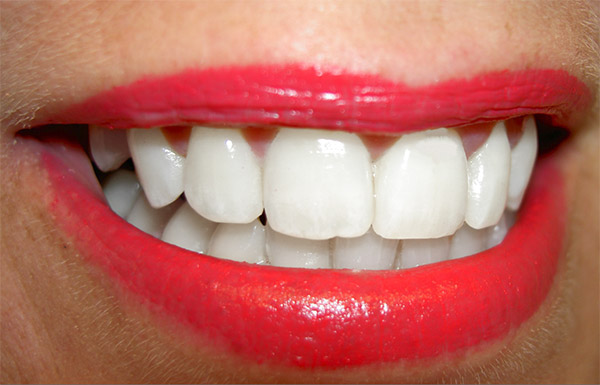
And that’s it! After apply the brush with the teeth whitening settings our sample photo looks like this:
You can also adjust the settings after the brush is applied if you are not totally happy with the effect.

