Free Photography Bundle ($180 value): PS actions, LR presets, photo overlays, & print templates!
Get it here.
This article is part of our series Photo Editing 101 by Ian Pullen. This series will cover all of the basics of using Photoshop for editing photos. If you’re just getting started with Photoshop or photo editing, or if you’re looking to improve your skills in this area, this series will provide an excellent foundation. If you want to make sure that you don’t miss future articles you can subscribe to our newsletter or follow us on Twitter, Google+, or Facebook. You can also find the articles that have already been published by visiting the Photo Editing 101 course page.
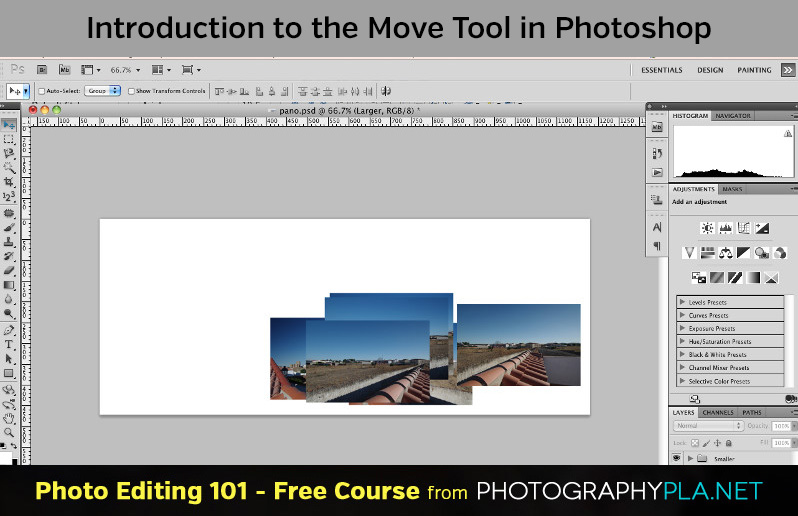
The Move Tool is the active tool every time that you start Photoshop and is useful for moving layers and selections around. While it’s quite a humble tool, there’s a little more to it than you may think, though some of the features may be best suited to designers rather than photographers.
The Align and Distribute features in particular perhaps fall into this category, though they may be useful if you’re producing a collage of images, perhaps for display on a web page.
Let’s take a look at the various options and get a better feel for all that is possible with the Move tool, including the ability to produce simple panoramic images. The full range of options only really become available when you’re working on files with more than one layer, but if you’re the type to get creative with your images by combining and compositing layers, you may find some of these features useful.
How Do You Activate the Move Tool?
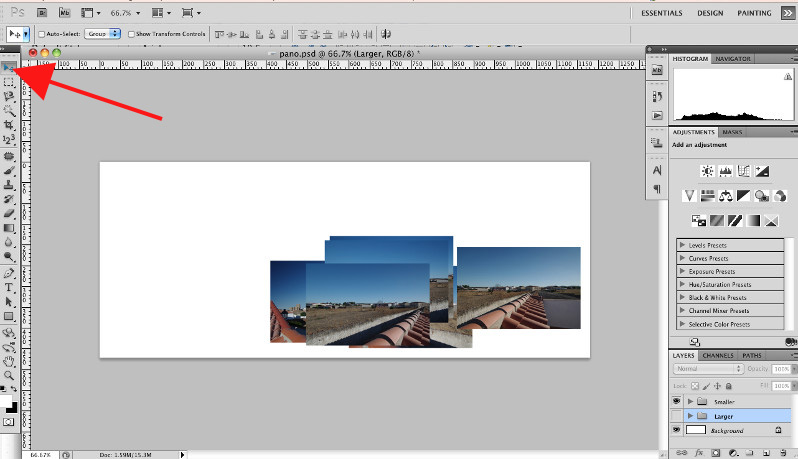
The Move tool is the very first icon in the Tools palette and is selected by default when you launch Photoshop.
What Does Auto Select Do?

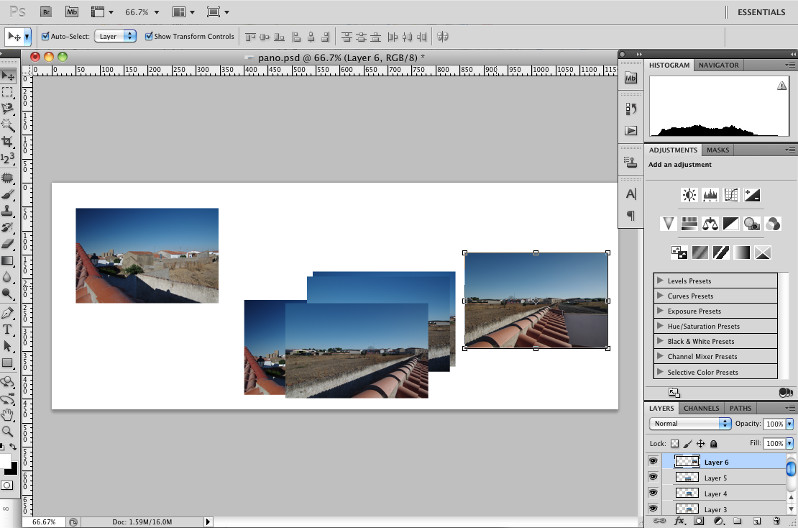
Have you ever been working on a Photoshop file with many layers and had difficulty trying to select a layer that contains a specific element? You can see the element, but can’t work out which layer it is on. There’s an easy way to remove the pain from this situation. Just click on the Auto-Select check box to activate it and you can now click directly on the image to select layers, rather than selecting them in the Layers palette.
If you look at my screen shot, you can see that I’ve got a file open with various layers and it would be very difficult to work out which one to select in the Layers palette, but with Auto-Select active, it’s very easy to select a layer directly in the image.
To the right of the Auto-Select control is a drop down menu with two options. When it is set to Layer, it will select just the layer that you click on, but when set to Group, it will select the complete group that the layer is contained within. In the event that the layer is not in a group, then just the layer is selected.
Note that if you click and drag, you’ll see a marquee is drawn and any layers that have pixels within this outline are selected.
What Does Show Transform Controls Do?
This can be a handy way to avoid having to go to Edit > Transform each time you wish to apply a transformation to a layer. When this check box is active, a bounding box with drag handles is automatically applied to the selected layer, allowing you to scale and change the proportions of the layer. If you have selected a group, a single bounding box will be displayed around all of the layers in the selected group.
What Do the Align Controls Do?
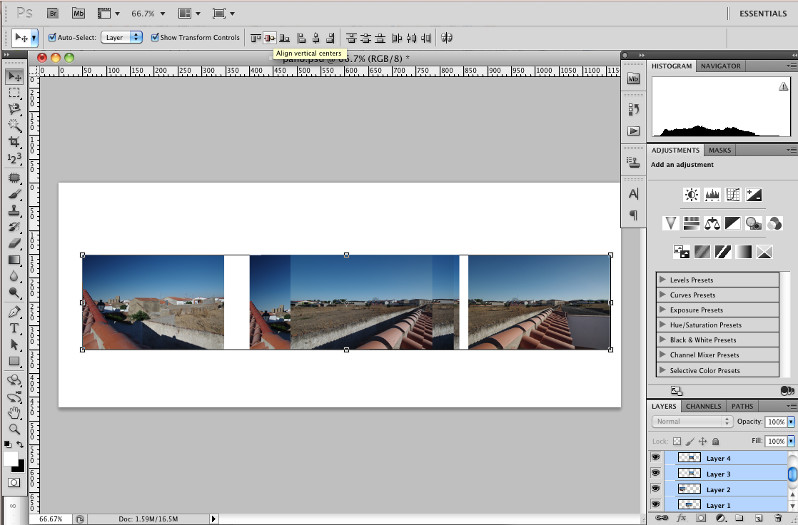
This makes it very easy to arrange multiple layers quickly. In the previous screen shot, you’ll have seen that all of the layers in my file are scattered randomly. In this screen shot, you can see that they are now aligned to the same point vertically.
I did this by selecting all of the image layers by clicking and dragging over all the layers with Auto-Select active. I then clicked the Align vertical centers icon. If you mouse over the icons, a tooltip describes what they do, though the icons themselves are quite descriptive.
What Do the Distribute Controls Do?
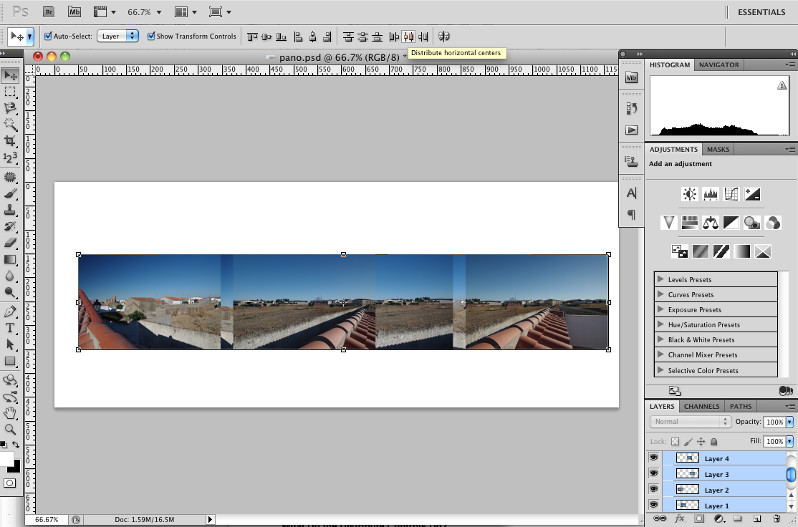
These are very similar to the align controls, but can be used to space layers evenly. In the screen shot, I clicked the Distribute horizontal centers, though because the layers overlap, it isn’t as obvious as it could be.
What Does Auto-Align Layers Do?
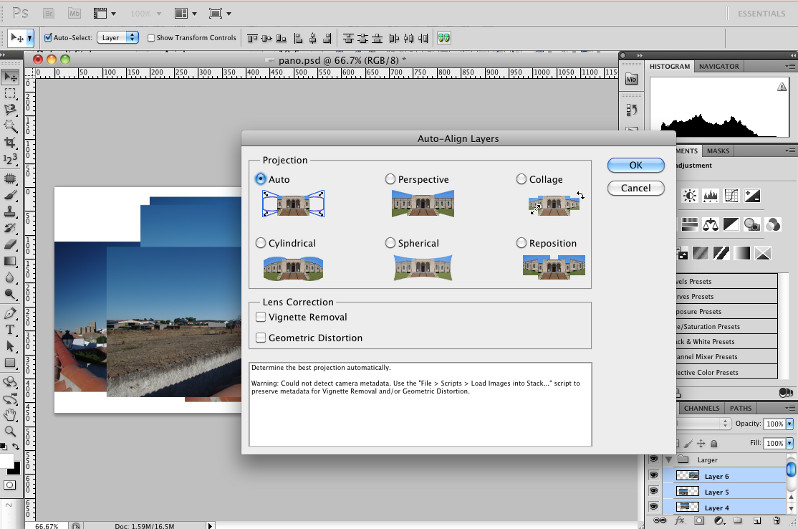
This final control sits right at the end of the tool options bar and this is the reason that I selected the photos that I have for the file that I’m working on, though I’m using larger versions of the images for this step. This feature is designed to automatically analyze layers and try and combine them when it recognizes common features in them. In this case, I have six overlapping images shot from my sun terrace and as before all six of the layers are selected.
I then clicked the Auto-Align Layers icon and opened the dialog that offers various options for combining the layers. I think the best advice is to try them all out and see which one best achieves the result that you’re after. Once you’ve clicked the OK button, you only need to go to Edit > Undo and you can then try one of the other options. Alternatively, you can combine different settings together.
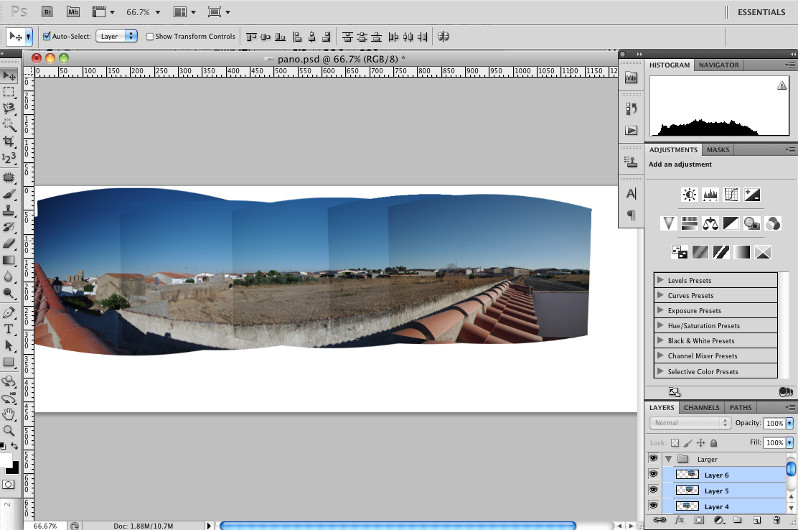
Here you can see the result of the Auto setting. It’s aligned the images quite well, but obviously the edges are quite obvious. To get around this, you need to manually blend the edges, but it does form a good base for a panoramic image if you don’t have specialist software for this task. The shot below shows this image cropped and blended into a better looking panorama.

Conclusion
Photoshop’s Move tool may seem very basic, but there are a few more features to it than you may at first realize that make it surprisingly powerful for some tasks.
See more articles in the Photo Editing 101 series.

