Free Photography Bundle ($180 value): PS actions, LR presets, photo overlays, & print templates!
Get it here.
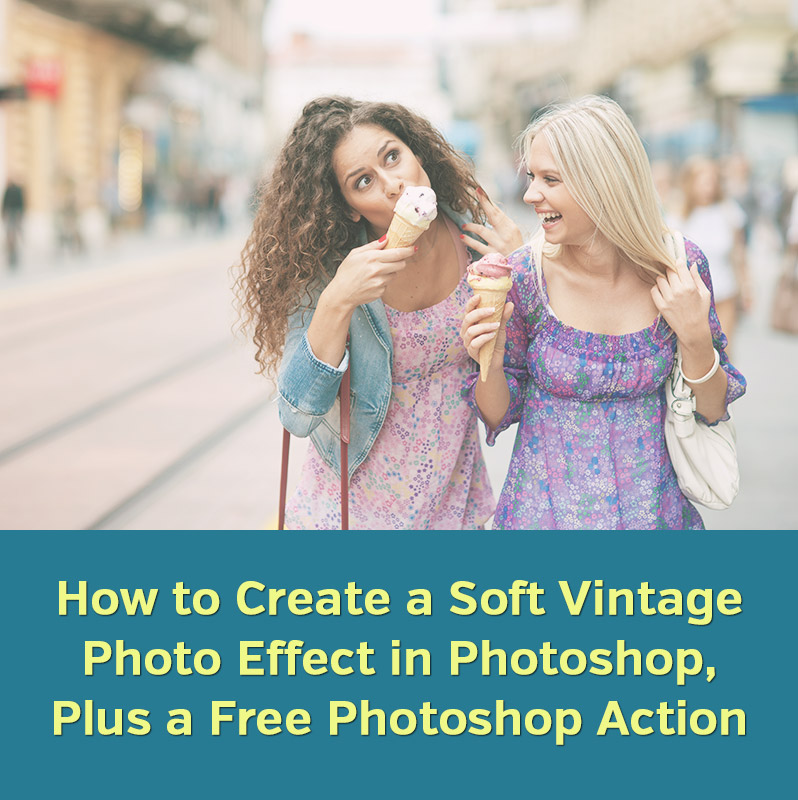
Vintage photo effects are extremely popular, and in this tutorial we’ll walk through the process of creating a soft vintage effect in Photoshop. At the end of the article you can also download this effect as a Photoshop action that you can use with your own photos if you prefer not to go through the steps manually.
In this tutorial we’ll use non-destructive adjustment layers, so you can always make changes later if you save it in PSD format, and the original photo layer will not be impacted or harmed.
Here is a look at the “before” version of the sample photo that I’ll be working with.
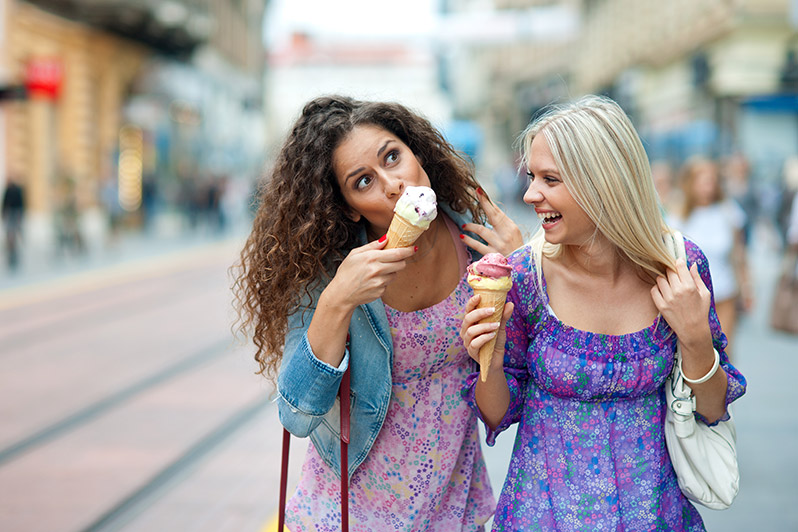
And here is a quick preview of the “after” photo.

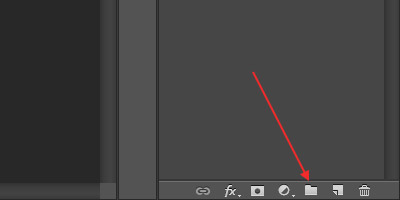
Ok, so let’s get started. First, create a folder in the layers palette by clicking on the new folder icon.
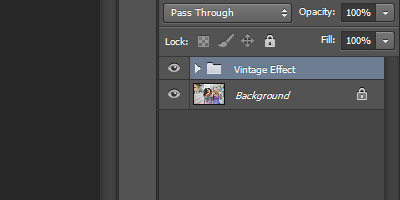
This creates the new folder. I’m going to label it as “vintage effect”.
Next, add a new curves adjustment layer. To do this, click on the icon to create a new adjustment layer.
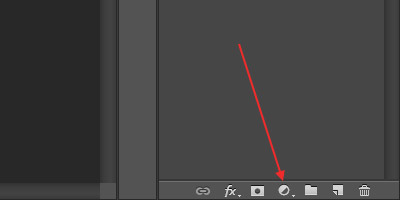
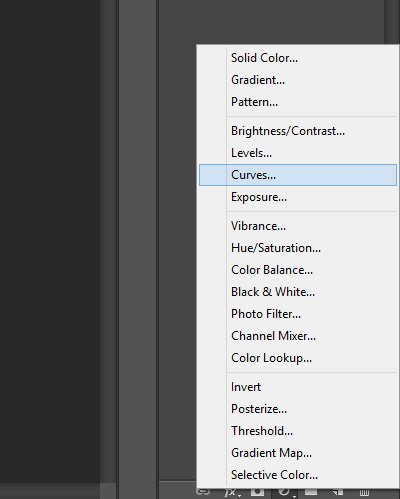
Then click on “curves” and it will create the curves adjustment layer.
Now you want to apply curves that resemble the ones shown below. You’ll adjust red, green, and blue, and then also the RGB curve.
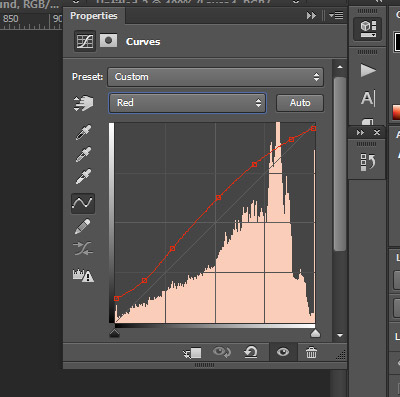
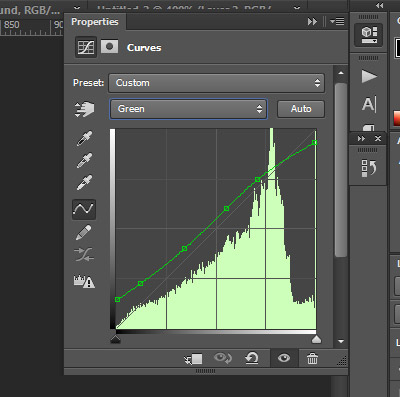
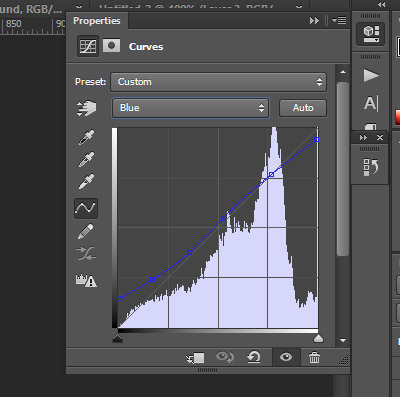
With the RGB curve (shown in white) you want to add a slight lift to the curve, which will slightly lighten the midtones of the photo.
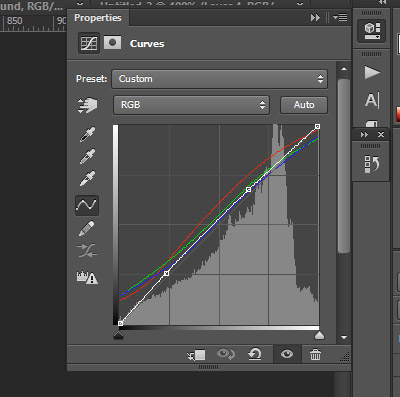
The changes to the red, green, and blue curves with adjust the colors and give it a subtle vintage feel. Here is a look at the photo after the curves adjustment.

Next, we’ll add a brightness and contrast adjustment layer. Click on the icon to add the adjustment layer and then select “Brightness/Contrast”.
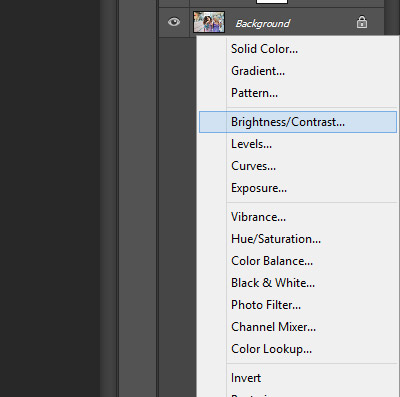
With this adjustment layer, set the contrast to -10.
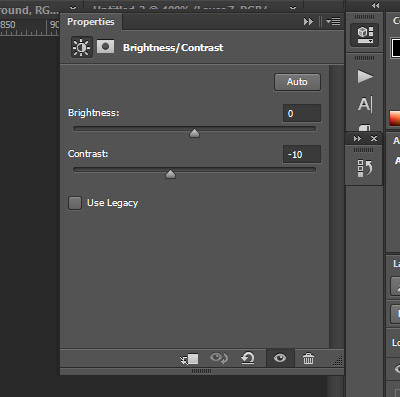
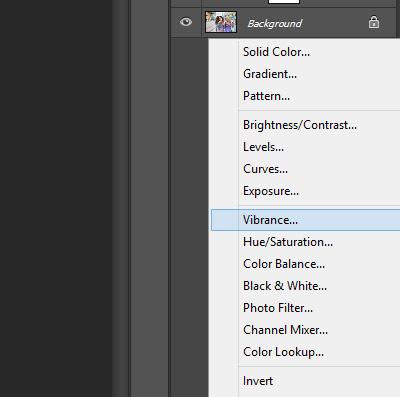
For the next step, add vibrance adjustment layer.
Set the vibrance to -10 and saturation to -12.
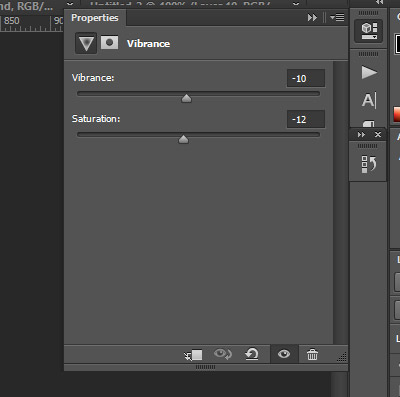
These changes to contrast, vibrance, and saturation will tone down the colors and give it more of a vintage/aged feel. Here is a look at the work in progress.

For the final step, add a solid color adjustment layer. Fill it with the color #f8ebd2, which is a light creamy color. Then set the layer’s blend mode to “soft light” and the opacity to 55%. You may want to adjust the opacity percentage based on the photo that you are working with.
And that’s it! Here is our finished product.

It’s a soft, subtle vintage effect that will work well with many photos. I’ve also created a Photoshop action that uses these steps, and you can download the action for free.
If you want to learn more about photo editing in Photoshop please see our free tutorial series, Photo Editing 101.

