Free Photography Bundle ($180 value): PS actions, LR presets, photo overlays, & print templates!
Get it here.
This article is part of our series Photo Editing 101 by Ian Pullen. This series will cover all of the basics of using Photoshop for editing photos. If you’re just getting started with Photoshop or photo editing, or if you’re looking to improve your skills in this area, this series will provide an excellent foundation. If you want to make sure that you don’t miss future articles you can subscribe to our newsletter or follow us on Twitter, Google+, or Facebook. You can also find the articles that have already been published by visiting the Photo Editing 101 course page.
The Curves Adjustment Layers in Photoshop are just one of several ways to adjust your photos’ exposure. Curves can look a little confusing at first, but they offer a greater degree of flexibility over adjustments than can be achieved using Levels. As there are several ways to work with Curves, everyone should be able to find a method that they’re comfortable with.
You can add a Curves Adjustment Layer by going to Layer > New Adjustment Layer > Curves or, if the Adjustments palette is open, click on the Curves icon which is the third from the left in the top row of icons.
How Do You Use Presets and Auto?
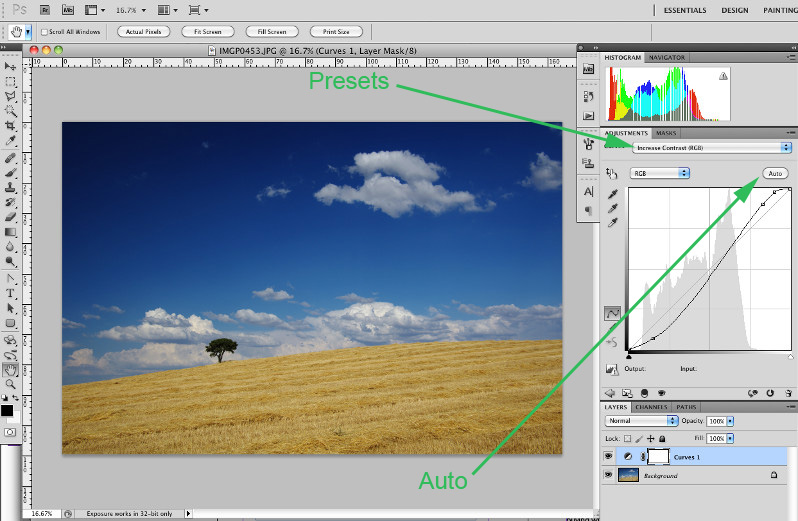
The easiest way to get to grips with Curves is to use one of the two one-click methods. The first of these is the Auto button and you may find that the results that you get with this are perfect for your use. In my case, it produced a very slight red color cast. The other option is to select one of the presets from the drop down menu at the top of the palette. In the screen shot above, you can see the result of using the Increase Contrast (RGB) setting.
One good thing about using these automatic settings is that you can see different settings in the Curves palette and see the effect they have on the image. This will help you to understand how the tool works and to make your own manual adjustments.
How Do You Manually Adjust a Curve?
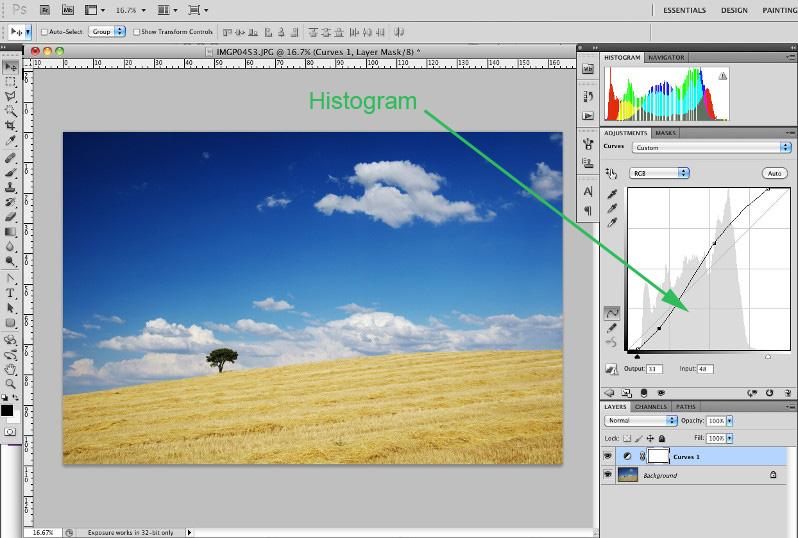
In a gray tone in the background of the Curves palette, you can see a histogram that represents the tonal values in the image. You should be able to make out that in my screen shot, the histogram doesn’t reach to either edge, meaning that there are no true black or white tones in the photo.
I can correct for this by moving the little black handle under the curves window to the right until it aligns with the left hand edge of the histogram. This has the effect of turning pixels that were dark gray to black or near black. Moving the white handle to the left until it aligns with the right hand edge of the histogram effectively lightens light tones to a pure white. This ensures that the image will now contain all or almost all tonal values from black to white, which gives the image a contrast boost.
To manually adjust a curve, you just click on the line that crosses in front of the histogram and drag up to lighten the pixels at that point and down to darken them. In the screen shot you can see that I applied an ‘S’ curve to my image. This is a very common technique that helps to boost contrast and make colors appear more saturated. This simply involves clicking on the line nearer to the dark end on the left and dragging down a little. Then you click nearer the light end and drag upwards. The darks become darker and the lights lighter, adding a little punch to the image.
How do You Adjust a Curve By Clicking on the Image?
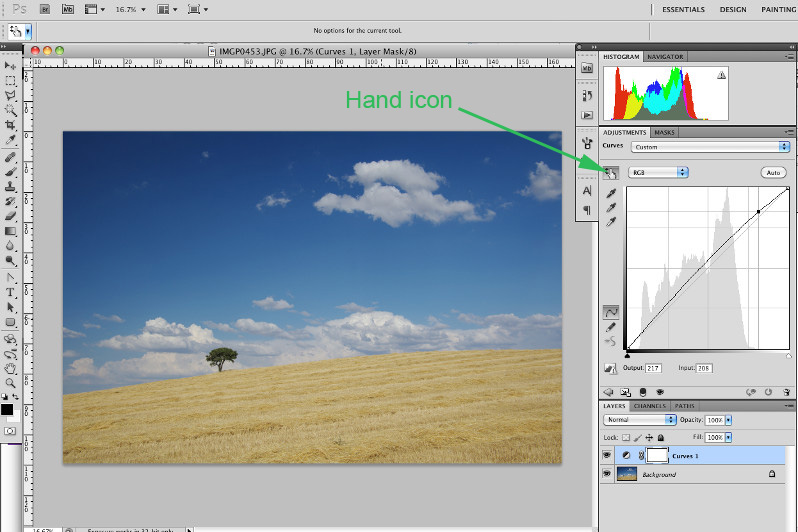
Another way to adjust the curve is by clicking on the little button with the hand icon that is at the top left corner of the curves window. If you now drag your cursor over the image, the cursor will appear as an eye dropper and you will see a circle appear over the curve line. The circle represents the tonal values of the pixels at the point that the cursor is currently hovering. In the image, though not visible, I’d hovered the cursor over a light region of the clouds and then clicked and dragged upwards. You should see that a black dot on the curve line represents the tonal value of the point that I clicked and that by dragging upwards, the curve was lifted up at this point. I could also have clicked on a dark area of the tree and dragged downwards to produce an ‘S’ curve similar to the one I made manually.
How Do You Adjust a Curve By Using the Eye Droppers
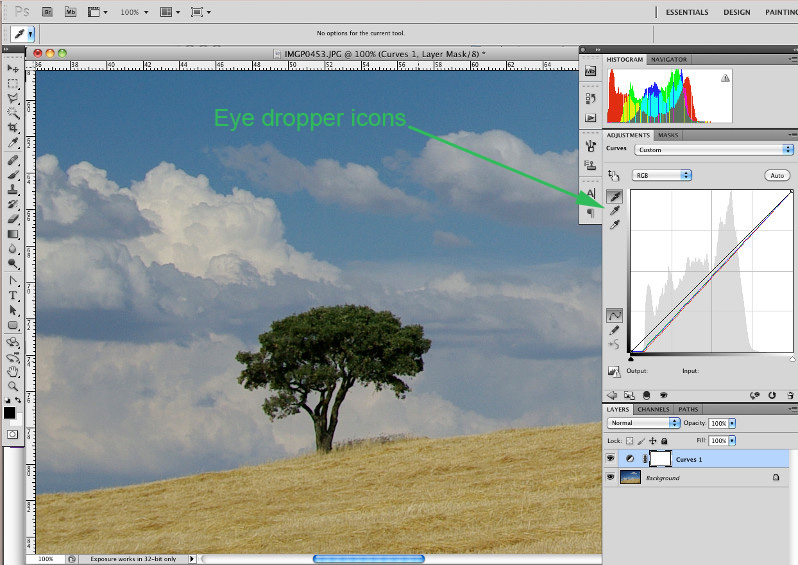
You should see three eye dropper icons to the left of the curves window and you can very easily use these to edit your Curves layer. In the screen shot above, I zoomed in so that I could more easily see where the darkest pixels in the image were. I then clicked on the top eye dropper, which is for setting the black point, and then clicked on the dark pixels. You should see that this had the result of splitting the curve into red, green and blue lines and also made the darkest tones of the photo darker. I could also have selected the bottom eye dropper and clicked on the image at the lightest point and this would have resulted in lighter tones at the other end of the histogram. The down side of using this technique is that if you click on a point where the mix of red, green and blue is not equal, you introduce a color cast to your image. This is particularly a problem if you use the middle eyedropper and try to select the mid gray point for your curve.
How Do You Draw a Curve?
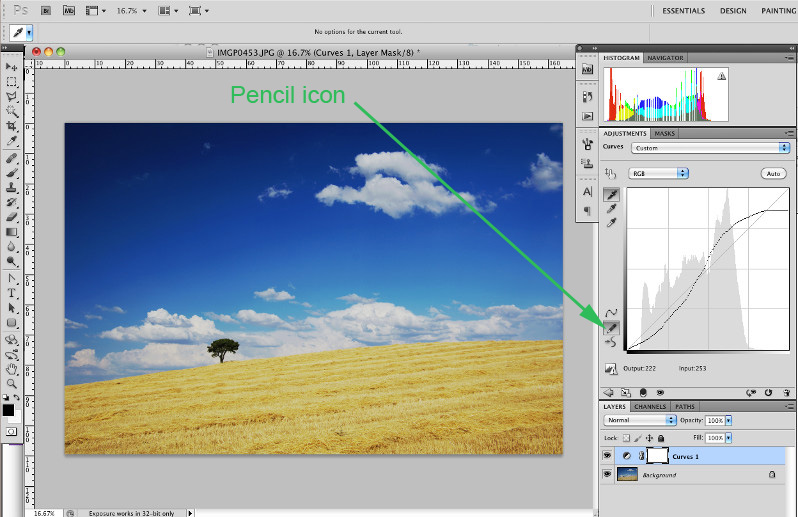
By default, curves are adjusted in smooth bezier-like curves, but you can also click on the pencil icon and draw a curve manually. In reality this would more commonly be used for making an adjustment to a curve, but in the screen shot you can see that I used the tool to draw an ‘S’ curve. You should see that the line looks a little rough compared to the other curves earlier on this page. You can, however, refine this curve by clicking on Smooth button below the pencil. Each time you click this, it will smooth the curve a little and should help to produce a more natural effect on your photo.
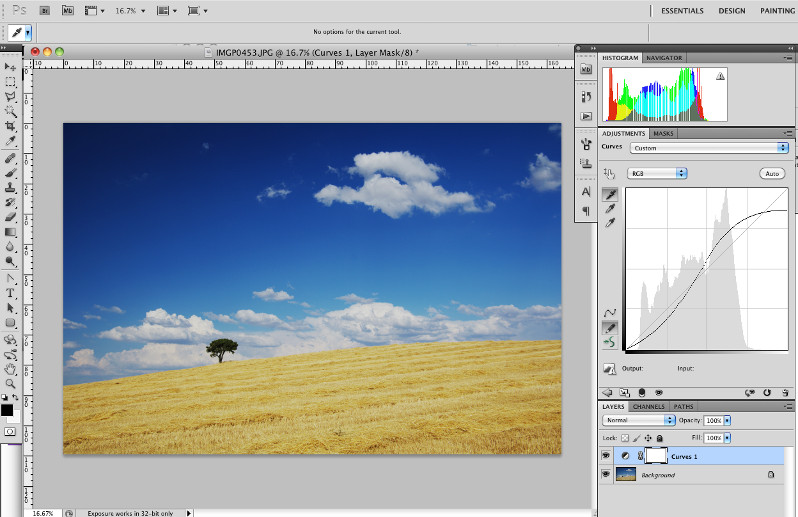
This screen shot shows the curve after it has been smoothed a little. It now looks less rough and hand drawn.
How Do You Adjust the Curves of Individual Channels?
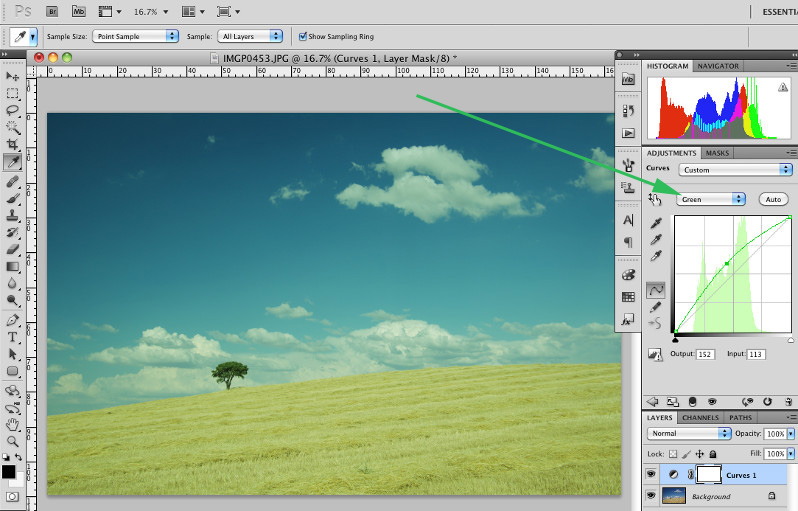
We saw that when the eye droppers are used, each individual color channel is adjusted independently. In most cases, you will only want to adjust all three channels equally and the default setting is for the channel drop down menu to be set to RGB.
If you want to specifically adjust a single color channel at a time, just change the drop down to your desired channel. In the screen shot above, I selected the Green channel and then pulled the curve upwards to apply a slight green color cast. This might be handy if you wanted to add a bit of a faux retro photo effect.
Conclusion
The Curves Adjustment Layers can look a bit confusing, but they are a very flexible and powerful way to adjust the exposure of your photos. Often a simple ‘S’ curve is enough to add some punch to a photo, but you can also target quite specific tonal values in a way that you can’t with Levels. Looking at the way the presets change the curves can be a good way to get a better understanding for how you can achieve different effects.
See more articles in the Photo Editing 101 series.

