Free Photography Bundle ($180 value): PS actions, LR presets, photo overlays, & print templates!
Get it here.
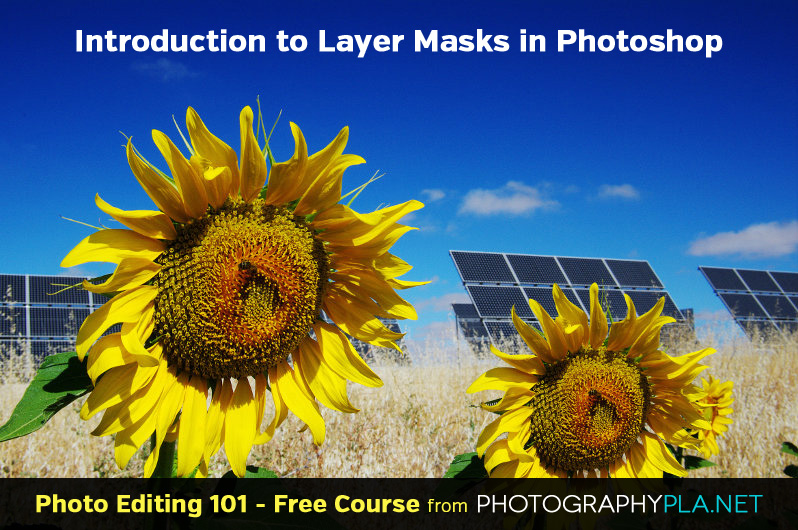
This article is part of our series Photo Editing 101 by Ian Pullen. This series will cover all of the basics of using Photoshop for editing photos. If you’re just getting started with Photoshop or photo editing, or if you’re looking to improve your skills in this area, this series will provide an excellent foundation. If you want to make sure that you don’t miss future articles you can subscribe to our newsletter or follow us on Twitter, Google+, or Facebook. You can also find the articles that have already been published by visiting the Photo Editing 101 course page.
Photoshop’s layer masks are a very powerful feature of layers that allow you make non-destructive edits to individual layers. When you form composite images with multiple layers, you generally need to remove areas of a layer to allow layers below to show through. You could just erase areas, but this permanently removes pixels and you have no way of making these pixels visible again if you later find that you’ve erased more than you should have.
Layer masks get around this problem by hiding pixels from view, without deleting them completely, so that you can make them visible again later if required. In this tutorial, I’ll give you a brief introduction to using layer masks.
Select an Image to Work With
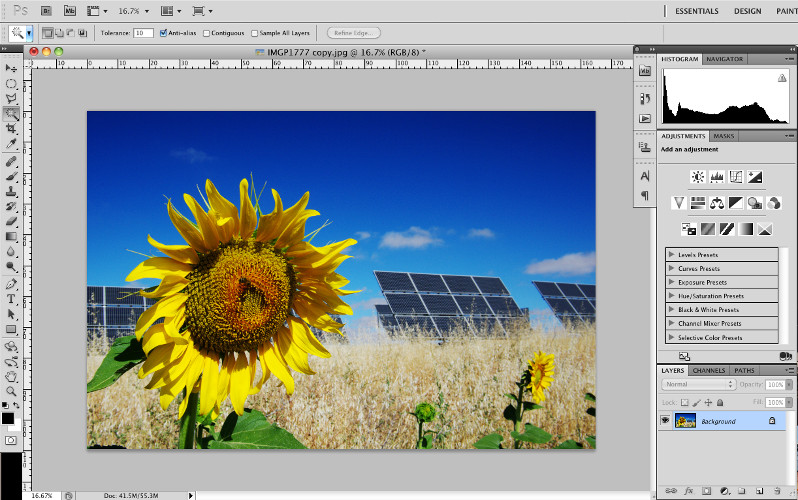
You may have already noticed that the main image at the start of this page has had an extra sunflower added to it. Though it won’t be so obvious at this size, it was a quick and rather rough job, though the biggest giveaway is probably the fact I just duplicated the main sunflower. You can see in this step how the image looked prior to that edit.
Select the Area You Want to Copy
You need to make a selection around the area that you want isolate and there are many different ways to achieve this. How you do this will be down to personal preference and the image that you’re working with, but making a selection by color or using the Magnetic Lasso are two fairly easy techniques, though I’ll quickly describe the technique that I used.
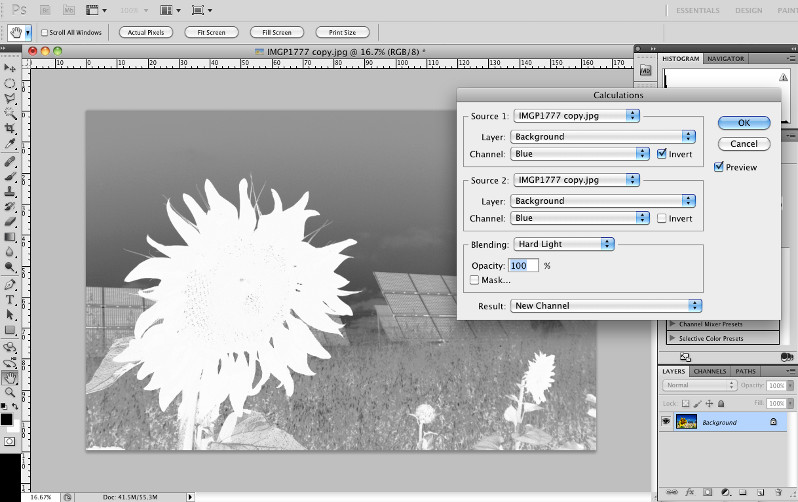
If I’d had more time, I’d have probably gone to work with the pen tool, but that’s just my personal preference. As it is, in this case I made a quick selection by going to Image > Calculations. Calculations can look a bit complex, but you’ll soon find your way around using them with some experimentation – I’ve described them previously in an article on creating masks using channels.
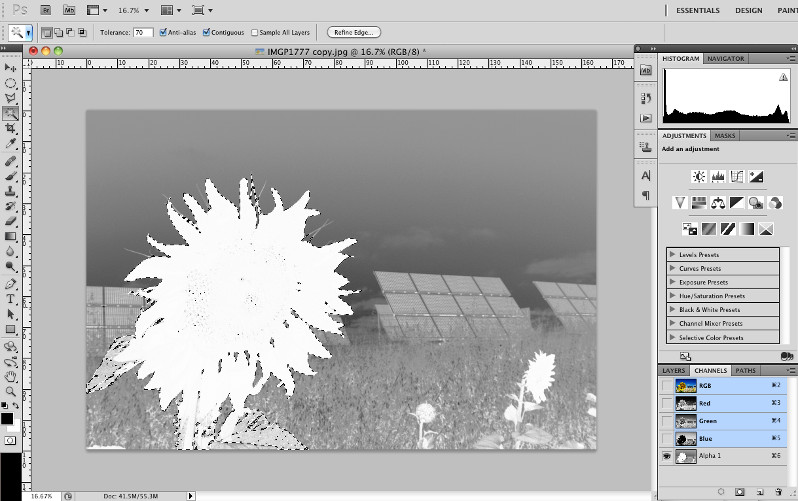
You can see in this screen shot that a new Alpha channel has been added to the image and I selected the Magic Wand tool, set the Tolerance at the top of the screen to a fairly high 70, ensured Contiguous was checked and then clicked on the white of the flower.
Add a Layer Mask
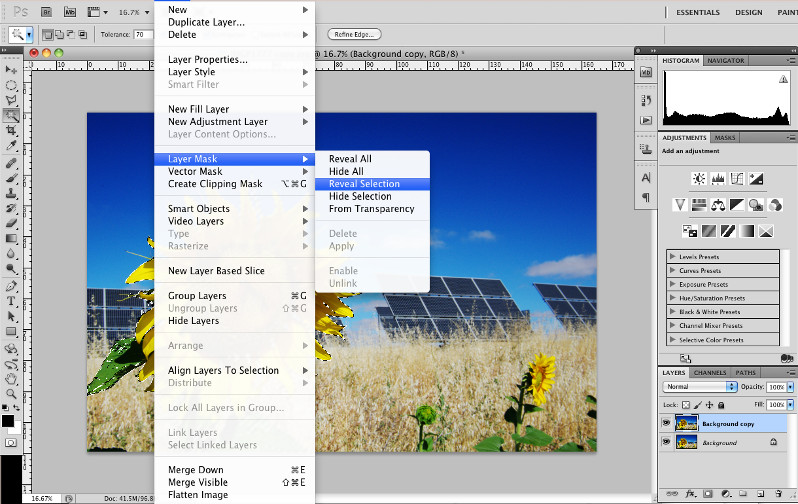
Next go to Layer > Duplicate Layer to create a copy of the background layer and then Layer > Layer Mask > Reveal Selection to apply a mask to the new layer. You’ll see that a new black and white icon has been added to the new layer that represents the mask that has been applied. The white areas of the mask are the parts of the layer that are visible and the black are the hidden areas.
Edit the Layer Mask
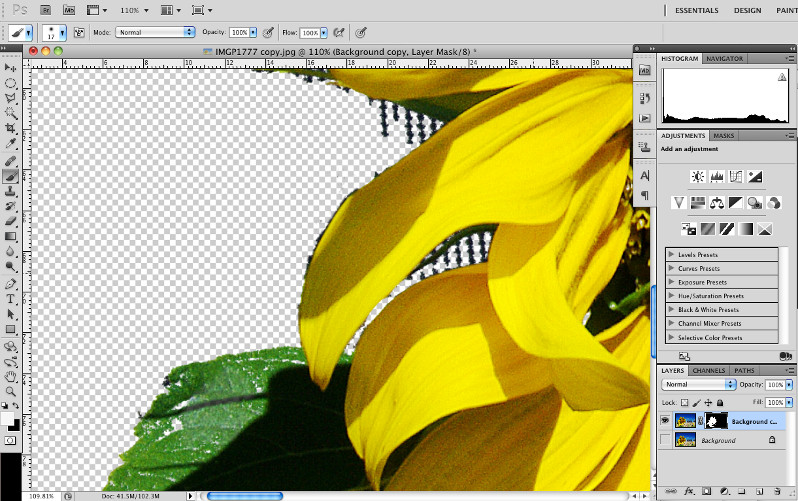
If you click on the eye icon of the background layer to turn off its opacity, you’ll see that the flower has been cut out from the background, most of which is now transparent.
However, you may find that some areas are invisible, that should be visible and vice versa. On the zoomed in screen shot, you can see that there are various holes in the leaf and some rough edges around the flower, including a few bits of the solar panels that were included in my rough selection. We can use the paint brush to edit the mask and show and hide areas as desired.
Click on the mask icon to ensure that it is active – a broken outline around the icon in the layers palette confirms it is active. You’ll see that the foreground and background colors are set to black and white. If you select the Brush tool, set it to an appropriate size and set the foreground color to white, you can paint directly onto your image and areas that aren’t visible will start to reappear. In the screen shot above, I’ve already started to paint on the leaf. Don’t worry if you paint on an area that you didn’t want to reveal. Just switch the foreground color to black and paint over it again to hide it.
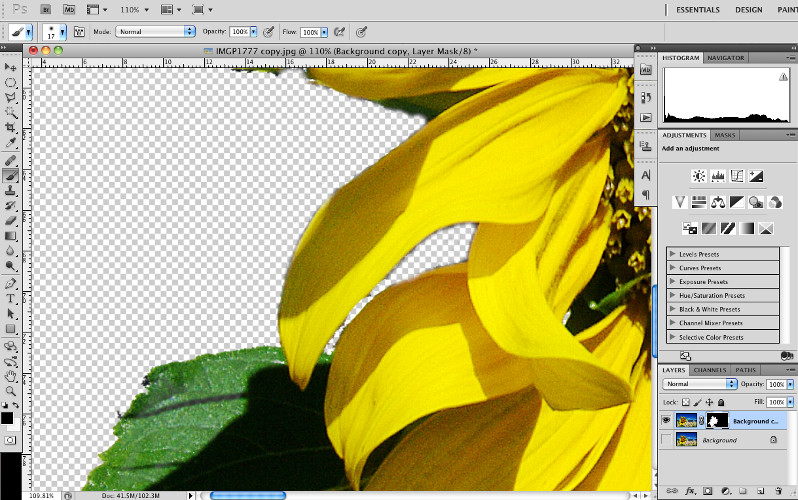
In the screen shot above you can see that I’ve switched the foreground color to black and painted over some of the areas around the flower to hide them. Using this technique, you can fine tune a mask to ensure that it reveals exactly the areas that you want to be visible, but always knowing that you are not permanently erasing areas in case you need to reveal them again later.
Move and Scale Your Duplicated Layer
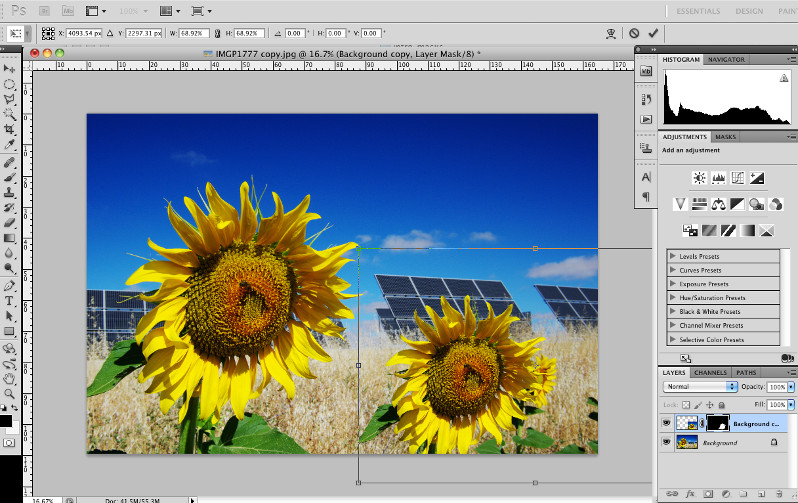
The final step for me with my image was to scale down the duplicated flower and re-position it. With the Move tool selected, you just need to click and drag the layer to position it as desired. Go to Edit > Transform > Scale and you’ll see that the bounding box matches the boundary of the layer, even though much of it is not visible. When dragging a corner grab handle to scale the layer, hold down the Shift key to keep the proportions the same.
That is a quick hands on introduction to how layer masks operate and how you can use them with your own work. If you’re already using layers to form interesting composite images, getting to grips with masks will make your life much easier and open up new creative possibilities.
See more articles in the Photo Editing 101 series.

