Free Photography Bundle ($180 value): PS actions, LR presets, photo overlays, & print templates!
Get it here.
Lightroom provides photographers with an amazing combination of tools for organizing photos and for post processing. And while Lightroom is extremely useful, chances are you would prefer to spend your time out in the field or in the studio rather than at your computer. By speeding up your workflow in Lightroom you can have more time to do other things aside from post processing.
So let’s take a look at 7 different ways to reduce the amount of time in your post processing.
1. Decide on a System for Organizing Your Photos
The first step is to establish your own organizational system for your photos. Lightroom’s Library module offers several ways to organize your photos through the use of metadata (like keywords), catalogs, collections, and folders. There is no right or wrong way to use these organizational tools, which can present a challenge for knowing how to use them effectively. Some photographers prefer to use multiple catalogs, and others prefer to keep everything in one catalog. Personally, I use the one-catalog approach and then use collections to organize photos. Keeping everything in one catalog makes it much easier for searching and filtering.
If you’re not already familiar with Lightroom catalogs and collections and how they work, please see Working with Catalogs, Collections, and Folders in Lightroom and How to Create and Manage Catalogs and Collections in Lightroom.
Once you become familiar with how Lightroom’s organizational tools and the Library module work you can decide on a setup that will work best for you. And it’s important that you stick to your system and use it consistently. For example, if you are using a single catalog you will need to be sure to add your freshly imported photos to the appropriate collection as soon as you import them, otherwise you’re likely to forget and wind up with hundreds or thousands of unorganized photos in your catalog.
Having an organized system is the first step in streamlining your Lightroom workflow.
2. Get Rid of the Bad Photos
After importing your photos, go through them and for each photo decide to either keep it or reject it. Lightroom’s Library module offers handy keyboard shortcuts to help with this process. To start, select the loupe view be clicking on the icon shown below, which will allow you to browse through photos one-at-a-time in the Library module.
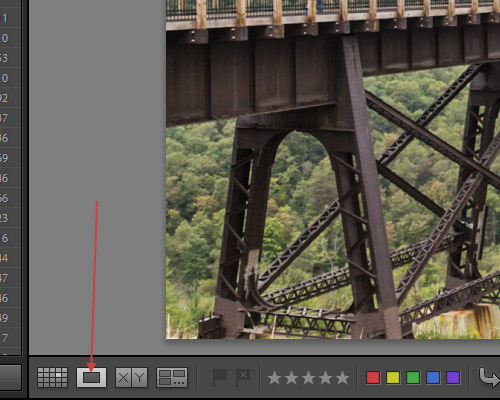
For each photo use either the keyboard shortcut “P” for pick (keep), or “X” for reject. Once you’ve gone through all of them you can use the keyboard shortcut Control + backspace (PC) or Command + backspace (Mac) to delete the rejected photos.
Now you will have fewer photos in your collection and you don’t waste time in post processing on photos that you will never use.
3. Use Flags, Ratings, and Color Labels Consistently
Lightroom offers several different ways to rate your photos. The key is to use these ratings consistently so they will mean something to you, and so that you can use them later to quickly filter your photos. In the previous point we looked at marking each photo as a “pick” or “reject”, which uses Lightroom’s flag rating system. Let’s take a look at the other rating options.
Stars – The star ratings are pretty straightforward. You can rate any photo from 1 star to 5 stars. Rating your photos in this way can help you to know which ones are worth spending time on in the develop module, and it can help you to find your best photos at any point in the future. To apply a rating simply click on the appropriate star icon below the photo in the Library module.
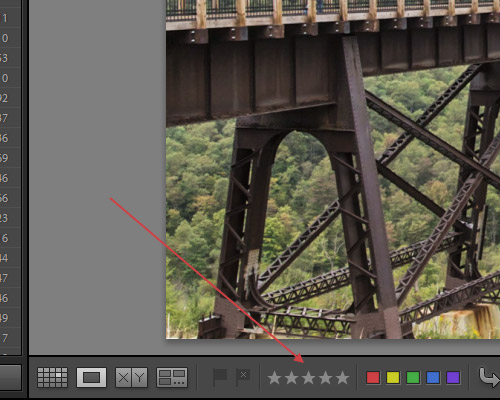
An alternative to clicking on the icons is to use keyboard shortcuts. Use keys 1 – 5 to apply the rating without needing to click any icons.
Colors – Lightroom also offers the option to assign one of five different color labels to your photos. Colors are less straightforward than flags or star ratings, so this gives you plenty of opportunity to customize your workflow and use the color labels in a way that can speed up your work. You can really use them to mean whatever you want, but just be sure to use them consistently.
As an example of how colors can be used, I use color labels to identify photos that are part of a panoramic sequence. If I have 8 photos that I shot for the purpose of creating a stitched panoramic I will give them a blue color label. Then when I am ready to work on the panoramic I can easily filter them and open them in Photoshop to be stitched. I also use color labels for marking stacked exposures that I want to use for creating an HDR image. I may have 5 exposures that I want to use later with Photomatix for HDR processing, so I will use a purple color label.
Use color labels in whatever way makes sense for your own workflow.
To apply a color label simply click on the color in the Library module.
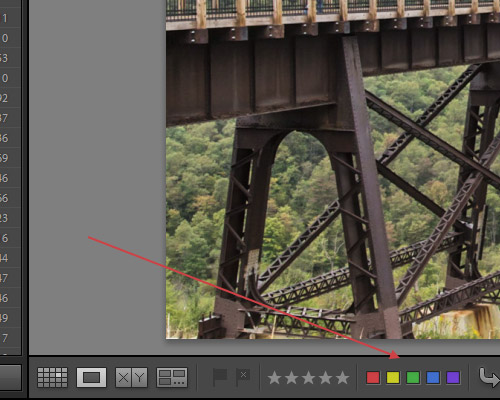
Or you can use the following keyboard shortcuts: “6” for red, “7” for yellow, “8” for green, and “9” for blue. Purple has no keyboard shortcut. You can also use the same keyboard shortcut again to undo if needed.
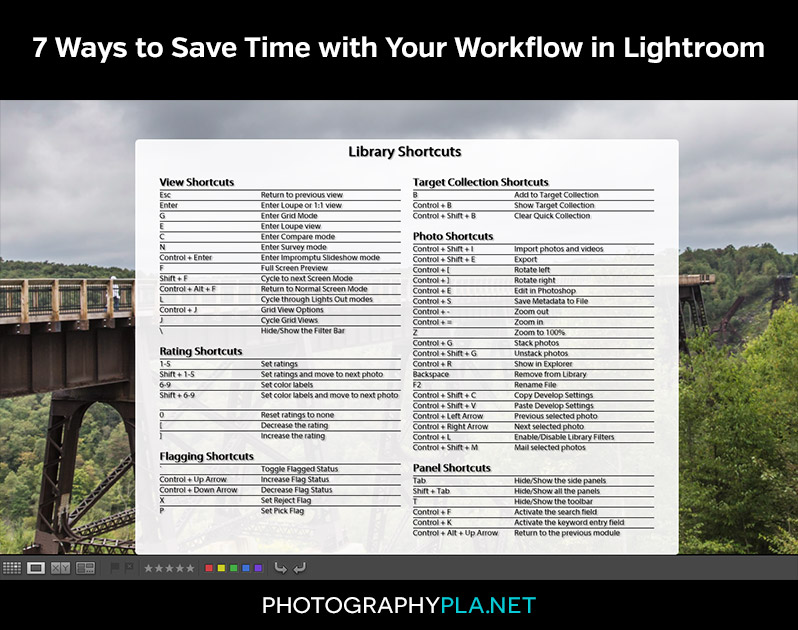
4. Learn and Use the Keyboard Shortcuts
Ok, so I’ve mentioned specific keyboard shortcuts a few times already, and with good reason. Making use of keyboard shortcuts is a great way to save time. Each time you use a keyboard shortcut it may only save a few seconds, but in Lightroom you’ll be doing a lot of repetitive action, so if you can save those few seconds over and over again it will all add up to a significant amount of time saved.
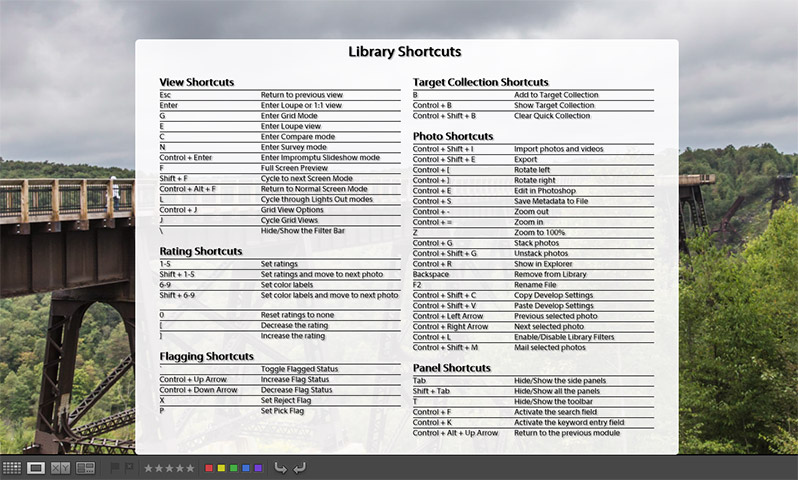
The first step is to learn the keyboard shortcuts. Each module has it’s own shortcuts. You can see them all listed by clicking on Control + the “/” key (PC) or Command + the “/” key (Mac) in any of the modules.
Take some time to learn shortcuts to the things that you do the most, and make an effort to start using them. You can start with just a few and then as you get in the habit of using them you can keep adding more.
5. Make Use of Develop Presets
The majority of your work in Lightroom will probably involve the Develop module. The Library module is no doubt important for getting organized, but mastering the Develop module can help you to save time and get great results with your photos.
Develop presets can be a great time saving tool. Lightroom comes with a few presets already installed, and you can also purchase commercial presets, download free ones, or create your own. There are a few different types of presets and the key is to use the kind that will work best for you.
First, you have one-click presets that will apply a certain type of effect with just a click of the mouse. The benefit of one-click presets is that they can help you to achieve a certain look in no time. The downside is that no preset will work exactly the same on every photo. Depending on the photo that you are starting with, the settings may need to be tweaked after applying the preset in order to get the best look, or it may not look good with the photo that you are using.
The second type of preset is the workflow preset. Most workflow presets are stackable and will only impact certain settings. With a set of workflow presets you may need to use several different presets to get the look you are after, but this offers far more flexibility than a one-click preset. As an example, our Master Workflow Lightroom Presets include stackable presets. With this approach you can quickly edit your photos in a few clicks, and you can get it to look just right with your photo, whereas a one-click preset takes more of a one-size-fits-all approach.
Both one-click presets and workflow presets can have a place in your workflow and can save you time as opposed to manually adjusting the settings for each photo. Consider your workflow and find presets that will help you to speed up your process. You can even create your own presets if you’d like.
At PhotographyPla.net we have several different sets that combine workflow presets and one-click presets to give you the best of both worlds:
- Master Workflow Lightroom Presets
- Wedding Lightroom Presets
- Black & White Lightroom Presets
- Dragan-Inspired Lightroom Presets
- And we also have 1,000+ presets available in this bundle.
6. Make Use of Copy and Paste
In addition to presets, another way to save time in the develop module is to use copy and paste. There are probably a lot of situations where you have several photos of the same subject in the same lighting. For example, you may have 5 photos of the same model in the same pose and each photo is relatively similar to the next. In these cases you can save time be editing the first photo and then copying and pasting the settings to the other photos. Say that you adjusted settings for exposure, contrast, vibrance, and clarity on the first photo, and you want to apply the same settings to the other similar photos. With your first photo already edited and selected in the Develop module click the “copy” button or use the keyboard shortcut Shift + Control + C (PC ) or Shift + Command + C (Mac). This will open a window like the one you see below.
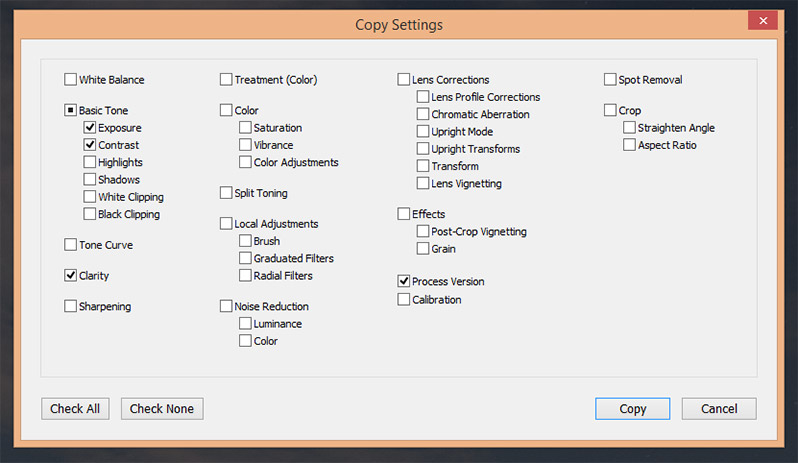
Check the boxes for the settings that you want to copy, and then click “ok”.
Next, select the photos that you want to paste these settings to and click the “paste” button or use the keyboard shortcut Shift + Control + V (PC) or Shift + Command + V (Mac). Those settings will now be applied to the selected photos.
7. Do as Much of Your Post Processing in Lightroom as Possible
Despite Lightroom’s capabilities, you may still need to do some things in Photoshop. However, if you want to speed up your workflow, do as much as you can in Lightroom and only use Photoshop when it is necessary. You can use Lightrooms’ adjustment brushes for things like smoothing skin, whitening teeth, and dodging and burning. If you learn to use the adjustment brush effectively it can save loads of time as compared to opening up Photoshop and moving between Lightroom and Photoshop more frequently.
Lightroom’s graduated filter and radial filter also offer plenty off possibilities for things like boosting colors in the sky or creating a custom vignette, so take the time to learn these tools and it will speed up your workflow going forward.

